Whilst in theory GCE can be played as one-off games the system doesn’t really shine like that. The thing that really brings it to life is playing a series of games where skilled Warriors emerge, old injuries persist, and fortunes are amassed.
This book outlines how campaigns work but you will need other books for various specifics. We’ve arranged things so that each player will only need a copy of rules that apply to them, however everyone will at least need access to a copy of this campaign book.
An important rule to state above all others: if the players in your campaign don’t like a rule - change it. These rules are a starting point - as long as you all agree to a rule change then that becomes the new rule.
Version 1.25 – November 2025
- Added post-game order explanation
- Clarified Hipshoota skill
Version 1.21 – October 2025
- Added missing value for scrap counters
- Clarified arm and leg Serious Injuries
- Fixed issue with Loota skill as it relates to factions with unusual income/profit calculations
- Added special characters
- Added bestiary
- Added advice for running a campaign
- Allowed warriors with 0 Movement / Strength / blindness to remain in a mob
Version 1.1 - October 2022
Version 1.0 - July 2022
- Reworked skills
- Modified Serious Injuries
- Modified Permanent Damage
Changes from Gorkamorka Rulebooks rules
- Skills reworked to attempt to make them universal across all factions
- Serious Injuries & Permanent Damage adjusted somewhat to apply universally
- Added option to retire warriors
- Weirdboy Scrap Hunters don’t have faction-based stipulations for Knows fings
- Bestiary
About This Book
A big difference between GCE and the rules for Games Workshop’s Gorkamorka™ is modularity. We’ve designed GCE to be a modular rule set so that you can bolt together what you need to build your own campaign.
As a result this campaign book doesn’t contain the rules for any factions. It’s here to provide the baseline that factions generally have in common. Injuries, levelling up, and income - that sort of thing. If your faction doesn’t have complete rules you can use the ones in here to plug the gaps. It’s also here to contain various tools for running campaigns, as and when those sections are finished and added.
If your faction doesn’t yet have a GCE faction pack - fear not! The Gorkamorka rules still apply. This may mean you need a copy of Digganob, or a PDF downloaded from tUGS.
It’s also possible that there’s a faction pack available for GCE that makes changes that you disagree with and you’d rather use the Gorkamorka rules. Not a problem - their rules should still work with GCE!
For the uninitiated here’s where you can find the Gorkamorka rules for each faction:
| Faction |
Source |
|---|---|
| Gorkers/Morkers |
Gorkamorka: Da Uvver Book |
| Diggas |
Digganob |
| Rebel Grots |
Digganob |
| Muties |
Digganob |
| Ork Freebooters |
Gubbinz |
| Dust Rats |
The Unnamed Gorkamorka Site |
| Feral Orks |
The Unnamed Gorkamorka Site |
| Ork Outlaw MCs |
The Unnamed Gorkamorka Site |
| Dark Eldar |
The Unnamed Gorkamorka Site |
| Boarboyz (Snortas) |
The Unnamed Gorkamorka Site |
Similarly a Scenario Book exists for GCE but if you prefer you can use existing materials. Scenarios were published in Gorkamorka: Da Uvver Book, Digganob, as well as various other Citadel publications. A complete list of what was published in Citadel’s magazines can be found here. You will also find a broad range of scenarios published on the Unnamed Gorkamorka Site.
What is a Campaign?
Campaigns are the role playing side of this game. They are intended for two or more players who wish to use the same Mob over multiple games. The end goal usually being to have the highest Mob Rating by the end of the campaign.
Players will need to manage their Mobs carefully, weighing up the pros and cons that come as a result of each battle. Sometimes good, like when a Warrior gains enough experience to Level Up and sometimes bad, like when a Warrior sustains a permanent injury preventing them from being as effective as they were. Will your choices (and a little luck) have you rise to infamy or have you disappear into the wasteland never to be seen again?
For the more adventurous groups a whole story could be crafted around some of the lesser explored areas of Gorkamorka, such as the Tar Pits or Howling Hills. A creative Games Master could pick and choose elements they like from these documents to create their own narrative experience. Perhaps all out war breaks out in Mektown with the completion of Gorkamorka or the Pyramids start moving as the dead rise from their sleep or perhaps there are new races and factions as yet unseen beyond the Boiling Sea…
…if you’re feeling really fancy you could even set your campaign on a different planet! Maybe it’s an iceworld with frozen tundra and blinding snowstorms, who knows?
Gorkamorka Worlds
Many will be familiar with the tale of Angelis. Orks have space hulk. Orks crash Space Hulk. Orks build society on destroyed planet. Orks scavenge for scrap for the Mekboyz. Mekboyz build giant technological effigy to Mork/Gork to get them rescued. Orks disagree whether it’s Mork or Gork. Civil war ensues. It’s a tale as old as time.
Angelis is a desolate and harsh environment. At least it is now, after the Orks ploughed into it. It should come as no surprise that all their scavenging is to provide scrap to the mekboyz so they can build their Gorkamorka. It is such a massive feat of greenskin engineering that nobody is quite sure how it will work. Perhaps a beacon or rocketship? Maybe a tellyporta? Who knows? The meks certainly don’t.
Angelis however is not the only planet where this has happened. Orks, if you would believe it, crash space hulks all the time. The range of planets they crash into vary significantly, from desert wastelands to ice moons, from ocean worlds to lava pits. I for one am curious that Orks tend to Crash into planets where one geographic typography is dominant. Although it’s not hard to imagine the curious flyboyz trying to take a closer look.
Orks have a very primal drive so it should come as no surprise to you that once faced with similar crashed space hulk scenarios that they behave in the same way.
I’m unsure if this predictable behaviour is their primal survival instinct or just in the space hulk’s inflight magazine and safety manual. In either case, the combination of the specific events and mechanical effigy is known as Gorkamorka, thus if we see Orks in that situation on a planet, the planet is known as a Gorkamorka world.
-Depiff, abridged
Recruitment
To play a campaign you’ll need some Warriors. In game terms this is your “Mob” (although different factions might call their groups something else - such as a “Raiding Party”).
This version of the game focuses on the journey of your Mob and does not reset between games. If a Warrior is seriously injured they’ll stay that way unless someone patches them up. Conversely if they do well in combat their stats and skills will improve. Pretty soon each of your Warriors will have their own story based on what they’ve done (or completely failed to do…).
At the start of a campaign you’ll recruit and outfit this group and it’ll stay with you throughout. New Warriors may well be able to be recruited, new weapons and equipment bought, and so on. Importantly though those are bought and once you’ve spent the cash in game there are no refunds. If you don’t like how a gun performs you can’t swap it for one of equivalent value between games - that money is gone!
With that in mind, it’s time to make some choices…
Mob Structure
Each faction has their own requirements that you’ll need to meet when creating a mob. This will usually involve a leader, some foot troops, and Vehicles or mounts to carry them into battle. You’ll find the specific details in their faction pack.
Currency and Your Starting Budget
Throughout pop-culture there are many different kinds of Orks, Orcs, and other spelling variants. Some are bestial creatures, savages who are little more than tool-using animals, others have their own societies and customs and trade between themselves and other races, using everything from gold to interesting rocks as currency. In Games Workshop’s Warhammer 40,000 universe Orks buy and sell using something a little different - Teef. Yep, that’s not a typo, we’re talking about Ork teeth and it’s hard to pronounce “th” with a mouth full of those (Most Orks' mouths make an alligator’s look inviting by comparison).
Teef are not Points
Many games attach points values to units for game balancing. The idea being that if each player fields the same number of points then they should be fairly evenly matched. GCE does not do this directly.
Instead GCE has Mob Ratings for that purpose.
As a result, Mob construction and strategic choices are made in part based on how they will affect future income. Sometimes a retreat is better to ensure enough of a player’s bread-winners are available to provide income rather than recovering from injuries.
Spending teef directly contributes to a player’s Mob Rating. The wider the gap between players’ Mob Ratings the greater the bonuses for the underdogs - spend your ill-gotten gains wisely!
Generally the Orks and Ork-like factions in GCE buy and sell with Teef, other factions may use another form of currency and there are even some who use no currency at all and instead get equipment based on reputation and favours. For simplicity all prices for all factions are given in Teef regardless of how the faction actually trades. This is mostly so that (regardless of the faction) a Mob’s Mob Rating can be compared to that of any other to gauge how evenly they are matched.
When recruiting your Mob you’ll have 100 teef to start with. Your group might decide to increase or decrease this based on the campaign you’re planning on having but rules for this game assume that as the baseline.
You are not required to spend all 100 - they’re currency, not points. Any you don’t spend now can be held in your Teef Hoard for future purchases. You never know when you’re going to need to pay to get your trukk patched up, after all!
Similarly you’re not required to equip every Warrior in your Mob with anything. You probably should but we’re not going to tell you who deserves a gun!
Types of Warrior
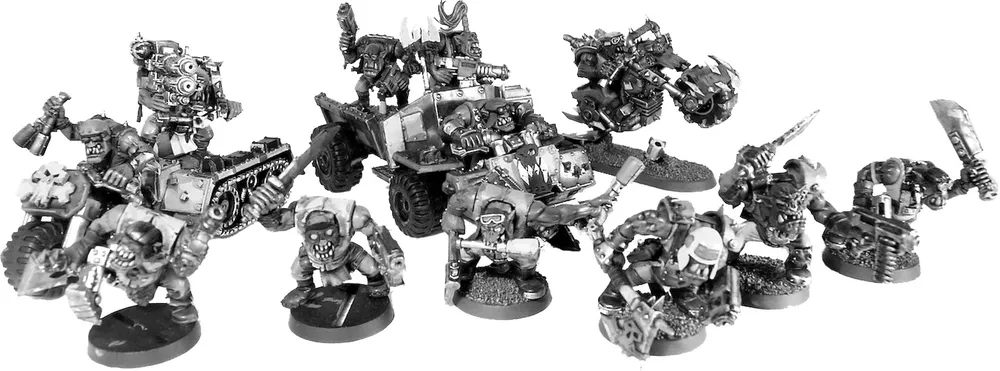
In broad terms Mobs consist of the following types. It’s not an exhaustive list but it should provide enough context to make reading the faction lists straightforward. The various restrictions and requirements on what you can field will be stated there. Most Mobs will contain a leader, a few specialists, some troops, and maybe some novices. Each of them will have an associated set of characteristics (Weapon Skill, Ballistic Skill, etc..) referred to as a statline. A Warrior's role in your Mob will also determine which weapons and armour they are allowed as well as which skills are available to them.
Leader
Each Mob has a single leader unit. They’re usually experienced fighters with access to some of the best equipment.
Specialists
Here the factions vary the most! This category covers a wide variety of Warriors from shamans to mechanics. They’ll have special rules and equipment that are unique to them.
Troops
The rank and file of any Mob. Solid fighters who also provide the majority of the Mob’s income in between battles.
Novices
These Mob members will become troops once they have a bit of experience under their belts. Until they do they’re fairly weedy but this is offset by how little they cost to hire!
Types of Equipment
When setting up your Mob you’ll be faced with lots of things you can buy with various restrictions on who can take what.
These categories aren’t exhaustive as various factions have their own variants on them but they all assume a basic grasp of these core ones:
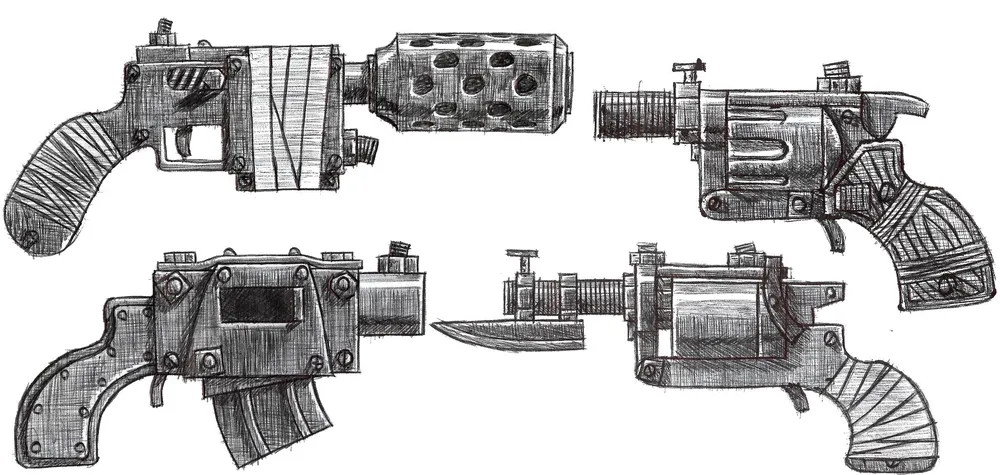
Hand-to-Hand Weapons
Weapons that can be used in the Hand-to-Hand combat phase of battles. This category also includes pistols which can also be used in the shooting phase to make ranged attacks.
Gunz
Ranged weapons of all kinds (this includes things like crossbows). Unless otherwise stated these all require two hands to use and are nothing but a hindrance in Hand-to-Hand Combat.
Grenades
Thrown weapons that rely on the user’s Strength characteristic for range.
Armour
Protective gear of some kind that provides a Warrior with an armour save.
Equipment
Miscellaneous stuff not covered by the other categories! This could be things like a Digga Shaman’s Findin’ Rod or a Mutie Raider’s Scrap Net.
Big Gunz
If your Mob wants a Big Gun they’ll need a suitable Vehicle to mount it on - these are not normally available to Warriors on foot.
Faction Special Rules
Most factions have their own special rules - for example all Rebel Grots are subject to the “Never Enuff Bullets” rule that means they need to take ammo Rolls twice as often. Each faction’s special rules can be found in their rules pack.
Similarly some factions have unique weapons and their details will be covered in their faction pack.
Experience Points and Starting Experience
The progression mechanics have been mentioned before but now we’re going to start getting into the specifics, starting with experience points!

Each Warrior has a number of Experience Points associated with them. These represent their knowledge and skills in a generalised sort of way. Over the course of a campaign they’ll gain more, assuming they don’t meet a sticky end. At certain amounts they’ll level up and gain either a permanent Characteristic Increase (such as greater Strength) or a special skill. To determine which they’ll Roll on the Advance table (what we’ll call an “advance Roll”).
When starting a Mob it’s common for most of the Warriors to have some Experience Points already (The specific numbers are detailed in the faction rules). It’s important to remember that their listed characteristics already include their level-up bonuses. An Ork Nob is already tough - they don’t join your Mob and immediately get seven advance Rolls!
Filling in a Roster
In the old days we had a thousand potatoes to peel and nothing to do it with except a particularly blunt carrot. Back then we only had paper rosters and pencils to keep track of everything and whilst the amount of peeling has decreased noticeably lots of us still prefer paper rosters. We’ll be talking about rosters as if they’re physical things but you might prefer a spreadsheet, a website, or an app.
Your faction pack will contain the starting statlines of your Warriors as well as any other details you’ll need to fill in your roster.
Mob Rating
Something you’ll need to do as part of recruiting your Mob is calculating your Mob Rating. This is a measure of the approximate threat level your Mob presents to other Mobs. In principle Mobs of the same rating should be equally matched. If you’re ranking the Mobs involved in a campaign the one with the highest rating would be considered the top one.
This rating is used for a variety of things both before and after games so make sure you keep it updated between games.
The formula for calculating it is quite simple:
Total experience of all Mob members, divided by ten and then rounded up.
Total cost of all Warriors, equipment, Vehicles, weapons, etc..
E.g. Nazgrab’s Yella Deff:
The twelve Warriors in the Mob have 1333 experience points between them.
Divide by ten (133.3) and then round up (134).
Those twelve Warriors and all their gear come to 89 teef and their Vehicles add a further 96 teef for a total of 181 teef.
Adding those two subtotals together gives a Mob Rating of 315 (134 + 181).
That’s a very well-equipped mob!
Special Characters
Some factions have access to Special Characters who can join your Mob temporarily to aid you - for a price. Most of the time this price is variable and it is unlikely that they will be able to earn experience points to level up like the rest of your Mob and as such they are not included in your Mob Rating in the normal way. Each Special Character’s description will tell you how much they temporarily add to your Mob Rating.
Getting Ready for Your First Game
You should now read your Faction Pack and recruit a Mob using your 100 teef starting budget. You’ll also need some models - time to get those ready for your first game!
Whilst it’s not required many players like to have secondary models representing any Drivers or Gunners in your Mob. If all goes to plan they should normally stay in their Vehicles for the duration of a battle but as they say, no plan survives contact with the enemy, so, if you are able, have some extra models to represent them should they disembark. You may want to refrain from glueing Driver and Gunner models into their seats for this same reason.
Playing a Game
The core rulebook describes how the rules work for battles - the “Playing A Game” section covers what you’ll need.
Remember, all of these campaign rules are 100% optional and you can play one off games if you so choose. If you are new to the game it can be a good idea to have a few of these to get a feel for how different aspects work before starting your first campaign.
Post Game
After each game there’s a process to work through, described in this section. The order matters – you cannot jump around and resolve the steps in any order you feel like!
-
Check Down and Out of Action Warriors for Serious Injuries
-
Retirements and Deaths of Warriors
-
Check Wrecked and Immobilised Vehicles
-
Experience points for Warriors
- Check Scenario for XP bonuses
- Apply Underdog Bonus if available to faction
- Level up Warriors using the Advance Table
- Gain new skills
- Check for Leadership Disputes
-
Check Scenario for XP bonuses
-
Apply Underdog Bonus if available to faction
-
Level up Warriors using the Advance Table
-
Gain new skills
-
Check for Leadership Disputes
-
Income
- Roll for Scenario income
- Check the Difference in Mob Rating for income purposes
- Check faction rules to determine the mob’s income
- Check faction rules for how upkeep and profit works
-
Roll for Scenario income
-
Check the Difference in Mob Rating for income purposes
-
Check faction rules to determine the mob’s income
-
Check faction rules for how upkeep and profit works
-
Spend your teef
-
- Review faction rules to see how teef can be spent. This step doesn’t have to be done in a particular order (e.g. weapons can be bought before or after recruiting new Warriors)
-
Review faction rules to see how teef can be spent. This step doesn’t have to be done in a particular order (e.g. weapons can be bought before or after recruiting new Warriors)
Many of these are quite vague because there are a variety of approaches to the individual steps. For example, whilst Gorkers & Morker Ork mobs have an upkeep table that provides how many teef they get to keep, the same is not true for Rebel Grot mobs.
This campaign book provides the default steps but any of them can be overridden by faction pack rules.
Out of Action/Down at the End of a Game
During a game Warriors that go Out of Action are removed from play but it’s not until afterwards you get to find out exactly what happens to them - by Rolling on the Serious Injury table. Roll two D6s - one for the tens, one for the units (a “D66” Roll) and consult the table to discover what happened to them. Some weapons are particularly nasty and have their own special rules for injuring Warriors and some Serious Injury results need you to know who caused them. You should make a record of who is responsible for taking any Warriors Out of Action and if it was done with a weapon with relevant rules.
Warriors who are Down when the game ends may also go Out of Action and have to Roll on the table. Roll a D6 for each Down Warrior, on a 4+ their injuries are superficial and they recover without issue, otherwise they go Out of Action. Similarly Warriors with Flesh Wounds recover and return to their normal stat’ lines. Similarly other effects such as being on fire are (unsurprisingly) gone in time for the next game.
Serious Injury Table
Roll a D66:
11 - 15 - Dead
The Warrior didn’t survive their injuries. Remove them from your roster along with all of their gear.
16 - Multiple Injuries:
Roll a D3:
1 = Chest and Leg Wound
2 = Arm and Head Wound
3 = Blinded In One Eye and Gobsmacked
21 - Chest Wound
Reduce the Warrior’s Toughness by 1. If this reduces them to Toughness 0 the treat as Dead (see above).
22 - Leg Wound
Reduce the Warrior’s Movement by 1 and randomly determine which leg has been injured.
23 - Arm Wound
Randomly determine which arm has been injured. When using a weapon that uses User Strength in that hand in Hand-to-Hand combat reduce the Warrior’s Strength characteristic by 1.
24-26 - Head Wound
The Warrior’s head has taken a severe beating. Before each game Roll a D6 - on a 4+ they’re subject to Frenzy, otherwise they suffer Stupidity for the duration of that game. Subsequent head wounds raise the chance of Stupidity by one, so after the second you would only be Frenzied on a Roll of a 5, then 6. If the unlucky Warrior suffers a further Head Wound they will be permanentlyStupid.
31 - Blinded in one eye
One of the Warrior’s eyes has been blinded. Reduce their Ballistic Skill by 1. If the Warrior runs out of healthy eyes they become blind and cannot participate in battles (unless cured, e.g with a bionic eye). Warriors have 2 eyes unless otherwise stated.
32 - Gobsmacked
The Warrior suffers a superficial but humiliating injury and loses a number of teef equal to a D6 roll. On a 4+ it’s so bad that they also lose the respect of their comrades and their Leadership is reduced by 1. The Mob who inflicted the injury gains the number of Teef as Income.
33-35 - Old Battle Wound
The Warrior never fully recovers from the injury. Occasionally it’ll flare up and they’ll have to miss a battle. See the rules below for further details.
36 - 55 - Full Recovery
The Warrior spends the time before the next battle recovering (malingering). They cannot earn income during this period. They may still take part in other post-battle activities (Leadership Disputes, etc..).
56 - Bitter Enmity
Physically the Warrior is fine but their attitude is noticeably affected. They’re now prone to Hatred of enemy Warriors. When this injury is acquired Roll a D6:
1 - 3: The Warrior Hates all Warriors of the Mob that injured them.
4 - 6: The Warrior Hates all Warriors of the faction that injured them (even if they’re of the same faction as the Warrior - excluding their own mob).
At the start of each Turn the Warrior may choose to take a Leadership test to control their Hatred. If they fail something has set them off and they Hate that group for this Turn.
61-63 - Captured
The Warrior has been captured by an enemy mob. The Captured Warriors section below details how this works.
64-65 - Impressive Scar
It looks worse than it is. Much worse. The Warrior is a fierce sight to behold and gains +1 Leadership. This result can be Rolled multiple times to gain several Leadership advances (up to the upper limit of the Warrior’s statline).
66 - Survives Against The Odds
The Warrior’s been through hell on the road to recovery but eventually pulled through. They gain +5 experience but their recovery time prevents them from earning income before the next game.
Cumulative Serious Injuries
Arm Wounds and Leg Wounds can be received multiple times. Each time you should randomise which limb is affected as it’s possible to be injured only in one (the characteristic changes still accumulate). Being reduced to 0 Movement or 0 Strength does not mean the Warrior must leave the Mob and they can take part in battles.
Old Battle Wounds
These old injuries can really take it out of a Warrior and it’s possible to receive several. For each sustained it’ll become more likely they’ll have to sit the battle out and eventually they’ll be of next to no use to the Mob any more.
Roll a D6 before each battle. On a result of 2+ the Warrior will be able to fight in this battle. Additional Old Battle Wounds results reduce the dice result by -1. A 6 is always a success but once a Warrior receives their sixth OBW they are Dead.
Example: SkubGob has three Old Battle Wounds. He will only be able to fight in the coming battle if the player Rolls a 4+.
If a 7+ is needed then the Warrior must be retired from the mob. They take their gear with them - remove it and the Warrior from your roster.
Gobsmacked
To illustrate how Gobsmacked works, here’s an example:
Da GutGowjaz are fighting The Seekers of Righteous Truth.
Krixit the Mutie Snaga takes Baz the Ork Boy Out of Action with a well placed blow from his Glaive.
At the end of the battle Baz ends up being Gobsmacked, so the Player he belongs to Rolls a D6 and gets a 5. The injury was so humiliating Baz’s ego never fully recovers and his Leadership characteristic goes down by one.
Krixit then Rolls against his Initiative and gets a 1, Magod be praised, and The Seekers of Righteous Truth add 5 Teef to their Income.
Healing Serious Injuries
Many factions have rules for removing serious injuries (such as Orks visiting the Dok) and you’ll find the details in the faction rules pack. Not all factions have the option though and so barring a campaign event or similar the injuries will be permanent!
Importantly if an area receives attention it heals all instances of that Wound (e.g. a Warrior with multiple Old Battle Wounds only needs healing once to remove them).
Retiring a Warrior
Once a Warrior reaches 401+ experience they will think about retiring from their Mob, particularly if they’ve incurred some injuries during their career. After each subsequent game, whether the Warrior was in the battle or not, they must take a Leadership test, adding +1 to the result for each Serious Injury they have sustained. If they fail they retire, keeping all the gear they had at the start of the battle (no last minute equipment swapping!). The Warrior takes their janglies to Mektown, or joins Da Kommittee or the equivalent reward of the faction they are from. Remove them from your Roster but remember to keep the mighty Warriors data profile (if you like) separate, perhaps they will return for one off battles as a Special Character…
If you wish to, you can “retire” a Mob member at any time. Warriors can be fired after each game if you are so inclined. Reclaim any transferable equipment they have and remove them from your roster. Faction packs may overrule this though – so check first!
Death of a Warrior
When a Warrior dies they are removed from your Mob completely. All the equipment and weapons they were carrying disappears with them. If they were a Vehicle Crew member then their place becomes available for reassignment as if the Vehicle was new. The Mob Rating should also be adjusted when they’re removed from the roster.
Death of a Leader
If your Mob’s Leader has been killed the Warrior with the highest Leadership value takes over. If there are multiple Warriors with the highest Leadership then the one with the highest total of experience points becomes your new Leader. If, for whatever reason, the position is drawn you should resolve the conflict using your faction’s rules for a Leadership Dispute.
Death of a Specialist
The different factions in this game have their own specialists of various kinds. There may be special rules for what happens should one of these specialists die - see that faction’s rules pack for details. Bear in mind that some factions have units and equipment dependent on having a specialist in the Mob (e.g. If an Ork Spanner dies any Vehicles they were responsible for maintaining will be unusable until a replacement has been hired.).
Captured Warriors
Each faction handles captives slightly differently but in general the options go in this order: hostage exchange, ransom, rescue. The first two options are only available to factions that are on speaking terms. You’ll not find Muties willing to engage an Ork in conversation, let alone engage in a transaction with them! Check the “X and Captives” section of your faction rules pack to see how they handle captives, who knows? You may even be able to convince them to join you.
Assuming these options are available then the first port of call is hostage exchange. If both Mobs have captured Warriors then they must be exchanged on a one-for-one basis. This is mandatory - you can’t decide you’d rather play a game to attempt rescue if exchange is an option. If one or both Mobs have captured two or more Warriors, the Warrior with the highest amount of experience points is exchanged first, if two captives from the same Mob have the same amount whichever cost more (including their gear) gets exchanged first. If one side has Captured a Warrior and the other has captured a Vehicle then no exchange is made, instead move straight onto the next stage.
The next thing to try is ransom. The capturing Mob names a price. It can be teef, equipment, weapons, or something else. It can’t be a Warrior though - they’re not for sale!
You obviously don’t have to pay this price - a price just has to be named. If you reject it then your only option is to try to rescue the Warrior, assuming you want to. Whilst captured Warriors and Vehicles are not exchanged directly these kinds of swaps are fair game as a ransom (e.g. asking for your Vehicle back as ransom for a Warrior).
If all other options have been exhausted you can choose to mount a daring rescue attempt. The two players should arrange to play a rescue scenario as soon as possible. If you have the option to rescue and don’t take it then in most cases the Warrior will be killed. There are exceptions to this (check the relevant faction pack) but generally you only get one chance.
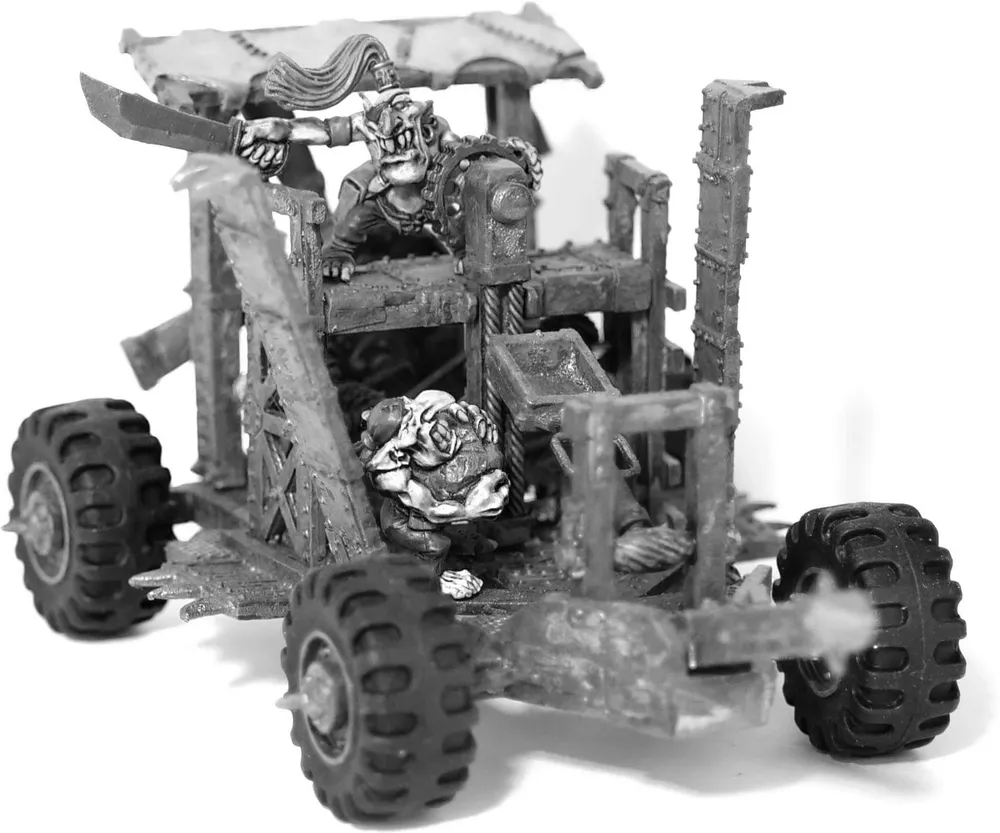
Wrecked and Immobilised Vehicles
During a game a Vehicle may end up “Wrecked” or “Immobilised”. If a Vehicle is Wrecked then you should Roll on the Vehicle Permanent Damage Table below after the game to discover its fate. Some rulesets refer to Vehicles being “crippled” - this is the same as being Wrecked.
Vehicles that are merely Immobilised at the end of the game may be fine - or they may end up Wrecked, particularly if their owners Bottled Out.
The fate of any Immobilised Vehicles will go one of three ways depending on specific factors.
If the Vehicle’s Mob Bottled Out:
- If no friendly Warriors were onboard it is automatically Wrecked.
- With at least one friendly onboard Roll a D6: on a 1 - 3 it is Wrecked.
If the Vehicle’s Mob didn’t Bottle Out then simply Roll a D6 for each Immobilised Vehicle. A result of 1 means the Vehicle is Wrecked.
Immobilised Vehicles that do not become Wrecked are patched up by the Mob in time for the next battle.
Each Wrecked Vehicle will need to Roll on the Vehicle Permanent Damage table (below).
A mob’s faction pack may have a table that replaces this one in which case Roll on that instead.
Unless otherwise stated results are cumulative. A Vehicle with two Annoying Squeak results will have a -2 to steering-related Leadership tests, for example. Results that don’t allow duplicates should be Rerolled.
Vehicle Permanent Damage Table
Roll a D66:
11 - 13 - Destroyed
That’s it for this Vehicle. It can’t be repaired - remove it from your roster (along with any Fixed Weapons, Gubbinz, etc.). If the Vehicle was destroyed in a battle against a single opponent (as opposed to a group battle) your opponent gains 2D6 teef income.
14 - 16 - Badly Mangled:
The Vehicle is in really rough shape - Roll a D6: 1 = Armour Weakened (twice)
2 = Bent Chassis and Fixer Upper
3 = Steering Jam and Boneshaker
4 = Annoying Squeak and Unreliable
5 = Captured and ‘Ard Looking
6 = Improved!
21 - 22 - Armour Weakened
Reduce the armour values of all locations by -1 point.
23 - Bent Chassis
Thrust tests are now taken with a -1 Modifier.
24 - Fixer Upper
The Vehicle can be repaired but it’s going to take a while! This Vehicle is not available for use in the mob’s next battle.
25 - 26 - Steering Jams
When turning using thrusters a successful Leadership test is no longer enough! The Driver must pass a Strength check (roll equal or under their Strength characteristic) or the turn fails as normal. Reroll duplicate results of this damage.
31 - 32 - Boneshaker
All shooting from this Vehicle is at an additional -1 to hit unless the Vehicle is Stationary.
33 - 34 - Annoying Squeak
Leadership tests to steer (e.g. turning whilst thrusting, swerving, etc.) are now taken with a -1 Modifier.
35 - 36 - Unreliable
Before each battle Roll a D6. On a result of 1 the Vehicle cannot be used this game. Further results are cumulative (see below for details).
41 - 56 - Fixed
It looks worse than it is - once those dents are hammered out it’s as good as new. Ish. The Vehicle is available next game as normal.
61 - 63 - Captured
The Vehicle has been captured by the enemy Mob, see below.
64 - 65 - ‘Ard Looking
This Vehicle has been through hell and survived! Friendly Warriors gain +1 Leadership while onboard.
66 - Improved!
Sometimes something needs to be properly broken before you can fix it. By the time the parts are back together the Vehicle is running better than ever - all permanent damage the Vehicle has sustained is fixed!
Unreliable
Roll a D6 before each battle. On a result of 2+ the Vehicle will be available for battle. Additional Unreliable results reduce the dice result by -1. If a Vehicle is damaged to the point where a 7+ result is needed the Vehicle is Destroyed.
Fixing Permanent Damage
Factions with Vehicles have their own specific rules covering repairing Permanent Damage. Consult their Faction Pack for details. If the Vehicle’s faction can repair Vehicle damage, each type is considered a single kind of damage (regardless of how many it has) and a repair will remove all of that type. You also have the option of selling off your Vehicles, should you be so inclined, and the rules for that are detailed in the Spending the Loot section.
Death of a Vehicle
If a Vehicle is destroyed for some reason (whether it’s the result on the Vehicle Permanent Damage Table or something else) it should be removed from the roster. All of its weapons, Gubbinz, kustom jobs, and so on disappear with it. Drivers and Crew are not affected - they remain in your Mob but obviously no longer have anything to drive or Crew!
Captured Vehicles
Vehicles captured by an enemy Mob need to either be exchanged, ransomed back, or rescued at the earliest opportunity - otherwise they’re for the scrapheap!

The order given there is intentional - rescue is the last resort. If both Mobs have captured a Vehicle from the other Mob then the first course of action is a swap. Both get their Vehicles back, scrub off the graffiti, and then things are back to normal. If one side has captured a Vehicle and the other has captured a Warrior then no exchange is made, instead move straight onto the next stage.
If that’s not possible then the capturing Mob can make a ransom demand. This is more of a negotiation than anything else. The price can be teef, equipment, or whatever else. They can’t ask for one of the other Mob’s Warriors as a ransom though - there’s some things that aren’t for sale! You can ask for your own Warriors back as part of a ransom though. If you’ve captured an opponent’s Vehicle and they’ve captured one of your Warriors you can always ask for your Warrior back as ransom.
The ransom doesn’t have to be paid - there just needs to be an offer there. If it’s not taken then a rescue will have to be arranged! The two players should arrange to play a captive scenario as soon as possible (ideally next game).
Unfortunately that’s the only chance the original owners get to take back their Vehicle. After the failed rescue the capturing Mob will tear it apart and gain 3D6 teef in income for that game. No self-respecting Mob would even consider keeping a captured Vehicle and using it themselves. It would take too long to re-paint and get the seats adjusted properly for a start!
A caveat to these rules is faction rules - some factions will not exchange or negotiate - rescue is the only option for those situations. Check the faction packs for both mobs to see if they’re on speaking terms!
Experience
During and between each game Mob members may earn Experience Points for accomplishing various things. For most Warriors this will mean they learn new skills and become better fighters (certain Warriors are exempt from this but that’ll be made clear in their rules).
Warriors start out with a certain number of Experience Points and accumulate more over the course of the campaign. On your roster you’ll find a box for each of your Mob members to keep track of it.
After each game you should calculate the new experience they’ve accrued and add it to their total. If they’ve surpassed certain thresholds they’ll have earnt the right to Roll on the Advance Table, levelling up their abilities in some way. We’ll deal with that in due course but for now let’s look at starting totals.
Starting Experience Levels
As mentioned earlier many Warriors start with a certain amount of experience. This reflects their abilities and experience before joining a mob. Each faction pack will contain details of the starting number of experience points for each Warrior type.
E.g. Ork Boyz from a Gorker or Morker Mob join the Mob with 20 + D6 e
xperience points each.
Earning Experience
Each game will use a scenario. Scenarios detail things Warriors can do to earn experience points. Usually there’s things like +5 Experience for Wounding an enemy, or +10 for the Leader of the winning Mob.
In terms of earning Experience Points for inflicting Wounds a Warrior there is a simple principle to follow. The number of Wounds that an opponent can receive is the number of Wounds it is possible to inflict (including Flesh Wounds). If they reach a point where they can no longer receive Wounds (due to being Out of Action) then no more Experience Points can be earnt.
Something that always holds true is that Warriors that do not make it onto the board during the game do not gain experience. Experience is only awarded to Warriors that show up!
There may be occasions where players are unsure whether a Warrior will receive experience for a given action. The general rule to apply is simple - if an intentional action you take results in the Wounding or Penetrating of an enemy Model, the Warrior who inflicted it gains Experience.
Example 1, Hand-to-Hand Combat: Krixit, a Mutie Snaga, Charges into Hand-to-Hand Combat with Skroggy, a Morker Ork Yoof. Unfortunately Krixit Rolls terribly and loses the combat, being Wounded by the Yoof. Skroggy gains experience for the Wound he inflicted.
Example 2, An Ork Trukk Crashing: SkubGob, a Gorker Ork Boy, is attempting to Ram a Morker trukk, driven by Baz. They’re at a tricky angle and SkubGob has to make a turn whilst thrusting. That proves too difficult and he drives straight into a rock, taking D3 damage. No one gains Experience for that damage.
Example 3, Vehicles colliding: Baz (a Morker Ork Boy driving a Trukk) attempts to Ram a Big Lugga belonging to Da Red Hand Gang, a fearsome Rebel Grot Mob. If Baz can pass a Thrust test he’ll be able to T-Bone the Big Lugga. Unfortunately he fails his Thrust test - but he does get lucky with the Thruster Buster Table and gets 5” of movement! Just enough! Da Red Hand Gang don’t manage to Swerve out of the way and both Vehicles take 1 point of Damage. Both Drivers gain Experience.
Underdogs Bonus
There’s nothing like a challenge to gain experience and that holds true in this game just as in reality. Before each battle, compare your Mob Rating with your opponents. The difference between them can then be run through the table below to find out how much extra experience the Warriors of the lower rated Mob receive. In the case of battles with more than two Mobs then the difference to calculate is between the highest rated Mob and each of the others. In those situations mobs only receive the bonus once, not once per opponent!
Three mobs take to the battlefield. Nazgrab’z Yella Deff (Mob Rating: 315), Grimlug’z Ladz (301), and Da Cuttas ov da Jibb (338). For Nazgrab’z Yella Deff the difference in Mob Rating is 23. For Grimlug’z Ladz the difference is 37.
Additionally this bonus only applies to Warriors who actually made it onto the battlefield for the game. If they missed the fight for some reason (such as an Old Battle Wound) or did not make it onto the board (for example, as reinforcements) then they do not receive any bonus. Warriors who go Out Of Action during a battle will keep any experience points they’ve earned up to that point (and usually a further D6 experience points if they don’t die from their injuries).
| Difference in Mob Rating |
Win/Lose bonus |
|---|---|
| 1-5 |
+1/0 |
| 6-10 |
+2/+1 |
| 11-15 |
+3/+2 |
| 16-20 |
+4/+3 |
| 21-25 |
+5/+4 |
| 26-50 |
+6/+5 |
| 51-75 |
+7/+6 |
| 76-100 |
+8/+7 |
| 101-150 |
+9/+8 |
| 151+ |
+10/+9 |
Levelling Up
Once a Warrior has gained enough Experience Points to break through their threshold they Level Up and will Roll on the appropriate Advance Table to see how they improve. This will either be a Characteristic Increase or a New Skill but the specifics will be covered shortly.
It’s entirely possible for a Warrior to earn enough experience points in a Battle to pass more than one threshold, especially early on in a Mob’s career. If this should happen, Roll once for every threshold passed (and maybe buy them a shiny new bit of gear as a reward).
There are also occasions where reaching a particular threshold will trigger a rule in addition to allowing a Roll on the Advance Table. Many factions have rules where Novice Warriors become Troops, changing things like their characteristics, equipment entitlements, and access to skills.
The thresholds for levelling up vary slightly between factions so you should be consulting your Faction Pack for the rules that apply to your Mob. Here is a generic chart that can be used if your faction doesn’t have its own:
| Exp. Points |
Notes |
|---|---|
| 0-5 |
Novices start at this level |
| 6-10 |
|
| 11-20 |
|
| 21-30 |
Most Warriors start at this level (Troops, Specialists) |
| 31-40 |
|
| 41-50 |
|
| 51-60 |
|
| 61-80 |
Leaders start at this level |
| 81-100 |
|
| 101-120 |
|
| 121-140 |
|
| 141-160 |
|
| 161-180 |
|
| 181-200 |
|
| 201-240 |
|
| 241-280 |
|
| 281-320 |
|
| 321-360 |
|
| 361-400 |
|
| 401+ |
No further advance Rolls happen after this point. |
Warriors never lose experience points from their total, however, there are instances where some experience may be deducted from the amount earnt that battle, before calculating the new total (e.g. If an Ork Nob declines a challenge issued during the “We Wuz ‘Ere Furst” scenario the experience points he earns at the end of the battle are reduced by D6). Additionally the totals are calculated after a game, not during, just in case that needed stating.
E.g. Krugkikka, a Gorker Ork, has 37 experience points, putting him in the 31 - 40 bracket. After the battle his new total is 45, shifting him into the 41 - 50 bracket. He should now Roll once on his Advance Table.
Something that needs to be made clear: the experience points a Warrior has when they join a Mob have already been factored into their characteristics. They do not receive additional advances based on their starting level and you do not Roll for them when they are hired.
E.g. Baz is a Morker Ork Boy who joins Da GutGowjaz. The player Rolls a D6 and determines that Baz has 22 experience points when he joins (20 +D6 is the starting level for Gorker/Morker Ork Boyz). When he reaches 31 experience points he will earn his first advance.
Advance Table
Advance tables vary somewhat between factions somewhat but they all look pretty similar. The table below is the default and should be used unless the faction pack provides a replacement.
| ADVANCE TABLE |
|
|---|---|
| 2D6 |
Result |
| 2 |
Know-wots. Choose any of the skill tables available to the Mob and generate a skill from it. |
| 3-4 |
Know-wots. Choose one of the standard skill tables for the Warrior type / faction and generate a skill from it. |
| 5 |
‘Arder. Roll a D6: 1-3 = +1 Strength; 4-6 = +1 Attacks |
| 6 |
‘Arder. Roll a D6: 1-3 = +1 WS; 4-6 = +1 BS |
| 7 |
‘Arder. Roll a D6: 1-3 = +1 Initiative; 4-6 = +1 Leadership |
| 8 |
‘Arder. Roll a D6: 1-3 = +1 BS; 4-6 = +1 WS |
| 9 |
‘Arder. Roll a D6: 1-3 = +1 Wounds; 4-6 = +1 Toughness |
| 10-11 |
Know-wots. Choose one of the standard skill tables for the Warrior type and generate a skill from it. |
| 12 |
Know-wots. Choose any of the skill tables available to the Mob and generate a skill from it. |
As with most other things in the game you should Roll the dice with another player to witness them.
Characteristic Caps
As the table above shows most characteristics can be increased permanently. There is an upper limit on these though - there’s only so tough or strong a Warrior can get!
Each faction pack contains details of the maximum statlines for each Warrior type that can be hired. For example here’s the maximum statline for a Morker Ork:
| M |
WS |
BS |
S |
T |
W |
I |
A |
Ld |
|
|---|---|---|---|---|---|---|---|---|---|
| Morker |
4 |
6 |
6 |
4 |
5 |
3 |
5 |
3 |
9 |
If your Warrior Rolls a characteristic increase that would take them above the cap for that stat then increase the other characteristic in that bracket instead. If both are at their cap then pick any other characteristic that hasn’t reached the cap yet and increase it by one instead. If every stat is maxed out then generate a skill from a relevant table as described below.
E.g. Krixit, a Mutie Snaga, has already reached a Toughness characteristic of 4. He Rolls a 9 on his Advance Table followed by a 5. His Toughness is already at its cap so instead he increases his Strength from 3 to 4. For Mutie Snagas the maximum value for Strength is also 4 meaning any future results of 9 on the Advance Table will allow him to increase one of his other characteristics.
Leadership Disputes
For many factions the role of Mob Leader is not a permanent one. Should one of the Mob members emerge as a better leader it’s entirely possible that they will challenge the incumbent for the position. This usually takes the form of some kind of combat challenge triggered by a Mob member reaching a higher Leadership characteristic than the current Mob Leader. The specifics vary by faction so check your faction pack for details.
Skill Tables
In addition to characteristic increases most Warriors can receive skills - special abilities that confer all sorts of different bonuses. These are spread across six categories: Muscle, Ferocity, Driving, Cunnin’, Dakka, and Odd. Many factions also have their own dedicated skill tables that will either be added to these or replace one (such as the Riding skill table that Muties have to replace Driving).
Broadly these can be summed up as follows:
- Muscle - these skills give Gorker-types an advantage on the battlefield.
- Ferocity - these skills give an advantage in Hand-to-Hand combat phase.
- Driving - these skills give Drivers an advantage with their Vehicles.
- Cunnin’ - these skills give Morker-types an advantage on the battlefield.
- Dakka - these skills relate to advantages in the Shooting phase.
- Odd - these skills give advantage in specific situations on and off the battlefield.
The names of the skills are thematic to Orks but don’t let that confuse you - they apply to all factions unless your faction pack says otherwise.
The skill tables available to each Warrior type vary, reflecting their strengths and weaknesses. Normally a skill advance only allows Warriors to receive skills from one of these tables - their Advance Table may override this and grant them access to more skill types than usual.
Each faction will have a table indicating which skill tables the various Warrior types available to them may normally Roll on.
E.g. Head Honchos, Banna Wavers, and Grots in Rebel Grot Mobs have the following skill access:
| Rebel Grots |
|||||||
|---|---|---|---|---|---|---|---|
| Muscle |
Ferocity |
Driving |
Cunnin’ |
Dakka |
Odd |
Boardin’ |
|
| Head Honcho |
✘ |
✔ |
✔ |
✔ |
✔ |
✔ |
✔ |
| Banna Waver |
✘ |
✔ |
✔ |
✔ |
✘ |
✘ |
✔ |
| Grots |
✘ |
✘ |
✘ |
✔ |
✘ |
✘ |
✔ |
As you can see in addition to the six core skill types they also have their faction-specific table - Boardin’ skills.
It is possible for a Warrior’s type to change under certain circumstances. If this happens they may lose access to a skill table but they will retain any skills they’d previously earnt. Unless otherwise stated skills cannot be lost.
E.g. Klepski, a Head Honcho, has been ousted by Skiffa, the Banna Waver. Klepski loses his rank and becomes a standard Grot. In doing so he loses access to Ferocity, Driving, Dakka, and Odd skills but retains the Kool skill he earned previously. Skiffa becomes Head Honcho and can now earn Ferocity, Driving, Cunnin’ Dakka, Odd, and Boardin’ skills.

Similarly Ork Yoofs that gain enough Experience change Warrior type and become Ork Boyz. Skroggy, a Morker Yoof, will initially have access to Driving and Cunnin’ skills. Upon becoming a full Ork Boy he gains access to Ferocity skills.
The skills available to any given Warrior type do not change by Experience level. An Ork boy reaching the skill level of an Ork Spanner does not suddenly gain access to more skills.
Generating a Skill
When a Warrior earns the right to Roll on a skill table, pick a table and Roll a D6 twice to generate two new skills. Choose one and add it to the Warrior’s profile. Skills the Warrior already has should be Rerolled and duplicate dice Rolls can be Rerolled. Obviously if the Warrior has four of the six skills already there’s no need to Roll. Some skills can be taken multiple times - these should not be Rerolled unless they have been taken as many times as allowed.
Muscle
| D6 |
Skill |
|---|---|
| 1 |
Right In Da Groin! The Warrior has a real knack for making a good hit count. In Hand-To-Hand Combat their Critical Blows count as +2 instead of +1. |
| 2 |
‘Ard as Nails I can’t believe e’z still standin’ - one tuff git… When Rolling on the Injury Table for this Warrior treat Rolls of 1, 2, and 3 as a result of Flesh Wound. |
| 3 |
Krumpa This Warrior doesn’t need big weapons to get the job done - fists, knives, or whatever they can get their hands on are more than good enough! If the Warrior is carrying no Hand-to-Hand weapons (excluding knuckles/knives), they gain a +2 to Strength in Hand-to-Hand Combat. |
| 4 |
‘Eadbutt This Warrior likes to daze and confuse their opponent. When they make a Charge action they bump heads and inflict Stupidity on their opponent during the first round of Hand-to-Hand Combat. This only affects their first opponent and doesn’t carry over into multiple combatant situations. |
| 5 |
Lobba This Warrior’s been practising lobbing stuff. They gain +2” to the distance when using any thrown weapons or equipment (e.g. explosives) and -2” in the event it Scatters. This is in addition to any other Modifiers or bonuses. |
| 6 |
Thick Skull Whether it is bones or muscle, blows just don’t seem to affect this Warrior. When Rolling to Wound a Warrior with this skill in Hand-To-Hand Combat reduce the Strength of any hits by 1. |
Ferocity
| D6 |
Skill |
|---|---|
| 1 |
Waaagh! The Warrior has learnt to throw caution to the wind. They may double their Attack Characteristic when Charging into Hand-To-Hand Combat. However, defensive abilities like blocking with a Shield, parrying, special blocks, etc, may not be used at the same time as this ferocious attack. |
| 2 |
Headlong Leap The Warrior is adept at leaping and can ignore the Obstacle Penalty when Charging and counts as having +1 Initiative when attempting to board and exit Vehicles. Additionally once aboard they may choose who they fight against. |
| 3 |
Flying Tackle The Warrior throws their body through the air at the opponent. They get a +2 Combat Score Bonus for Charging rather than just +1. |
| 4 |
Windmillin’ The Warrior flails their arms around so fiercely that they always win draws in Hand-to-Hand Combat, even if using a weapon that has the Loses Draws special rule. If both Warriors have this skill, draws are resolved as normal. |
| 5 |
Gotcha! This Warrior can pounce on enemy Warriors from the back of a Vehicle and engage them in Hand-To-Hand Combat. If the Vehicle they’re on passes within 2” of an enemy Model on foot during its Movement Phase the Warrior can bail out onto them! This inflicts a Strength 4 hit on the enemy and the Warrior counts as charging them, assuming they survive the initial hit! This works differently for mounted Models (bikers, riders, etc.). Instead they can remain mounted and choose to pull a single (random) enemy off a Vehicle within 2”, inflicting a S4 hit on them and placing them on the ground beside the Vehicle. Assuming the enemy survives they count as being engaged in Hand-to-Hand Combat with their attacker counting as charging. |
| 6 |
Play Chicken The Warrior preys upon the ego of most Drivers and will stare them down for an easy ride. If a Vehicle tries to squash a Warrior with this skill and they pass their Initiative test to dodge, they may instead choose to board the Vehicle as if they had successfully Charged and will fight in the Hand-to-Hand Combat Phase. Additionally once aboard they may choose who they fight against. |
Driving
| D6 |
Skill |
|---|---|
| 1 |
Chase Driver I can’t shake ‘im! A Driver with this skill may Reroll failed Leadership Tests when Chasing or force their opponent to Reroll a successful Leadership test when being chased. The second result stands. |
| 2 |
Skid Start Eazy… eazy… Go! Go! Go! A Driver with this skill may make Slow Speed Manoeuvres before moving the Vehicle as normal. |
| 3 |
Fixer They may not be an expert but they know a thing or two about the workings of the mob’s Vehicles. After each game one Roll on the Vehicle Permanent Damage may be affected by this skill. Instead of Rolling once - Roll twice and choose one result to apply. If you choose to use this skill it must be done when the initial Roll is made - you can’t wait to see what kind of damage each of your Vehicles takes and then Reroll! |
| 4 |
Stunt Driver If yoo ain't outta control, yoo ain't in control! A Driver with this skill may choose which way their Vehicle Swerves and may Reroll the scatter die in the event of a spin. The second result stands. |
| 5 |
Emergency Stop Lightning reactions and a well-developed survival streak keep this Driver alive. His passengers may have to fend for themselves. If a Vehicle is forced to move in a way that will result in a Crash/Collision (such as after a Roll on the Thruster Buster Table) a Driver with this skill can stop the Vehicle safely next to the obstacle by passing a Leadership test. Crew must Roll equal or under their Strength to hang on - any that fail are thrown D6” from the Vehicle in the direction it just moved and take a S3 hit on a 4+. If there’s nowhere to place the dislodged Crew then place them wherever seems most sensible. |
| 6 |
Ded Canny Don’t worry about this lad - he can move when he ‘az to. This Warrior gains +1 to their Leadership for the purposes of all driving-related tests. |
Cunnin’
| D6 |
Skill |
|---|---|
| 1 |
Supa Sneaky I’ll catch up with you lads later… This Warrior may deploy after all other Models have done so. They must be at least 18” away from enemy Warriors but otherwise may deploy anywhere on the board. |
| 2 |
Wrecka Ooh, this bit looks important… If a Warrior with this skill Boards a Vehicle they can opt to cling on to the outside and attack a Hit Location directly. While doing this the Crew cannot target them! The Vehicle can attempt to shake them off though and each time it thrusts or turns the Warrior must Roll equal or under their Strength to hang on. If they fail they take a S3 hit and are placed on the board behind the Vehicle. |
| 3 |
Dodgy Git Why do they call him the Bullet Dodger? …‘Cos he dodges bullets! The Warrior gains a 6+ unmodifiable save against all damage sources. They may gain this skill up to three times with each instance adding +1 to the save. |
| 4 |
Duck ‘N’ Weave Serpentine, serpentine! As long as the Warrior is not onboard a Vehicle all shooting attacks against them are resolved at an additional -1 to hit. |
| 5 |
Play Dead Wait a minute, this one’s faking! Tricksy git! If the Warrior goes Down they may not be attacked by enemy Warriors. This applies to Hand-to-Hand Combat too meaning the Warrior doesn’t automatically go Out of Action if taken Down. |
| 6 |
Sneak Off A backup knife in a boot, an extra burst of adrenaline, or maybe just some really convincing bloat work. This Warrior just never seems to end up a prisoner. Rolls of “Captured” on the Serious Injury Table for this Warrior are treated as “Full Recovery”. |
Dakka
| D6 |
Skill |
|---|---|
| 1 |
Kool Taking the time to assess where it’ll make the most difference rather than going with gut instinct makes this Warrior more dangerous than most. This Warrior can shoot at any Target in range, not just the closest one. If choosing to shoot at a Vehicle they may choose the location to hit rather than Rolling on the Hit Location Table. |
| 2 |
Hipshoota No time to slow down but still time to shoot! The Warrior may shoot even if they ran in the Movement Phase. The Warrior may also ignore the -1 to hit penalty caused by firing from a fast moving Vehicle (over 6”). This bonus does not apply to shots made using Fixed Weapons. If a Warrior already has the ability to run and shoot due to a faction ability then Reroll this skill. |
| 3 |
Dakka Dakka! More! More! More! How’d ya like dat?! This Warrior may Reroll one Sustained Fire Dice per shooting phase. The second result stands. |
| 4 |
Bomma This Warrior loves grenades and always finds room to bring a few more than anyone else. When throwing grenades of any kind this Warrior may ignore their first Ammo Roll of the game. This only applies once per game, regardless of how many different kinds of grenades the Warrior is equipped with. |
| 5 |
Rapid Fire This Warrior’s got their firing technique down to a fine art and can be ready for a follow-up shot in the blink of an eye. A Warrior who doesn't move in the Movement Phase (or spends their Turn on a Stationary Vehicle) may shoot twice with a weapon of their choice (except Big Gunz). This second shot can be used to reload weapons that require an action to be taken. |
| 6 |
Deadeye The Warrior’s ability to hit something vulnerable is uncanny - watch out! If a ranged attack from this Warrior Wounds an enemy, Roll two dice and choose the result you prefer. |
Odd
| D6 |
Skill |
|---|---|
| 1 |
Dok When a Warrior Rolls on the Serious Injury Table you may choose to use one of your Warriors with this skill to treat them (assuming they themselves weren’t taken Out of Action in the previous game). Instead of Rolling once on the Serious Injury Table, Roll twice and choose the result. To use this skill the injury must be Rerolled as it happens - you can’t wait to see how the rest of your injured Warriors Rolled and then Reroll! A Warrior with this skill can only treat one patient per game and the patient cannot be treated by multiple Warriors with this skill to gain multiple Rerolls. |
| 2 |
Loota The wastes are full of shiny things for those with a careful eye. This Warrior has a gift for sniffing out valuable stuff that no one’s going to miss. Each Warrior with this skill that doesn’t go Out of Action adds an additional D6 to the mob’s Income on top of what they would normally generate. If the Warrior’s faction doesn’t use profit calculations (i.e. all teef earned are kept) then this skill instead generates 1 toof. |
| 3 |
Taktiks Stick to da plan, ladz! We’ll ‘ave ‘em on da run in no time! Other Warriors within 6” of a Warrior with this skill may Reroll failed Leadership tests. The second result stands. |
| 4 |
Brewboy
This Warrior’s got something bubbling away back at camp. Good for what ails ya… …also for degreasing engines and killing brain cells. Each Warrior with this skill allows a Warrior with an Old Battle Wound a Reroll if they fail their test to take part in the battle. You do not gain additional rerolls for a Warrior if you have multiple Warriors with this skill. However a Warrior with this skill cannot Reroll their own Old Battle Wound - they’re not going to drink their own brew, they know what’s in it! |
| 5 |
Gunboy Some Warriors get a bit weirdly attached to their gear, whispering to their guns and so on. That extra care and attention might be a bit odd but it does pay off! Failed Ammo Rolls and weapon explosions from weapons this Warrior is equipped with can be ignored on a 4+. |
| 6 |
Rizin’ Star This Warrior is one to watch - they’re destined to be something special! You may Reroll any future advance Rolls for this Warrior. The second result stands. |
Income
There’s quite a few different ways for the Mobs of this game to earn income. Many battles are fought over who takes home loot of some kind - usually in the form of scrap counters. This isn’t the only way Mobs bring in income though - many have side activities such as mining, extortion, or scavenging. These are usually only available to Warriors who weren’t seriously injured during a battle. The faction packs detail how this kind of income works for each Mob type.
Scrap counters are worth D6 teef of income each, rolled individually, unless the scenario or faction pack rules provide a different value/mechanic.
Something universal is the ‘Ardboyz Bonus - any Mob taking on a more reputable Mob (and winning!) gets an income bonus. Whether that’s not having to pay for their own drinks or a more generous quartermaster is going to depend on the faction but either way consult this table:
| Difference in Mob Rating |
Bonus |
|---|---|
| 1-10 |
+1 |
| 11-15 |
+2 |
| 16-20 |
+3 |
| 21-25 |
+4 |
| 26-50 |
+5 |
| 51-75 |
+10 |
| 76-100 |
+15 |
| 101-150 |
+20 |
| 151+ |
+25 |
That covers most forms of recurring income. Campaign events may present other opportunities along with things such as ransoms for captives.
Profit
As in reality whatever a Mob earns has to pay for things - it’s not all profit.
After each game a Mob will spend their earnings on a variety of things ranging from ammo, repairs, fuel, their bar tab, and so on.
Different factions have their own post-game income earning mechanics in addition to what they earn during a game. These contribute to the mob’s total income.
This gets compared with the size of the Mob which consists of its permanent members and Vehicles. Each Warrior on the roster counts as one, each Vehicle counts as one. Special characters will probably count as two or more Warriors (to represent what it costs to keep them around), but hired guns and other temporary Mob members may not count towards this total, as always, check your Faction Pack for details.
Find the relevant row and column in the table. Where they cross over that’s how much profit the Mob gets. There’s no addition or subtraction involved here - the number is how many teef the Mob gets to keep.
A Mob’s faction pack may have a table or other system that replaces this one in which case use that instead.
| Mob Size |
|||||||
|---|---|---|---|---|---|---|---|
| Income |
1-3 |
4-6 |
7-9 |
10-12 |
13-15 |
16-18 |
19+ |
| 0-2 |
3 |
3 |
2 |
2 |
1 |
1 |
0 |
| 3-5 |
5 |
4 |
3 |
3 |
2 |
1 |
1 |
| 6-8 |
7 |
6 |
5 |
4 |
3 |
2 |
2 |
| 9-12 |
9 |
8 |
7 |
6 |
5 |
4 |
3 |
| 13-17 |
11 |
10 |
9 |
8 |
7 |
5 |
4 |
| 18-23 |
13 |
11 |
10 |
9 |
8 |
6 |
5 |
| 24-30 |
15 |
13 |
12 |
10 |
9 |
7 |
6 |
| 31-38 |
16 |
15 |
14 |
12 |
10 |
8 |
7 |
| 39-47 |
17 |
16 |
15 |
13 |
12 |
10 |
9 |
| 48-57 |
18 |
17 |
16 |
14 |
13 |
11 |
10 |
| 58+ |
19 |
18 |
17 |
15 |
14 |
12 |
11 |
For example:
Grimlug’z Ladz consist of 2 Traks and 9 Orks. This includes the Drivers and Gunners for the Vehicles. That’s a Mob size of 11. In their most recent battle they didn’t get any scrap counters but four of their boyz were able to work in their mine. This gave them a total income of 15 teef.
Looking at the table we can see the 13 - 17 income bracket provides 8 teef of profit for a Mob size of 10-12. This means the Mob adds 8 to its teef hoard which can be spent on whatever the player wants or saved to be spent after a future battle.
Spending the Loot
Once injuries have been resolved, experience dealt with, and profits added up mobs can finally get a chance to spend what they’ve earnt.
Now’s the time to recruit Warriors, buy new equipment, get some repairs done (to both Vehicles and Mob members!), and if very desperate - sell stuff to pay the bills…
Hiring Warriors
Adding new Warriors to the Mob works almost exactly like hiring for a new Mob - your faction pack will have the specifics on costs and restrictions (you can’t hire a second Leader, no matter how many teef you’ve got to spend!).
Once they’re hired you should generate experience for them as normal and equip them with whatever you want, assuming you can afford it.
Note: Warriors can be fired between games if you so choose. Their gear can be reclaimed before they’re fired. Warriors that die or retire after hitting the experience point cap will take their equipment with them!
Buying Vehicles
Similarly adding new Vehicles works much like during the Mob creation process. You’ll need to assign Drivers and Gunners too (assuming you opt for a Fixed Weapon). Fixed Weapons can be added later - they do not need to be bought at the same time as the Vehicle. Don’t forget that more Vehicles may require you to hire more specialists to maintain them.
New Weapons and Equipment
Unless otherwise stated you may swap equipment between Warriors between games. Weapons and equipment belong to the Mob, not the Warrior, so if you’d like to buy a new weapon for one of your Warriors you can move their old gear to someone else within the Mob, or add it to the Mob’s hoard to be assigned at a later date. Weapons and Equipment cannot be swapped between Warriors and Vehicles during a battle.
Bear in mind that you can only assign weapons and equipment to a Warrior if their rules allow them to be equipped that way.
E.g. A Rebel Grot Mob has a Head Honcho equipped with a Shoota. The Mob buys a Kannon and assigns it to the Head Honcho. In a Rebel Grot Mob only Head Honchos and Banna Wavers are allowed things from the Gunz list so the Shoota can either be assigned to the Banna Waver, kept in storage, or sold off. It cannot be assigned to any other Rebel Grots - the weapon is far too prestigious for them!
Selling Weapons, Equipment, or Vehicles
Mobs may find themselves with surplus weapons and equipment. They can sell them during the post game stage. The value is half the roster price, rounded down.
E.g. Da GutGowjaz have a bill from the Mek for kustom work done on their buggy. They have a spare Kannon, bought for 3 teef, but they can only get 1 toof for it at the bazaar!
If selling a Vehicle the price is also half the roster price, rounded down but don’t forget to include the cost of any upgrades and Gubbinz in this calculation. If the Vehicle has a Big Gun you may choose to keep it to be mounted on another Vehicle at a future time.
Trading Weapons, Equipment, or Vehicles
Unless otherwise stated weapons, equipment, or Vehicles may not be traded between Mobs.
Fixing Vehicles and Patching up Warriors
If your Mob contains Vehicles with Permanent Damage or Warriors with Serious Injuries now is the time when those can perhaps be attended to. Your options will depend on your faction rules so check there for specifics.
Customising Weapons and Vehicles
Some factions are able to get their gear customised in various ways. Vehicles can sometimes be made faster, weapons more deadly, and so on. Check your faction pack to see what your options are!
Your Next Game
Once you’ve recruited, bought, repaired, healed, sold and swapped as appropriate, and removed dead members then make sure you calculate your new Mob Rating.
Running a Campaign
Campaigns typically come in two forms - story and casual. Sometimes campaigns are a mix of the two but we’ll define them and you can decide your own balance.
A casual campaign is a fairly simple arrangement - players create their Mobs and then arrange to play against each other. The end point is usually defined either by time (two to three months, for example), or by Mob Rating (usually 400).
A story campaign is a somewhat more elaborate affair. As the name suggests this might involve a story but also things like mapping systems and recurring foes controlled by a campaign master. The level of complexity depends on the player and campaign master and the sky’s the limit.
Towards the end of this book you’ll find a section that goes into more details on this subject.
Special Characters
The galaxy is full of interesting oddballs, sometimes arriving at the last minute to provide a helping hand, other times found shouting at their own feet in a random alleyway. Often both of those sorts of behaviours apply to the same person!
In this game Special Characters are unique Warriors who can be temporarily recruited.
There are other special characters beyond the ones listed in this section but they are faction specific. The ones listed here are available to multiple factions.
Archetypes
The Special Characters described here are archetypes, rather than named characters. Each one has a named example but the idea here is that your GCE campaign could be set on any planet in the universe. There’s could well be a strange bionik Ork, or an outlaw painboy, or whoever floating about. If you’re setting your campaign on Angelis then you might well run into Nazgrub Wurrzag, but perhaps you’re on Kharos IX and Grogteef Snikfang is up to very similar scrap-pilfering tricks!
This also means that there can be more than one of a Special Character active in your campaign at the same time, unless your campaign group decides not to allow this.
Choosey
Special Characters are somewhat faction specific and we are only including Special Characters in this book that apply to multiple factions. Your faction pack provides a list of which Special Characters can join your mob. Your faction pack might also include some special characters only available to your faction. Unless otherwise stated, the general rules below apply to hiring and working with Special Characters.
Recruiting a Special Character
There are two ways a mob can recruit a Special Character - tracking them down or a chance meeting.
Tracking Them Down
In short, some of your Warriors go looking for a specific Special Character and try to recruit them if they find them.
The Warriors that can try to find a Special Character are Troops. That is to say, not your leader, not your specialists, and not your novices. For Gorkers/Morkers that’s Ork Boyz (but not Ork Yoofs), for example.
This search takes the time the Warrior/s would otherwise use between games to do things. We’re not going to list everything every Warrior can do, but this includes skill activities, generating income, and so forth. This action happens after Income Generation, so make sure you’ve nominated your searchers beforehand.
Decide which Special Character they’re looking for and which of your Warriors you are sending. Have each Warrior take an Initiative Test (roll equal or under their Initiative). If at least one passes then you have successfully located the Special Character. Regardless of how many pass, they all use their time on searching. You cannot reassign them to other duties once they’ve been selected for searching!
Assuming you successfully locate the Special Character, roll 2D6. This is the amount of teef the Special Character is asking for to join the mob. If you want to pay it, do so now. If you choose to recruit them then you should immediately add their Mob Rating Modifier to your Mob Rating. Otherwise the Special Character leaves and you’ll need to search for them again after a future game.
Chance Meeting
There is a chance that a Special Character will join a mob that is facing a tougher opponent. Before a game begins the underdog can choose one Special Character and roll on the table below to see if they show up to help them. There must be a Mob Rating difference of more than 25 points for there to be any chance at all.
| Difference in Mob Rating |
D6 |
|---|---|
| 0 - 25 |
- |
| 26 - 50 |
6+ |
| 51 - 100 |
5+ |
| 101+ |
4+ |
Don’t forget the rules about Special Characters being unique, detailed above. You cannot pull a fast one and roll for a Special Character that is already part of your opponent’s mob!
If the Special Character you selected shows up then add them to your mob for the battle but do not add their Mob Rating modifier (otherwise the Special Character would affect your underdog bonuses!). After the battle you can choose to recruit them permanently for 2D6 teef. Roll the cost first, then decide whether you wish to apply it. You should handle your usual post-game Income generation before dealing with this cost.
Adding a Special Character to a Mob
Once a Special Character joins a mob’s roster (whether by being tracked down or following a battle after a chance meeting) they mostly function like a normal mob member.
Weapons and Equipment
Special Characters will not use any weapons, armour, grenades, equipment, or anything else like that provided by anyone else. They have the stuff listed on their profile, no more, no less. If their equipment is lost for some reason then they will replace it before the next battle, unless otherwise stated.
Similarly you cannot reassign their stuff to anyone else in your mob!
Experience
Special Characters do not earn Experience, gain Advances, or otherwise change.
Serious Injuries and Permanent Damage
Special Characters suffer from Serious Injuries and Permanent Damage to their Vehicles as normal. Serious Injuries affect whether they will stay with a mob (see below) but Permanent Damage doesn’t concern them - their stuff can be repaired!
You cannot send a Special Character to be treated for their injuries (e.g. sending an Ork character to Da Dok) or otherwise cure them. You may use equipment, skills, and similar to reroll Serious Injuries when they are acquired, just as normal.
We leave it to players to decide whether Serious Injuries a Special Character sustains should persist throughout a campaign or not.
Leadership Disputes, Drivers, and Gunners
Special Characters will never challenge a mob leader. Similarly they cannot be assigned to be Drivers or Gunners of your mob’s Vehicles, or challenge for those positions. The reverse is also true - if a Special Character has their own Vehicle your other mob member cannot challenge them to become Driver or Gunner.
Mob Rating Modifier
Each Special Character has their own Mob Rating Modifier value. This is because they do not have Cost and Experience values. As described above, once you’ve paid the initial 2D6 teef you should add their Mob Rating Modifier to your Mob Rating. Unless otherwise stated this modifier is static, but specific Special Characters may have rules that affect it.
Upkeep Costs
Special Characters count as two models for the purposes of mob size during the profit calculation, unless otherwise stated.
Firing a Special Character
If you’d like to be rid of a Special Character you have hired, you can choose to do so after any battle - after you’ve paid them. You cannot fire them before dealing with the upkeep costs!
Special Characters Leaving
Special Characters will only put up with so much and Serious Injuries are the deciding factor. After each battle (after dealing with Serious Injuries) roll a D6 and subtract the number of Serious Injuries the Special Character has received during their time with your mob. If the result is 0 or less, the Special Character leaves immediately (you don’t have to pay them at least!).
Weirdboy Scrap Hunter
Orks are a very psychic species, in their own way. When Orks get riled up and rowdy they generate a powerful psychic field. That’s not a problem for most Orks but a few of them are a little more sensitive to it. That is to say if it gets bad enough their heads sort of… explode.
Some of these weirdboyz learn to channel the psychic energy, others learn to avoid it, and plenty of them manage neither and don’t get much further than that.
Of course, even if an Ork learns to channel the psychic energy, it still needs to actually go somewhere, usually with explosive results. That sort of thing doesn’t make you popular in a built-up area.
Some weirdboyz end up living in towers to avoid other Orks and are occasionally dragged out to be used as living weapons. However on a Gorkamorka world there’s a decent living to be made exploring the wastes looking for scrap. Orks aren’t particularly solitary by nature though so these prospectors will often join up with a mob for a bit. This rarely lasts though as the notion of sharing scrap doesn’t really align with a prospector’s priorities!
| M |
WS |
BS |
S |
T |
W |
I |
A |
Ld |
|---|---|---|---|---|---|---|---|---|
| 4 |
4 |
3 |
3 |
4 |
2 |
4 |
1 |
7 |
Pinning: Weirdboy Scrap Hunters are not subject to pinning.
Equipment: Choppa, Kannon, Knife, Flak Armour
Skills: ‘Ard as Nails (Muscle), Loota (Odd), Sneak Off (Cunnin’), Gunboy (Odd)
Weirdo Powers: Weirdboy Scrap Hunters have two psychic powers – Zapp! and Knows Fings.
Zzap!: If there’s enough Orky psychic energy near a Weirdboy Scrap Hunter he’ll need to discharge it. This hurts the Weirdboy Scrap Hunter but if he can keep his composure he can direct it like a shooting attack.
In each of a Weirdboy Scrap Hunter’s shooting phases perform the following check:
Roll a D6. Deduct the number of Orks within 6” of the Weirdboy Scrap Hunter (friend or foe, makes no difference, but only Orks count towards this, not other Warriors). Also deduct 1 from the result for each separate instance of Hand-to-Hand combat within 6” (including if the Weirdboy Scrap Hunter is involved). Multiple combatant situations count as 1 combat. If the result is 0 or less, resolve a Zzap! Attack.
The attack will autohit one target within range if the Weirdboy Scrap Hunter can pass a Leadership test. Otherwise roll a scatter dice to see where the psychic blast goes.
| Range |
Hit Modifier |
S |
Save Mod |
D |
Ammo Roll |
|---|---|---|---|---|---|
| 4D6” |
- |
D6 +1 |
-2 |
D3 |
N/A |
Determine the Strength of the hit first and after dealing with the blast resolve a hit of the same Strength against the Weirdboy Scrap Hunter (but only 1 Damage).
Knows Fings: When rolling to determine which scenario will be played, you must have your Weirdboy Scrap Hunter take a Leadership test. If he passes you may choose who rolls. If he fails then your opponent rolls.
If both you and your opponent have Weirdboy Scrap Hunters in your mobs then the two cancel each other out and you skip this mechanic.
Mob Rating Modifier
Once a Weirdboy Scrap Hunter joins your mob permanently, add 25 points to your Mob Rating. If he leaves, remove it.
Special Rules
Scrap Fever: Weirdboy Scrap Hunters Hate enemies carrying scrap counters. This applies to enemy Warriors and enemy Vehicles carrying scrap (the Hatred applies to the Warriors onboard, not the Vehicle itself). See the Psychology section of the GCE Core Rules for how Hatred works.
Nazgrub Wurrzag
Whether Nazgrub chose the hermit life or merely had it thrust upon him is hard to say. He’s certainly abrasive and curmudgeonly, but that could fall into cause or effect.
His aversion towards co-operation doesn’t help matters much, particularly as he feels every other Ork is wrong about where to look for scrap. They see some metal poking out of the ground and hope for more but he instead listens to his gut, or possibly the wind, or maybe it was the Great Green. That sand dune? Doesn’t feel right – that’s a buried attitude thrusta’ from some big space thingamajig! Grab a shovel!
Unfortunately he’s never quite managed to wrap his head around the notion that scrap can belong to other people though and this tends to result in his tenure being cut short when he invariably has a bit of a disagreement about property rights. Alone he might be able to find scrap, but he’s not that good at getting it out of the ground. Maybe this next lot of lads might actually listen to him and help him dig up his latest big find...Thievin’ Git: During the income phase of the post-battle sequence roll a D6 for each scrap counter. On a 2+ your mob keeps that scrap counter, but each one you roll a 1 for gets nicked by the Weirdboy Scrap Hunter! They don’t count towards your income or anything else – they’re just gone! Git!
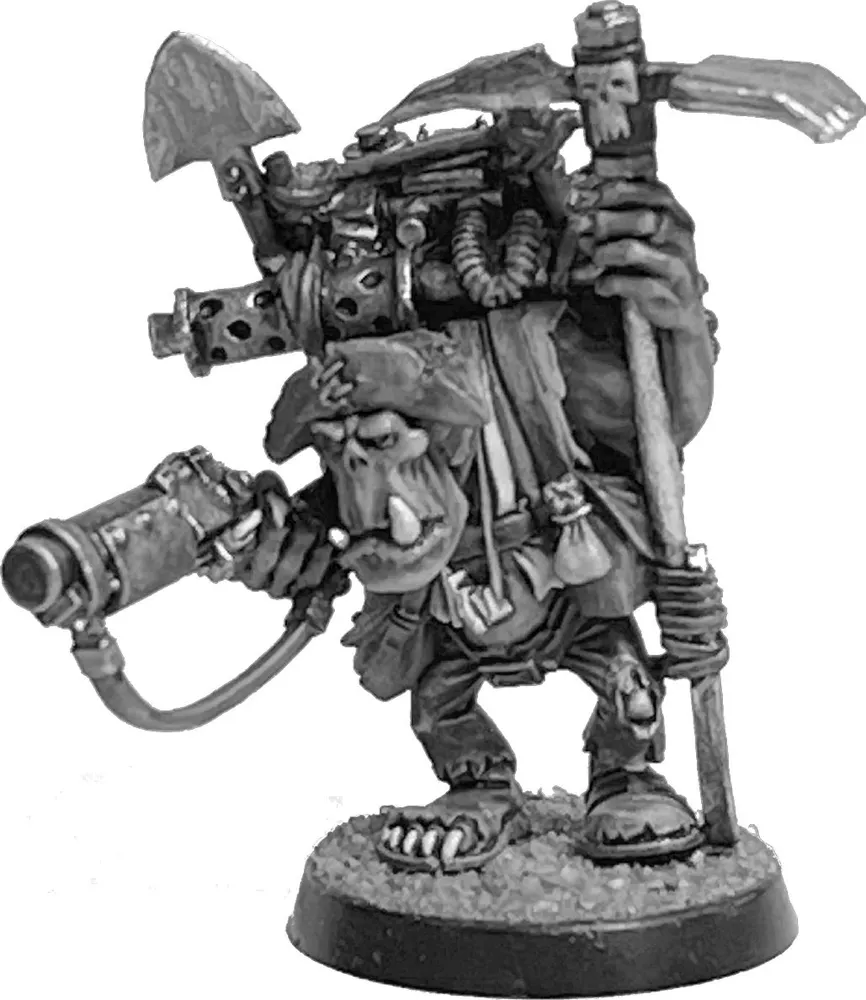
Outlaw Painboy
All Ork doks have to walk a fine line when it comes to practicing their skills. Whilst they remain sufficiently helpful their peculiarities are tolerated but if the balance tips too much towards “I wunda wot wud happen if…” behaviour then there tend to be rather terminal consequences.
Doks are of course aware of this but their rather malevolent flavour of curiosity is hard to control. Orks don’t really go in for the whole “ran him out of town” approach to ostracism – they take the more direct approach and simply burn down the Dok’s serjery with him still inside it. If he’s lucky.
As a result there’s a few doks wandering around providing a “konsultin’ serviz” out in the wastes. They usually claim that they’re just performing a public service, or some such, and can go back to Mektown whenever they like...
| M |
WS |
BS |
S |
T |
W |
I |
A |
Ld |
|---|---|---|---|---|---|---|---|---|
| 4 |
4 |
3 |
4 |
4 |
1 |
3 |
1 |
7 |
Pinning: Outlaw Painboys are not subject to pinning.
Equipment: Bone Saw, Slugga, Knife, Studded Armour.
Skills: Well ‘Ard (Ferocity), Duck ‘n’ Weave (Cunnin’), Doc (Odd)
Well ‘Ard Skill: an Outlaw Painboy may charge whichever Warrior he likes, ignoring the rules regarding the nearest Enemy.
Mob Rating Modifier
Once an Outlaw Painboy joins your mob permanently, add 25 points to your Mob Rating. If he leaves, remove it.
Special Rules
Bone Saw: The bonesaw is rather nasty and inflicts rather permanent injuries, despite ostensibly being a tool of healing. If an Outlaw Painboy puts a Warrior Out of Action using it you must roll twice on the Serious Injuries table and taking the lowest result. Make sure you keep track of who this rule applies to!
| Range |
Hit Modifier |
Strength |
Save Mod |
D |
Ammo Roll |
Notes |
|---|---|---|---|---|---|---|
| - |
- |
AU +1 |
Var |
1 |
N/A |
Roll twice for Serious Injuries if taken OoA. |
Doktorin’: An Outlaw Painboy provides his services to the mob that recruits him for free. It works just like visiting an Ork Dok (see your faction pack for rules) except the roll on the Da Big Day table has a -1 modifier.
Bad Doc Dreggutz
One of the legends of Angelis is ol’ Bad Doc Dreggutz.
It’s not clear what he was thinking when he decided a rocket booster would be a good addition to a Gorker nob’s cranium, probably just “dat’d be hilarious...”
Arguably he was right, however it quickly became clear he’d gone too far and the rest of Mektown had had enough of his antics. He set about making himself scarce for his own safety. Given there’s only one of him, he’s pretty scarce already!
These days he’s a bit of a drifter, often showing up when it looks like a mob will imminently need his services and aren’t likely to ask too many questions.
Deffkopta Mek
It’s not entirely clear why but the sky seems to hold a strange appeal to a certain kind of Orks, regardless of the associated peril. No matter how many Stormboyz vanish in explosions as their rokkit paks detonate, there’s always another Ork keen to have a go.
The same is true for Mekboyz. Most of them are content with staying on the ground. Most. There’s a particularly obsessive kind of Mek that feels the sky is his destiny.
Some dream of planes or airships – big projects that need a whole team to put together. Others though, no, they want the immediate thrill of a single-seat whirlybird that is their personal sky chariot.
This obsessiveness does tend to cause practical problems – it’s hard to keep a workshop running if one doesn’t have any interest in doing any actual work for other people! The nomad lifestyle suits them better and they relish the opportunity to show off what they’re pride and joy is capable of. Death from above!
| M |
WS |
BS |
S |
T |
W |
I |
A |
Ld |
|---|---|---|---|---|---|---|---|---|
| 4 |
4 |
5 |
3 |
4 |
2 |
3 |
1 |
8 |
Pinning: Deff Kopta Meks are not subject to pinning.
Equipment: Kustom Six-Shoota, knife.
Skills: Skid Start (Driving), Stunt Driver (Driving), Skid Turn (Unique, see below).
Skid Turn Skill: At the start or end of gas engine movement the Deffkopta Mek can attempt make a skid turn – instantly turning their Deffkopta up to 180˚ on a D6 roll of 4+. Failing the roll results in D6” of movement in a random direction followed by a spin. Regardless of the result the Deffkopta Mek can then continue moving their Deffkopta as normal.
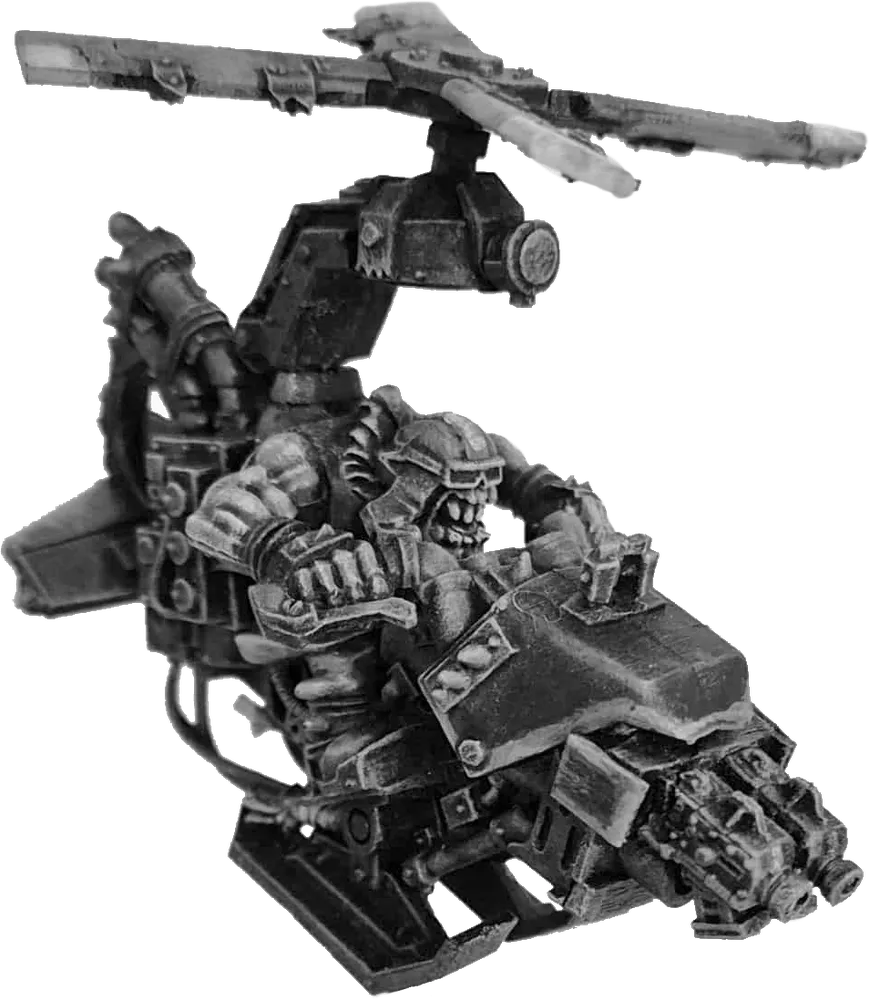
Mob Rating Modifier
Once a Deffkopta Mek joins your mob permanently, add 60 points to your Mob Rating. If he leaves, remove it.
Special Rules
Kustom Six-Shoota: a Deffkopta Mek’s gear is kustom and only marginally less important to them than their kopta.
| Range |
Hit modifier |
Strength |
Save Mod |
D |
Ammo Roll |
Notes |
||
|---|---|---|---|---|---|---|---|---|
| Short |
Long |
Short |
Long |
|||||
| 0” - 6” |
6” - 12” |
+1 |
- |
4 |
0 |
1 |
4+ |
2 SFD, 1 shooting phase to reload |
Upkeep: a Deffkopta Mek and their Deffkopta count as 3 models for the purposes of upkeep.
The Sad Loss: the Deffkopta Mek and their Deffkopta are a package deal. If the Deffkopta is Destroyed then the Deffkopta Mek will leave your Mob immediately (so will not count towards upkeep costs). This also applies if their Deffkopta is Captured and then scrapped rather than rescued.
Similarly, no one else can fly the Deffkopta Mek’s Deffkopta if the Deffkopta Mek is killed or Captured. Your only option is to scrap it for 2D6 teef of income.
Kustomisin’: a Deffkopta Mek is, first and foremost, a Mek. He’s also a strange chap and doesn’t show any interest in anyone else’s kit. Between games he likes to fiddle with his Deffkopta and his trusty sidearm.
If you’re able to hire a Deffkopta Mek then your faction pack should contain the rules for taking things to the Mek.
The way this is resolved is as follows:
The Deffkopta Mek will attempt one repair or one Kustom Job per post-battle sequence.
If you opt for a repair then pick an item of Permanent Damage the Deffkopta has sustained and resolve what happens by rolling on the Da Big Day table with a -1 modifier.
If you instead choose to have the Deffkopta Mek attempt a Kustom Job then choose what he is working on – the Deffkopta, the Deffkopta’s twin-linked Kannons, or the Mek’s Kustom Six-Shoota. Resolve this by rolling on the Da Big Day table (again, with a -1 modifier).
All three items are considered to have had their “first one’s free” upgrade without trade-offs, so you will need to roll on the relevant performance loss table.
Regardless of result your Mob never has to pay for this work. However if a Kustom Job is successfully performed add the usual 5 teef to the item’s cost for the purpose of Mob Rating.
Deffkopta
Deffkoptas work like Small Vehicles (like Bikes) with a few additional special rules.
| Deffkopta |
|||
|---|---|---|---|
| Armour Value |
Location |
Armour Value |
Location |
| 0 |
Crew |
8 |
Wurly Bitz |
| 8 |
Fixed Weapon |
8 |
Driver |
| 8 |
Gubbinz |
10 |
Engine |
Just like Ork Small Vehicles a Deffkopta is fast and so has a free thrust:
One Free Thrust
Each time a Deffkopta is eligible to Thrust it does not have to roll on the Thrust Table for the first attempted Thrust - it automatically passes. Subsequent Thrusts must be rolled for as usual, starting from 2+.
Airborne
A Deffkopta can either be on the ground or in flight during a battle. By default it is in flight – it doesn’t have to take off at the start of the game, it’s considered to be airborne from the start.
First we’ll deal with how it works in flight.
When in flight a Deffkopta can clear anything up to 6” tall. This essentially means that all types of terrain are treated as Open Ground.
| Wurly Bitz |
|
|---|---|
| Terrain Type |
Movement |
| Open Ground |
Normal |
| Difficult Ground |
Normal |
| Very Difficult Ground |
Normal |
| Impassable Ground |
Normal |
During flight a Deffkopta needs at least 1” above/below it at all times (cumulatively). This is already factored into its clearance for flying over things but we mention it for the purposes of flying under/through things (e.g. flying under a bridge or through a stone arch). There needs to be enough clearance for the whole model (excluding the base/flight stand) plus an additional inch.
Anything higher than 6” will cause a Head-On Collision, similarly if forced into a gap where there isn’t 1” of clearance a Head-On Collision occurs!
A Deffkopta cannot Ram or be Rammed during flight. It also cannot be Boarded or have friendly Warriors embark and become Crew in flight.
The Crew location is included on a Deffkopta’s datacard for situations where the Deffkopta is on the ground. On the ground it can be Boarded as normal, have friendly Warriors embark, etc.. It cannot take off whilst they are onboard though – you can have flight or you can have Crew, not both!
Basically this is included for the sake of the Deffkopta taking damage on the ground – anyone clambering on it for one reason or another isn’t going to have any armour to protect them!
This also means that during deployment for a battle or similar circumstances the Deffkopta cannot arrive/start with any Crew, as it always starts in flight.
Deffkopta Thrusters
Deffkoptas are very finnicky – if you fail a Thrust test you will need to roll on the Thruster Buster table AND the Deffkopta Thruster Buster table and resolve the effects simultaneously, as the additional table covers what’s going on with the machine in terms of verticality.
| Deffkopta Thruster Buster Table |
|
|---|---|
| D6 |
Result |
| 1 |
Stall! The Deffkopta crashes to the ground and is no longer airborne. It takes D6 Damage. Next turn, if it is able to after resolving damage, it will automatically become airborne again. |
| 2 |
Krunch! The Deffkopta just barely stays airborne, scraping along the ground and taking D3 Damage. It performs this move at ground level with no clearance – so if anything gets in its way whilst resolving the Thruster Buster result it will Collide with it. Next turn, if it is able to after resolving damage, it will automatically become airborne again. |
| 3 |
Skreech! The Deffkopta skims the ground as it attempts to stay airborne. If anything gets in its way whilst resolving the Thruster Buster result it will Collide with it. Next turn, if it is able to after resolving damage, it will automatically become airborne again. |
| 4+ |
Phew! The Deffkopta suffers no additional penalties this time. |
Deffkopta Armament
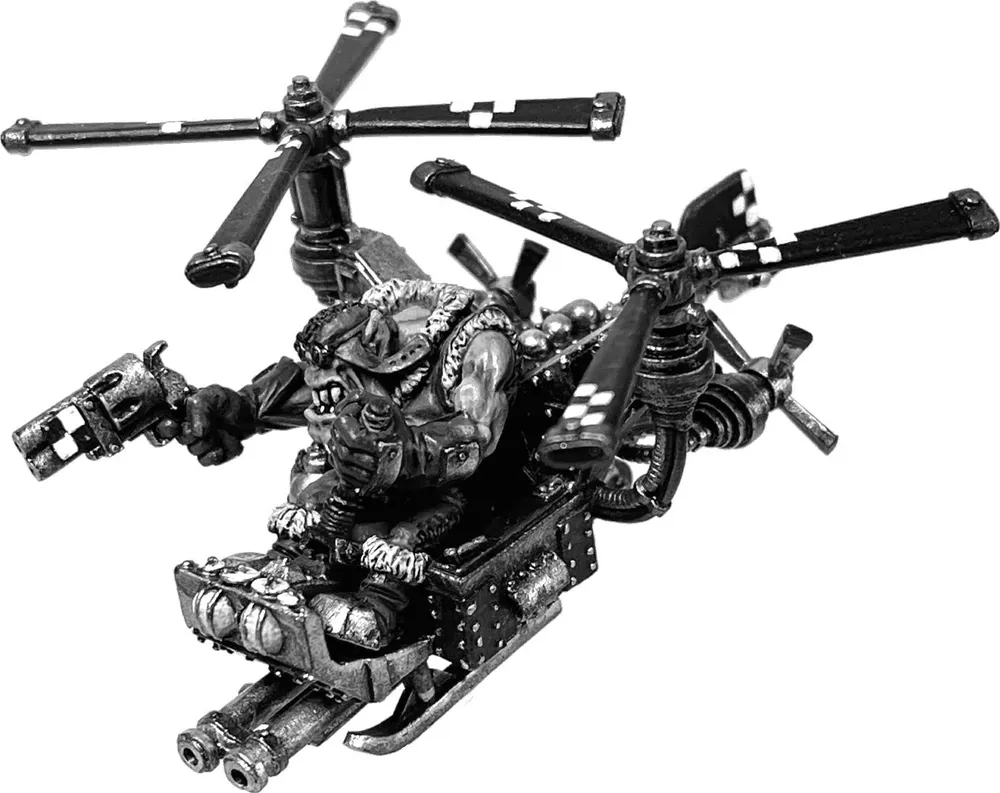
Deffkoptas have Mek-special twin-linked Kannons and cannot swap their weaponry for anything else. They do not have a Hit Modifier for shooting at long range and they start with the More Dakka Kustom Job. This means that all future Kustom jobs will incur trade-off penalties (see Kustomisation rules in your Faction Pack).
| Range |
Hit modifier |
Strength |
Save Mod |
D |
Ammo Roll |
Notes |
||
|---|---|---|---|---|---|---|---|---|
| Short |
Long |
Short |
Long |
|||||
| 0” - 4” |
4” - 18” |
- |
- |
4 |
0 |
1 |
4+ |
2 SFD, Knockback |
Dregmek Blitzkart – Mekboy Extraordinaire
Oddboyz all trend towards unhinged and Dregmek Blitzkart is no exception. His dream was to fly. Something in his blood whispered to him, insisting it was his destiny.
Not one to argue with destiny, he set about laying his hands on the parts to build a suitable sky chariot. This took many attempts and the bill of parts became rather large. Fortunately, he wasn’t paying. Unfortunately, those parts belonged to some Big Meks with some rather forceful opinions on property.
Still, it clearly was his destiny as Dregmek easily escaped off into the wastes on his “Deth Kopta” rather than sticking around to face the music!
These days Dregmek seems to appear from the skies periodically. Rumour has it that he has a cult of flyboyz living on a floating fort above the desert somewhere, plotting a return to Mektown, but that’s probably just idle Brewhouse banter...They are fired in the usual 1” firing corridor used by Small Vehicles (see the GCE Core Rules for details).
diagramDeffkopta Datacard
Mega Cybork
Orks can withstand a truly astonishing amount of serjery, when they’re lucky, but it’s hard to say whether Mega Cyborks are fortunate or genuinely cursed.
Plenty of Orks have bioniks, often they’re their proudest possessions, badges of honour, shown off in brewhouses with phrases like “Yoo should see da uvver lad!”. That’s usually the extent of it, but some Orks take it far further, becoming the pet project of a Painboy. Invariably a Dok loses interest when their patient needs a skilled welder more than he needs surgeon.
From that point a Mega Cybork has to find a new place and they’re still Orks at heart (if perhaps not literally anymore) and crave a good scrap. Into the wastes they go to really show off how much more flash than the average Ork they are!
| M |
WS |
BS |
S |
T |
W |
I |
A |
Ld |
|---|---|---|---|---|---|---|---|---|
| 4 |
5 |
4 (5) |
4 |
Armour 9 |
2 |
1 (4) |
7 (8) |
|
Pinning: Mega Cyborks are not subject to pinning.
Equipment: Shoota bionik arm, Claw bionik arm.
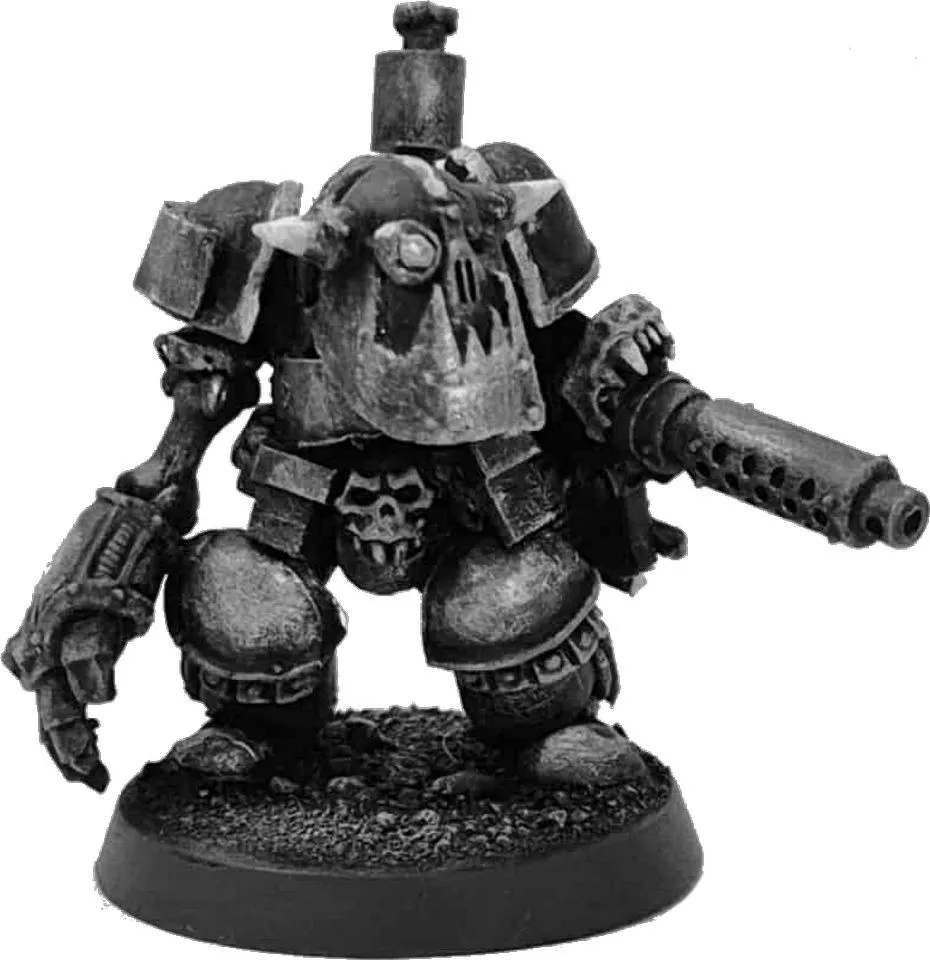
Skills: Well ‘Ard (Ferocity), Chuck (Muscle), Hipshoota (Dakka), Gunboy (Odd)
Well ‘Ard Skill: a Mega Cybork may charge whichever Warrior he likes, ignoring the rules regarding the nearest Enemy.
Chuck Skill: Once a round of Hand-to-Hand combat has been resolved, if a Mega Cybork wins he can choose to throw his opponent rather than end combat in the usual manner. Roll a D6” – this is both how far the loser of the combat is thrown and the Strength value of the hit they take when they land. The loser of the combat can be thrown in any direction the Mega Cybork chooses, including into other Warriors. If thrown into another Warrior then halve (rounding up) the Strength of the hit and apply it to both Warriors. The Mega Cybork does not have to roll to hit as this is not a shooting attack – simply choose a target.
e.g. TinWurr just barely wins a round of combat against Baz, an Ork Boy, scoring a single successful hit. Rather than resolve the hit, TinWurr decides to try to throw Baz into Skroggy, an Ork Yoof, standing 4” away.
TinWurr rolls a 5 and Skroggy hurls Baz into him. Both Baz and Skroggy take a Strength 3 hit (5/2 = 2.5, round up to 3).
Mob Rating Modifier
Once Da Krusher joins your mob permanently, add 35 points to your Mob Rating. If he leaves, remove it.
Special Rules
Da Bionik Ork: Mega Cyborks disregard the normal limits on Bioniks – this is not an oversight. Also all the statline changes from the bioniks are already factored into their statlines. The brackets show these stat changes, as explained below. Bear in mind that the values in brackets are bonuses and are not considered part of a Mega Cybork’s statline. For example, if a Mega Cybork experiences Frenzy then his Attacks double from 1 to 2, not 4 to 8!
Shoota Arm
| Range |
Hit Modifier |
S |
Save Mod |
D |
Ammo Roll |
||
|---|---|---|---|---|---|---|---|
| Short |
Long |
Short |
Long |
||||
| 0”-12” |
12”-18” |
+1 |
- |
3 |
0 |
1 |
4+ |
Claw Arm
| Range |
Hit Modifier |
S |
Save Mod |
D |
Ammo Roll |
|---|---|---|---|---|---|
| - |
- |
6 |
-3 |
1 |
N/A |
Two De-lux Kickin’ Legs: Mega Cyborks receive 2 bonus Strength 4 attacks in Hand-to-Hand combat.
Steel Horns: Mega Cyborks receive 1 bonus Strength 4 attack in Hand-to-Hand combat when he Charges.
Bionik Eye: +1 BS for the purposes of Shooting.
Iron Mask: Mega Cyborks cause Fear.
Da Krusher
Something happened to Da Krusher and whatever it was, he didn’t ask for what was done to him after that.
Once the Doks had cut away all the dead, dying, and burnt bits there really wasn’t much left, but they did their best. Or so the stories go...
He’s more machine now than Ork, twisted and evil. Perhaps there’s voices in his head telling him to do things, maybe it’s just a ghost in the machine. Whatever is going on under all those rivets is hard to say but he’s a terrifying thing to have to fight.
Fuel Injection Implant: Each turn a Mega Cybork can receive +2 Movement and +2 Initiative on a 2+. A result of 1 means the implant does nothing this turn.
Cybork Body: Mega Cyborks don’t have Toughness or Wounds – they have Armour like Vehicles. If a hit penetrates his armour roll a D6. On a 4+ the Mega Cybork is taken Out of Action, otherwise the Mega Cybork ignores the hit. Penetrating a Mega Cybork’s armour counts as wounding for the purposes of experience points, regardless of the outcome.
This also means that Mega Cyborks never roll on the Injury table.
Temperamental: Mega Cyborks are have Serious Injuries - a single Old Battle Wound and a Head Wound. See the Serious Injuries table earlier in this book for details.
Klunky: Mega Cyborks do not gain +1 to their score in Close Combat when they Charge and enemies shooting at a Mega Cybork from Overwatch gain an additional +1 to hit. Mega Cyborks cannot set Overwatch and cannot Hide either.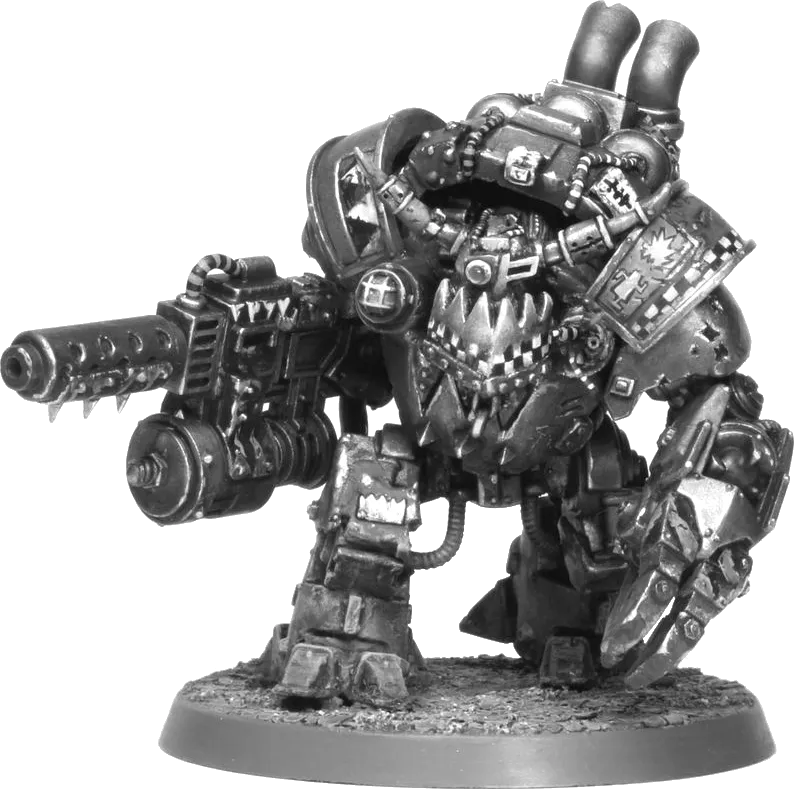
Campaign Tips & Tools
So you’re planning to run a GCE campaign, eh? Let’s see if we can give you some ideas and tools to help you.
Firstly, let’s deal with what a campaign involves or perhaps more usefully can involve.
In its most basic form a GCE campaign sees players meet up at reasonably regular intervals to play GCE against each other. In between games they earn income, level up, hire new Warriors and buy new gear. Eventually either the campaign reaches its planned duration or a player hits the Mob Rating cap and things end with a winner. The other option is that a campaign loses momentum and peters out - unfortunate, but worth acknowledging here. Try to have an end point in mind to stop that from happening - a final scenario that will see things conclude.
That said, more complex narrative campaigns are possible within this system, and for players that are interested it can really step up how much fun GCE can be. These kinds of campaigns can either have pre-planned stories with branches or they can involve dynamic stories and emergent narratives. Usually a campaign involves a bit of both and that’s going to be the basis of what we describe in this part of the book.
You Will Need…
First off, a games master (GM) to run things. It’s their job to provide structure to the campaign. That doesn’t necessarily mean organising when games happen, although it can do, but it does mean creating the narrative and mechanical side of things. They’ll probably discuss things with players before the campaign starts (to gauge what their potential players might want) but ultimately they’re the ones running the story.
They will decide on campaign events, choose NPCs, arrange special scenarios, and generally guide players through the journeys their mobs take.
The GM will need (if possible) a lot of experience of GCE or games like it. They should also be ready to read up on all the factions involved in the campaign so they have a firm grasp of the lore they’re going to be working with.
Lastly, but most importantly, they’re going to need enthusiasm. The GM is the driving force behind a narrative campaign and needs to be willing to put in the work to make it happen. A large part of this is storytelling - they need to be up for weaving a narrative both from natural occurrences in the campaign (victories, deaths, etc.) but also introduce their own, tailored to the players involved.
Communicating with your players
The story of your campaign needs to be communicated to your players in a way that works for you. Perhaps that’s emails, a group chat, a printed bit of paper on the gaming club notice board, a video update, carrier-squidgeon, or maybe it’s a verbal briefing before each game session. Whatever works for you, really.
We’re going to be talking about this as if you’re writing something long form, as that’s the traditional way these things are done, but don’t feel that you have to go that route if it’s not for you. After all, if you write something lengthy but your players don’t like to read that sort of thing, you might as well not have bothered. You’ve got to speak to your players through a medium that they’ll engage with.
Emergent Narrative
Every campaign sees the game mechanics themselves create what we call “emergent narrative”. In short - stuff happens. A Warrior does something innocuous, random chance means that an injury is sustained, the player rolls “Dead” on the Serious Injuries table, and before you know it there’s the story of how Zodnosh tripped over his bootlaces and got squashed under the wheels of his own trukk.
These events can be relied on to happen, and as games master you should pay close attention to them to add to the narrative.
Particularly of interest are:
- Victories and defeats (particularly pyrrhic victories and snatching-defeat-from-the-jaws-of-victory)
- Deaths
- Special Characters
- Bitter enmity results (where a Warrior starts to Hate either a mob or a whole faction)
- Captured mobsters, rescue missions (successful or botched)
- Silly little recurring things (see below)
Emergent Narrative and recurring incidents
In pretty much every game of our campaign we would destroy the Mutie tent - initially by accident which added much hilarity to the games, but then players started intentionally going out of the way to do so. We ended up adding the rule that you get +5 exp for destroying it. And players came up with their own emergent narrative ideas on what this recurring pattern of tent-discrimination meant, such as Mutie camps encroaching on other territories, or some orks had a bad experience camping so are fixated on eradicating tents from existence, or some poor Mutie kept having to move to set up a new life for himself only to get his tent destroyed so he moved elsewhere only for it to keep happening. This in turn could evolve into a scenario where the angry Mutie decides to take revenge on the players’ mobs!
Advice from a GM
Our friend, Ross, has run a few campaigns in recent years and we decided to ask him to give us his thoughts. Morgan and Ross had a chat about how to run a campaign, talking about both the positives and the negatives, the successes and the failures, and these are some of the key notes from that that conversation (with a fair bit of editing from Morgan). Learn from our mistakes!
what kind of campaign Do you want to run?
Some players will want a narrative that threads between games and makes a compelling story and they’ll look forward to that and thrive off of it and want to be involved in the creative process, writing new content or converting up interesting models based on the narrative as inspiration. Others might say they want that, but will ultimately show no interest other than rolling dice. You’ll get some who are a bit of both. You should absolutely try to communicate what kind of campaign you want to run in the campaign document, but you might not actually find out how keen players are on it until mid-campaign.
You need to go with the flow (or rather with the majority). Of course I’m talking about narrative campaigns versus a more straightforward off-the-rack campaign, but other types exist too – such as competitive campaigns (which don’t really work for GCE that well because Bottlin’ Out is often the most strategic option, so tracking wins/losses is a bit broken). And I’m sure there are other types too!
Creating a Campaign Document
Create a campaign document with everything players need to know about the campaign. A campaign document is the best way to keep all players on the same see about what to expect from the very start. The GCE document templates are freely available if you’d like to make your campaign document look a little fancy too – nudge nudge.
Your campaign document should include:
house rules & validity of fan made content
If your campaign has players that have run various related game systems, chances are they’ll have a number of house rules that they’ll swear blind are part of the published ruleset. Invariably these are actually house rules from the person that taught them to play. Rather than have players bickering over which rules exist, spell out any changes you intend to make to the ruleset (and which common misconceptions are not part of the campaign rules!).
The next question is which additional rules will be allowed. Depending on the gaming background of you may well find they run the gamut between “anything goes – here, I scribbled some rules at lunchtime!” and “If it’s not in the printed rulebook it doesn’t/shouldn’t exist”.
Have a chat with your players and decide which of the fan rules you’re all aware of should be allowed and the process for getting new rules included later.
It’s incredibly difficult to make rulings about this stuff midway into a campaign, as it will upset players, unless you’ve thought about it from the start.
Limitations
It’s hard to see why you would want to put restrictions in a campaign, but depending on how you’re running yours, you might need some. Some will of course be based on rules or house rules with regards to building your mob. But other restrictions should help sculpt the campaign’s level of fairness and its progression. This boils down to “tweaking the meta”. You might find that certain weapons were wildly overrepresented in a previous campaign and introduce a limit on them to encourage variety, for example.
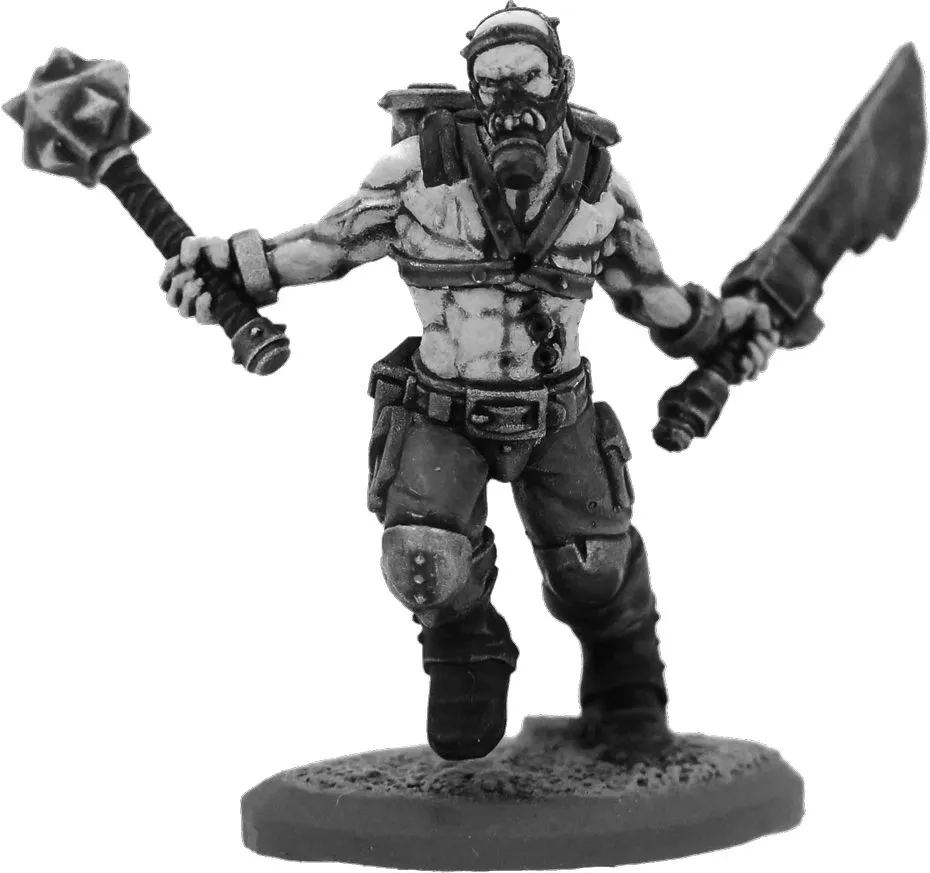
Who’s in charge
Don’t just state who is organising it (usually whoever is writing the campaign document), but state anyone who has any role other than simply “player”. This is important because mid-campaign it might not be clear who holds what roles, and if any changes need to be made (like fixing unfair rules) or writing/running narrative scenarios then players will need to know who is the authority on such things.
If nobody is declared in the beginning to be taking on these duties, then players may not respect any changes or new content that comes up mid-campaign. If the organiser is going to take on all roles, that’s fine, but you’ll also find that some roles naturally emerge – like there will always be some people who players seem to gravitate towards for rules queries. You may also want to declare who second in command of the campaign is, just in case you’re not around and a decision needs to be made. It’s also nice to give minor roles to other players as it helps them feel more involved - if one of the players has a load of creature models, then give them the title Squig Wrangler where they’re responsible for any NPC models the campaign might need.
Start & End Dates
After all, people want to know when they can start! But after much experimentation, having an end date in mind is also a very good idea. You could set an end date, then decide to extend it a bit longer. But having no set end date often means the campaign drags and players lose interest. Having a clear end date drives up enthusiasm as everyone tries to get all their games in. And builds excitement for the finale.
Deadlines
The end of a campaign is a very final deadline, but you might want to throw in other deadlines too, like if a warrior is captured you need to face off that player to attempt a rescue before a game with anyone else or that warrior is lost.
Game limit
It might be per week, per month, per campaign. But having an idea of how many games they can play will help players understand etiquette. I made a mistake of running a campaign without a game limit, and two of the newer players played four times as many games against each other than against anyone else, resulting in their mob ratings shooting up, well beyond the system’s ability to compensate, unbalancing the whole campaign. It also, unfortunately, led to awkward grumbling between players, which could have been avoided if game limits had been communicated up front.
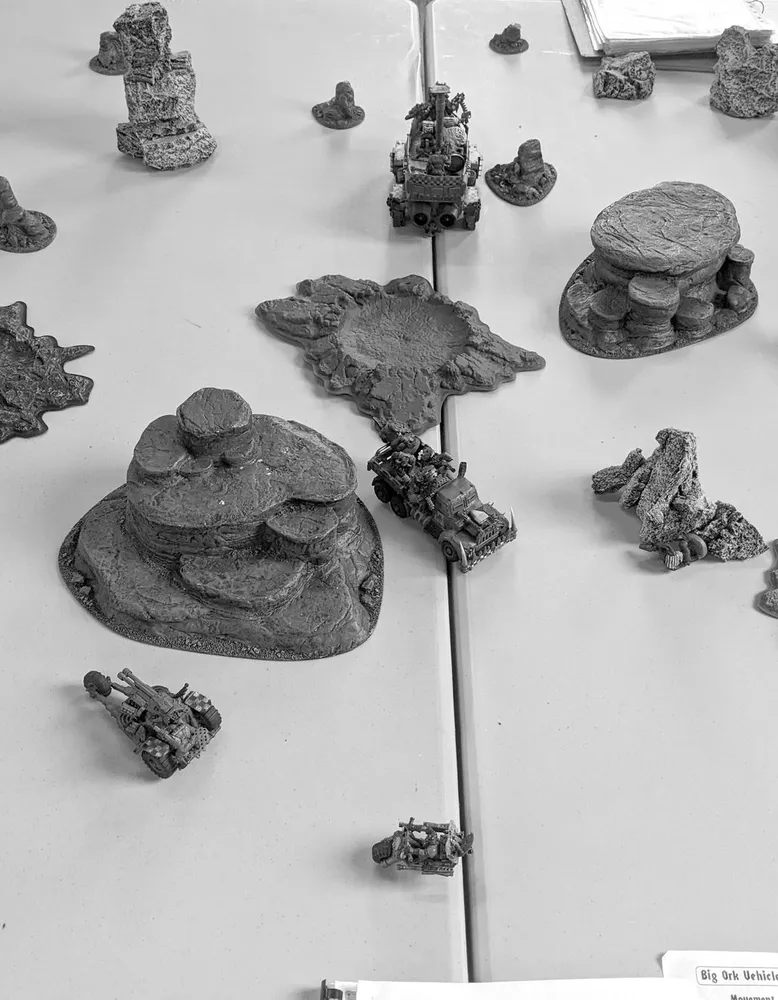
Expectations and etiquette
Declare what you expect from players. Don’t work on assumptions – be explicit in what constitutes good conduct (and what doesn’t). If you expect players to make efforts to plan their opponent match-ups in a particular way say so. This also means that by joining the campaign players effectively agree to abide by the campaign document, providing some backing should you need to nudge players to do what they’re supposed to.
It may be that you have a place in mind for playing your campaign. It may be that it doesn’t matter where you play. But if there’s a preference or expectation on where people are to play you should state it in the campaign document to make sure everyone is on the same see about it. I speak from experience. For one campaign, it was assumed to be universally understood that everything was to be played at a local gaming store. Because of this, it was never mentioned in the campaign document (because why would it need to be if everyone is assumed to know it?). However, it absolutely should have been because when some newer players with fresh mindsets joined, they started playing almost exclusively at home with occasional in-store games. It essentially became two separate campaigns that happened to cross over now and again, which really didn’t work.
Other bits of advice
Do you need a tracker? – Probably not.
First off, what is a tracker? Some games or players might insist on keeping track of campaign data – wins, losses, who’s played who, mob ratings, etc.. These kinds of documents are “trackers”.
Wins and losses are not a driving force behind GCE as Bottlin’ Out is often more strategic so a player can officially lose but come out ahead overall, thus keeping track of victories is a bit hollow.
If you still really want to track wins/losses/etc., assign someone to gather and maintain that data. We don’t recommend a shared tracker (like an online document). It sounds simple/easy to implement, but players will forget, make mistakes, try to be helpful but actually make it worse – and it just becomes an incomplete mess. And the more players in your campaign, the higher the chances of it going wrong (and not in the fun way like on the table!)
Mob ratings are important, but don’t need to be on a tracker. Some players may push to have lower rated mobs playing other similarly lower rated mobs. It’s not without its merits, but the underdog bonus is designed to help such mobs catch up faster, so it’s better if they just play whoever. GCE’s balancing system needs the swings needed to average out across the campaign.
Players will know who they’ve played already, but might need a little nudge to play everyone. Some will not care who they play, so as the organiser you might need to make arrangements to ensure everyone gets the chance to face everyone else out of fairness.
What do players want from a campaign?
Ask players what they want from the campaign, ask them what they want at the end of the campaign, ask them what they want before the end of the campaign. You should get a mix of responses and it is your job to best facilitate them.
Some examples include: “I really want the two Mutie mobs to team up against the Grots”, “I really want to buy two more trukks”, “I would like to play a Halloween themed scenario”, “I would like to write my own scenario and run it”, “I would like to have more narrative and plot hooks”, “I keep destroying that Mutie tent, so maybe some Mutie related shenanigans”, “I really want to fight a Necron flayed one”. That last one will require a bit of creativity to achieve!

Additional Resources
With each version of this book we intend to add resources to make running a campaign interesting. To begin with we are including a bestiary written by Ross Graham (previously published as “Sumfink In Da Sand”). A games master can use these to add to scenarios or to build entirely new ones.
Ross had some ideas in mind for how he might use them in his games. It might be fun to fend off a Steel Gulpa and an opposing mob while trying to grab some scrap, or opting to send captured warriors in a pitfight against a Whip Scorpion to earn his freedom, or even using Skratchers to surround a fort during a siege. Of course, it's all up to you!
Bestiary
Unless otherwise stated these creatures' teeth and claws (amongst other things) count as knives, i.e. user strength. They should be treated as third-party Notmobz and all the rules are in their profiles for how they should behave. Mob Ratings have been included in the profiles for underdog bonuses and just in case you have some ideas of your own. Of course this is not the only way they can be used and creating your own scenarios using them is encouraged!
Whip Scorpions
Mob Rating: 85
Whip Scorpions are truly the hunters in the sand. Mobs often come back raving about something that snatched one of their Yoofs in front of their very eyes. And some mobs don't come back at all. Technically speaking Whip Scorpions are part of the Squig family, but you would never have thought it. Its sharp spiny legs, clacking claws, and whippy tails bear little resemblance to the Squigs that the Orks know. "Theyz likes to hide in da sand" isn't really much of a warning, but it's the closest thing you'll get.
| M |
WS |
BS |
S |
T |
W |
I |
A |
Ld |
|
|---|---|---|---|---|---|---|---|---|---|
| Whip Scorpion |
6 |
4 |
0 |
6 |
5 |
3 |
4 |
4 |
10 |
Fear: Whip Scorpions cause Fear.
Equipment: The Whip Scorpion has 4 attacks in its profile, attributable as follows: two for the claws (treat as User Strength +1), one for the tail or stinger (treat as a User Strength +1) and one for the monster's spikes and legs (User Strength). Additionally, the Whip Scorpion gains an additional stinger attack in the first round of combat if it charges. The Whip Scorpion's bony plates make excellent armour, to represent this in game terms, the Whip Scorpion counts as wearing Flak Armour (6+ normally, 5+ against template weapons although Save Modifiers still apply).
Ouch!: A good defence is a good offence and even a Whip Scorpion knows this. At any time, during any phase of any turn, the Whip Scorpion may lash a nearby warrior with its tail or stinger. If a warrior passes within 2" of a Whip Scorpion, it will attack in this way. The warrior must take an Initiative test. If passed, the warrior moves away from the monster. If failed (and assuming the warrior can) they may charge into combat with the Whip Scorpion, or take the hit. If for some reason the warrior is unable to charge it, he is hit. See above for details on the Whip Scorpion's tail attack.
Movement: As Whip Scorpions have no shooting capabilities, they are always able to run, so their maximum movement is 12" per turn (plus any follow up move after close combat). Additionally Whip Scorpions are expert scuttlers and jumpers, they move through difficult and impassable terrain as if it were open ground. The Whip Scorpion will move during both players' turns just after the player has moved. This represents the fact that it is hard to hit as it scuttles off after warriors have moved into a more strategic position. A Whip Scorpion will always move directly towards the nearest enemy (i.e. not another Whip Scorpion) at its full movement rate.
Theyz likes to hide in da sand: While this isn't exactly the best advice to know where to find them, it does explain why they're so hard to hit. This is represented in game terms in that anyone attempting to shoot at the Whip Scorpion will be at -1 to hit.
Jabberz
Mob Rating: 8 + D3
Jabberz come in all shapes and sizes but are easy to recognise if you come across one due to their mischievous nature. Covered in spiny spikes, they like to hide in the sand until the most "opportune" moment, then thrust upwards. It's not known whether it's intentional or simply a defence system but it sure is annoying... especially when you're stranded miles from Mektown!
| M |
WS |
BS |
S |
T |
W |
I |
A |
Ld |
|
|---|---|---|---|---|---|---|---|---|---|
| Jabberz |
4 |
3 |
0 |
3/4 |
3 |
1 |
4 |
2 |
10 |
Hatred: All Warriors are treated as Hating Jabberz.
Equipment: Jabberz have 2 attacks on their profile (they are relatively simple creatures). One is at Strength 4 representing its spikes, and the other at Strength 3, representing its teeth and claws. In addition to this, the spikes that cover the Jabberz provide excellent defence, so they are treated as wearing Studded Armour (6+ Saving Throw).
Movement: Jabberz can't see particularly well and seem to wander aimlessly. Once revealed Jabberz move 4" in a randomly determined direction. If a Jabber comes within 2" of a Warrior (not another Jabber), it will engage it in Close Combat immediately. Jabberz effectively have their own turn before the players’ turns and so always move first.
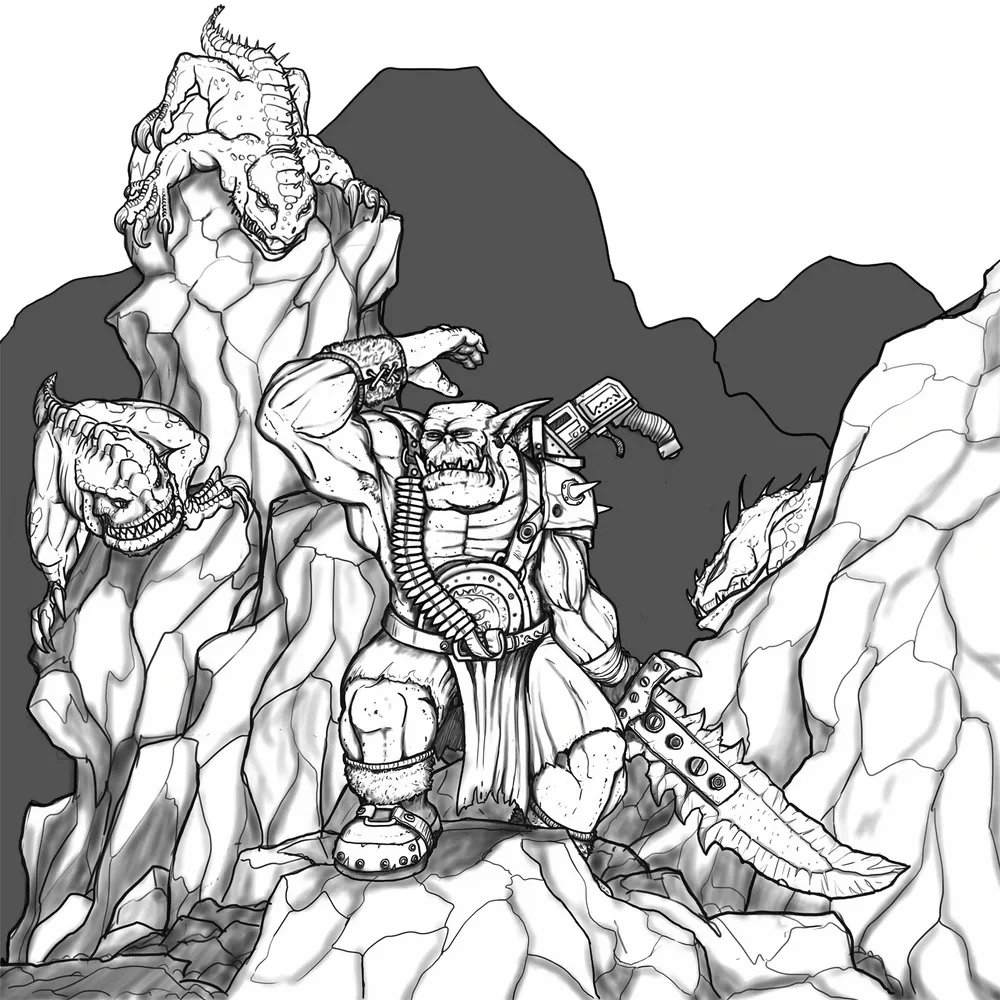
Jabbed!: For each 6" moved by a player (Warrior or Vehicle), roll a D6. On the result of a 1, some Jabberz have thrust upwards into the Warrior or Vehicle. A Warrior caught like this may make attempt to jump back by passing an Initiative test; if successful they will engage in Close Combat with the Jabber. Should the Warrior fail they will suffer a single S4 hit. Vehicles may not dodge and will instead suffer a S4 hit. Once this has been resolved the Jabber becomes part of normal gameplay.
Skratchers
Mob Rating: 4 + D3
Skratchers like many of the Squig family come in a variety of breeds. Like so many squigs, they're not always squig-like; some are like your regular run of the mill Cave Squigs, others are blind with huge rending claws, and some more like hissing Growler Squigs! Some have even been known to swallow entire bikes before! But most of the ones on Angelis tend to be more like something between mutant rats and vicious lizards.
| M |
WS |
BS |
S |
T |
W |
I |
A |
Ld |
|
|---|---|---|---|---|---|---|---|---|---|
| Skratcherz |
D6 |
3 |
0 |
3 |
3 |
1 |
4 |
1 |
7 |
Equipment: Skratchers fight with teeth, claws and tails (they hit at User Strength).
Movement: Skratchers move in randomly determined directions at D6" per turn. This move is done before each player’s turn. If a Skratcher comes within 2" of a Warrior (not another Skratcher) it will enter Close Combat.
Squigs of a feather attack together: When something threatens a Skratcher it's seen as attack on all of them. Once a Skratcher is in Close Combat the rest will start moving towards it. If there's multiple simultaneous combats then they will move towards either the nearest or the one that needs the most help, use your best judgement.
Steel Gulpa
Mob Rating: 75
The Steel Gulpa is as troublesome as it is ferocious. While many wild things are mutations and evolutions of the squig as we know it the Steel Gulpa is much simpler. It's a squig that eats metal and likes the taste. As squigs are quite adaptable, it's no surprise that the Steel Gulpa is the animal it is now; a monstrous beast towering between two and three times the size of an Ork; its gaping maw with teeth as sharp, as long, and as deadly as choppas; and dripping with corrosive drool as its tongue whips out to lick scrap metal into oblivion.
| M |
WS |
BS |
S |
T |
W |
I |
A |
Ld |
|
|---|---|---|---|---|---|---|---|---|---|
| Steel Gulpa |
7 |
5 |
0 |
5 |
5 |
2 |
4 |
3 |
9 |
Equipment: The Steel Gulpa is armed with a whip-like tongue, corrosive juices, metal chomping teeth, and a few claws to match (all hitting at User Strength). Its thick hide confers a 5+ save.
Movement: The Steel Gulpa will move towards the nearest Warrior with equipment, Vehicle, or piece of scrap (you can choose more things that it's attracted to if you wish!). Steel Gulpas amble along looking for something to munch and so do not run between their courses. If there is nothing with equipment left on the board, then it will start on the Warriors, which will count as Charge move (but their Movement isn't doubled like a normal Charge). This move is done before players' movement phases.
You'z gonna need a bigger trukk..: The Steel Gulpa is so big and metal crazed that it can also ram Vehicles! It counts as a large Vehicle for ramming purposes. If rammed it may attempt to dodge as normal; if struck, it takes a S3 hit like any other Warrior on foot would.
Gulp!: As all Orks fear - it's after their tasty shiny stuff. In Close Combat, if the Steel Gulpa wins, it will attempt to eat weapons, equipment, and scrap. Warriors must pass an Initiative test to hold on what they’ve got. If failed, randomly determine what the Steel Gulpa has swallowed. This equipment cannot be retrieved unless the Steel Gulpa is put Out of Action.
If the Steel Gulpa encounters/rams a Vehicle, then it will also try to take a chomp out of the vehicle. This is treated as attacking a vehicle (A User Strength hit against a location). Randomly determine any scrap, Gubbinz or Fixed Weapon that it will gulp (roll to penetrate armour as normal). If there are none of those (or if it's gulped them already) then randomise amongst the remaining hit locations. Whatever is penetrated will have its armour reduced by 1 point for the duration of the game (this is not cumulative, and will be repaired after the game at no extra cost).
Scrap is treated in a similar way. If a Warrior is holding scrap, it is treated as part of their equipment. If a Vehicle is carrying scrap then it will attempt to munch on that, as explained above. If scrap is left unattended then the Steel Gulpa will have to spend a turn to gobble it up… unless something gets in its way.
Hatred: Any Warrior that has their equipment gulped will Hate the Steel Gulpa from then on.
Fear: The Steel Gulpa is much larger and more ferocious than other squigs. It causes Fear.
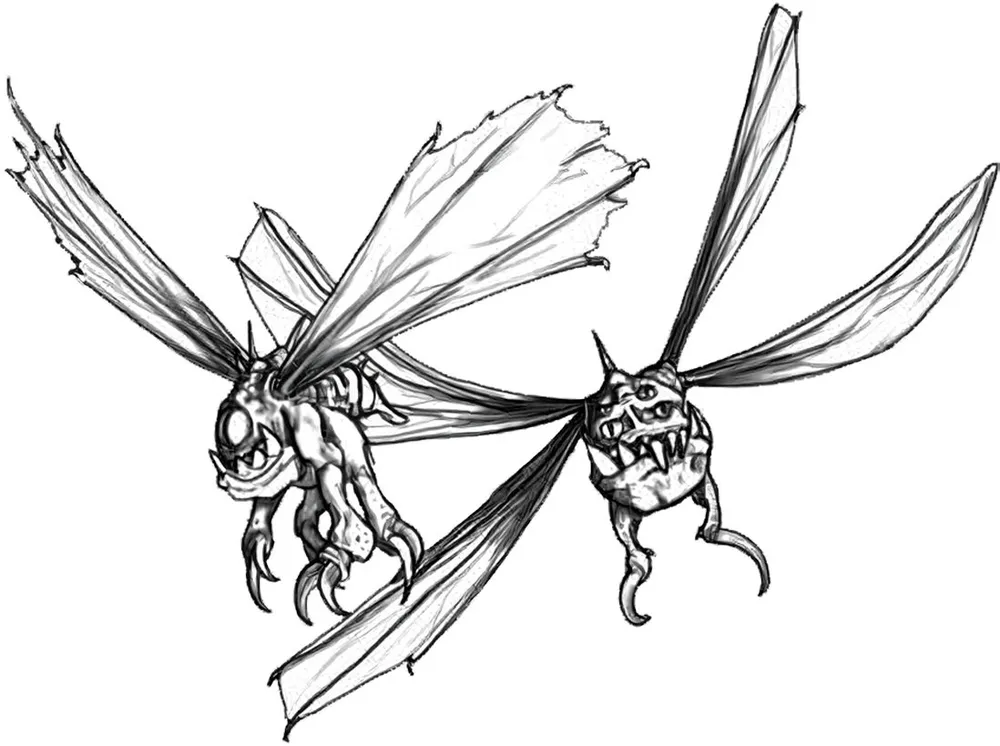
Buzzin' Bugs
Mob Rating: 6
Closely related to Buzzer Squigs, Buzzin' Bugs are the bigger members of their family. They live in large hives and dislike the sentient folk who have a tendency to smoosh them. They fly all over Angelis looking for things to bring back to the hive… including Orks. Occasionally they will get caught in crossfire between mobs and descend upon their foes.
| M |
WS |
BS |
S |
T |
W |
I |
A |
Ld |
|
|---|---|---|---|---|---|---|---|---|---|
| Buzzin’ Bugs |
4 |
2 |
0 |
2 |
2 |
1 |
2 |
1 |
10 |
Frenzy: Buzzin' Bugs are always treated as being Frenzied. If there are no targets for them to Charge they just buzz idly in the same area.
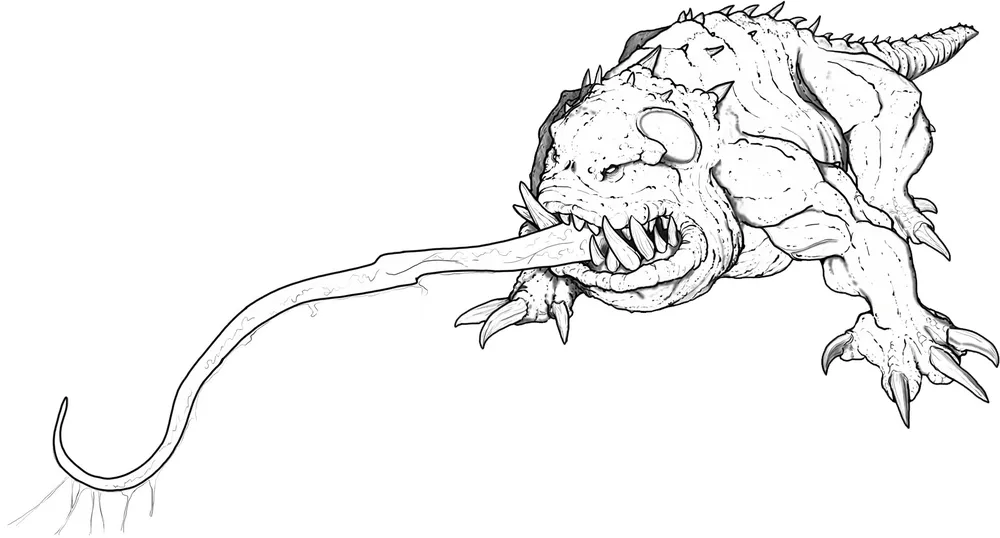
Buzz: As Buzzin' Bugs always seem to be buzzing around over heads and rooftops (hence the name), it is almost impossible to swat them effectively. This is represented in terms of gameplay in that for every Buzzin' Bug in a single Close Combat the opponent receives -1 to their WS, but to represent Warriors ganging up on the bugs, Warriors trying to swat them receive +1 WS for every additional Warrior in the combat. In addition to this, Buzzin' Bugs are always at -1 to hit when being shot at as they move so quickly, ignore all terrain features and do not need to take any tests for movement purposes (such as Initiative tests to board a Vehicle, or to move out of the way to avoid being Squashed).
Call of the Hive: Buzzin' Bugs all contribute to what's best for the hive, so will always help each other out. This means that whenever you find one, there will soon be more to follow. At the start of every turn after the first Buzzin' Bug enters Close Combat (regardless of the result), roll a D6, on the roll of 1 or 2 more Buzzin' Bugs have arrived! Place D3 Buzzin' Bugs within 6" of a randomly determined Buzzin' Bug. This is cumulative, so the game could have Buzzin' Bugs arrive every turn!
Appendix
Experience Points
Each scenario has rules for experience points gained. Occasionally a scenario will have rules for losing experience points. These only apply to points gained during the scenario - it’s not possible for a Warrior to finish a scenario with less experience points than they started with!
Wounding Hits
Most scenarios include the experience rule “+5 Wounding Hit”. You might not expect this but it turns out that this rule is probably the biggest source of conflict in the whole ruleset!
The issue is that it can be interpreted a number of ways and we’ve found that everyone we ask has their own take on what it “obviously” means. The GCE Core Rules describe the difference between Sequential and Batch rolling and after considerable debate we’ve decided to include a couple of other popular options here.
The approach your group takes is a matter of personal preference as they all have their pros and cons. We’re going to explain our methods here and hopefully give you enough information to choose an approach that suits your group.
Sequential Rolling
+5 (Sequential) Wounding Hit
A Warrior earns 5 Experience Points for each successful Wound on an enemy Warrior that goes unsaved and is awarded before rolling for Injury. Each Wound, Save and Injury is rolled for (and resolved) separately, one at a time. So long as the opponent does not go Out of Action the process repeats. This approach is more methodical and will be familiar to Fantasy Football coaches. Earning Experience Points this way is much slower and you benefit more from NOT putting your opponent Out of Action too quickly.
For example:
Grodkicka, an Ork Nob, wins a round of Hand-to-Hand against Nikkit, a Grot. Grodkicka lands 5 Hits (which has the potential to become 5 Wounds). The first Wound roll is successful. Nikket has no armour and suffers 1 Damage. Grodkicka gets 5 Experience Points. This reduces Nikkit’s Wounds characteristic to 0, triggering an Injury roll. The result is 2, a Flesh Wound. The second Wound is also successful, Nikket suffers another Damage and Grodkicka gets another 5 Experience Points. Although Nikket had recovered with a Flesh Wound, he is reduced to 0 Wounds again triggering another Injury roll. The result this time is a 4, Nikket goes Down, fortunately he is not alone and Combat continues. The third Wound is also successful, Nikket suffers 1 Damage and Grodkicka gets 5 Experience Points. Nikket is still on 0 Wounds and another injury roll is required. This time the result is a 1, another Flesh Wound. However, this reduces Nikket’s WS and BS to zero and he goes Out of Action. Now that Nikket has been removed from play, the last two Hits are not resolved. Grodkicka earned a total of 15 XP but it had the potential to be as much as 25!
+5 (Sequential) Penetrating Hit
Similar to above, a Warrior earns 5 Experience Points for each Hit that successfully Penetrates an enemy Vehicle's Armour and is awarded after a failed Save (e.g. Armour Plates gubbinz) but before rolling for Vehicle Damage. The process repeats as long as the Vehicle does not become Wrecked.
Batch Rolling
+5 (Batch) Wounding Hit
A Warrior earns 5 Experience Points for each unsaved Wound inflicted on an enemy Warrior. As batch rolling obscures the order of events, Experience Points are awarded regardless of the result of the Injury rolls, even if the Warrior would go Out Of Action multiple times.
For example:
Badshag the gunner fires his ‘Eavy Shoota. He lands 6 Hits on Grodkicka, an Ork Nob (who has 2 Wounds on his profile), his armour fails to protect him and the ‘Eavy Shoota easily Wounds Grodkicka six times. Each Wound causes 1 Damage. This takes Grodkicka down to 0 Wounds and causes five Injury rolls! Regardless of the outcome of these Injury rolls, Badshag gets 30 Experience Points (6 x 5). 5 for the first Wound removed from Grodkicka’s profile and 25 for the five Injuries. What an excellent shot… dat’z a lot of experience!
+5 (Batch) Penetrating Hits
Similar to above, a Warrior earns 5 Experience Points for each Hit that manages to Penetrate an enemy Vehicle's Armour after a failed Save (e.g. Armour Plates gubbinz). Experience Points are awarded regardless of the number or result of Vehicle Damage, even if the Vehicle becomes Wrecked multiple times.
Bounties
+5 Wounding Target & Bounty
A Warrior earns just 5 Experience Points for each Wound they remove from an enemy Warrior’s profile (down to zero). Note that this is regardless of the number of Hits or Damage inflicted. However, once a Warrior goes Out of Action you score a Bounty equal to that Warrior’s total Cost or their Experience divided by 10, (whichever is higher). Wounding or taking a Warrior, who was already Down, Out of Action does not count.
Note: Warriors without Experience or Cost values, such as Special Characters should use the value that is added to the Mob Rating instead. Warriors without a value should use the opponents Mob Rating instead divided by 10.
For example:
Skullstompa, an Ork Nob charges Oi, an unarmed, sniveling Snot. Combat is a breeze. Not only does Oi fumble his only Attack, Skullstompa rolls well. He lands 7 Strikes on Oi, they all Wound easily. Oi has no Armour (obviously) and suffers 7 Injuries. Oi didn’t stand a chance and goes Out Of Action. Skullstoma is awarded 6 Experience Points. That’s right, only 6!
+5 for the Wound and +1 for Oi’s cost. Had the tables been turned and Oi had been more lucky, landing a killing blow on Skullstompa, Oi could have looked forward to a much higher Bounty!
+5 Penetrating Target & Bounty
A Warrior earns just 5 Experience Points for Penetrating an enemy Vehicle’s Armour. Note this is regardless of the number of Hits or Damage inflicted. However, once a Vehicle becomes Wrecked you score a Bounty equal to that Vehicle’s total Cost.
Note: Vehicles without a Cost value should use the opponents Mob Rating instead divided by 10.
Pros & Cons
These are currently the ways of handling Experience Points for Wounding Hits but you may well want to come up with your own way of doing things for your campaign. That’s okay too! As long as the method used is consistent between all players in the campaign no one should have an unfair advantage.
| Pros |
Cons |
|
|---|---|---|
| Sequential |
Methodical. Ordered. |
Slower paced games. Slower progression. |
| Batch |
Fast XP progression. Chaotic! |
XP scaled to the number of successful Hits. Weaker opponents risk being farmed. |
| Bounties |
Fluffier. Experience Points scaled to the Target’s value. |
Only rewards Out Of Action or Wrecked. Fairly complex and edge cases require a bit more work. |
Licence details and Credits
This document was written by Morgan Fox, Michael Haslam, Matthew Bester, Ross “Depiff” Graham, Ben Saunders, Andrew Meijers, Andrew Little, Tom Inglis, Ben Middleton, and Chris Noto.
It is licenced under Creative Commons Attribution-NonCommercial-ShareAlike 4.0 International
https://creativecommons.org/licenses/by-nc-sa/4.0/
Unsure what any of that means?
Visit https://gorkamorka.co.uk/creative-commons for an explanation.
Cover art by David Prentice (also licenced under Creative Commons Attribution-NonCommercial-ShareAlike 4.0 International).
Additional art and images provided by:
Andrew Meijers (Creative Commons Attribution-NonCommercial-ShareAlike 4.0 Unported license)
Andrew Trevorrow-Seymour (Creative Commons Attribution-NonCommercial-ShareAlike 4.0 Unported license)
Clayton Tait (Creative Commons Attribution-NonCommercial-ShareAlike 3.0 Unported license)
Darren Sampson (Creative Commons Attribution-ShareAlike 3.0 Unported license) David Cammack (Creative Commons Attribution-NonCommercial-ShareAlike 4.0 Unported license)
David Prentice (Creative Commons Attribution-NonCommercial-ShareAlike 4.0 Unported license)
Fabio Veronelli (Creative Commons Attribution-NonCommercial-ShareAlike 4.0 Unported license)
Lars Strøbæk (Creative Commons Attribution-NonCommercial-ShareAlike 4.0 Unported license)
Louis DePrix (Creative Commons Attribution-NonCommercial-ShareAlike 4.0 Unported license)
Matthew Bester (Creative Commons Attribution-NonCommercial-ShareAlike 4.0 Unported license)
Morgan Fox (Creative Commons Attribution-NonCommercial-ShareAlike 4.0 Unported license)
Nicola Juno (Creative Commons Attribution-NonCommercial-ShareAlike 4.0 Unported license)
Steve Byrne (Creative Commons Attribution-NonCommercial-ShareAlike 4.0 Unported license)
The layout was made by Morgan Fox using images created by Jenny Fox and is also licensed under a Creative Commons Attribution-NonCommercial-ShareAlike 3.0 Unported license.
GCE is in no way affiliated with Games Workshop.
Furthermore, Gorkamorka is a trade mark of Games Workshop Ltd. and is used without permission. No challenge to its status is intended.