Version 1.11 – November 2025
- Removed duplicated Advance Table for clarity and a few other minor fixes from user feedback
Version 1.1 – October 2025
- Worked on standardising on “small vehicle” instead of “bike”
- Corrected ‘Eavy Shoota ammo roll to 4+
- Unified wording with Shaman across this pack and Gorker/Morker Faction Pack.
- Glossary capitalisation overhaul
Version 1.0 - July 2024
- base faction pack released
Changes from Gorkamorka Rulebooks rules
- Big vehicles split into transport and support (rather than trukk/trak)
- Shaman skills tweaked
- Codified mob member removal
- Tweaks to Dok’z Serjery
- Vehicle and weapon upgrades now add +5 teef to their value, rather than the original D6 cost
- Skorcha kustomisin’ rules refined
- Kannons can now be kustomised
- ‘Uge Choppas/Clubs use highest arm Strength value
- ‘Eavy Shoota now has a -2 to hit modifier at long range
Introduction
This is the Digga faction pack for humans. It’s designed to work in conjunction with the other GCE rulebooks so you’ll want to grab copies of those too. You will need the GCE Campaign Book for some elements of these rules.
Of Orks and Men
Countless worlds have been settled across the galaxy but only a small number of them are still settled today, or at least what we might think of as civilised. There are many planets that have humans but don’t necessarily have human civilisation - refugees, shipwrecks, catastrophic wars, or even simple colony collapse.
These pockets of humanity tend to inhabit a strange middle ground between the culture they came from and the more feral reality of their current existence. Scattered memories from the distant past blend with superstition to create a society that to an outside observer appears disconcertingly off.
Diggas
The Diggas of Angelis are the eponymous example of these societies. Their forebears were imperial researchers investigating a planet whose orbit and ecosystem (or lack thereof) raised questions. There were clear signs that there had been life at some point (pyramids are not generally naturally occurring) but the vast catacombs beneath yielded only further questions. Years of work went into the research and progress was indeed made on finding the source of the alien energy readings. Unfortunately for them the Ork hulk that appeared and impacted the planet did so with the force of a cataclysmic nuclear exchange, sealing the expedition beneath the surface, never to be heard from by the Imperium again.
Whilst it may have been the end of the story as far as the rest of humanity was concerned it was certainly not the end for the expedition. Generations of intertribal war followed as the limited resources they had were fought over in the gloom of the underground. Little knowledge of their history survived, save that they had not always lived beneath the surface.
Eventually one tribe, the Wreckers, determined that they were not truly alone in the tunnels. The catacombs were almost like a necropolis, although rather than being dead the strange denizens were merely dormant. In time it became clear that the Wreckers had brokered some sort of agreement with the creatures and with help from their new allies they quickly became the dominant tribe.
With peace, or at least subjugation, finally achieved, the Wreckers set their sights on the world above. Whilst tonnes of rock and sand were moved it was never enough and in quiet moments they began to despair. It was at this point they encountered the Orks for the first time, their arrival heralded by tremendous explosions.
An outside observer would have seen the Orks using excavators and blasting to dig into the plateau that was home to the pyramids. From the perspective of the humans beneath it was more akin to being besieged by furious metal beasts, clawing at the edge of their world.
As shafts of light began to pour in it became clear what was happening and the humans redoubled their efforts to be free. The first Ork who peered into the darkness saw them scrabbling in the dirt and labelled them with a dismissive grunt - “Diggas”.
The humans’ notion that the Orks were there to free them was quickly dispelled as it became clear that it was the catacombs that were the goal. If anything the Orks thought of them as something between vermin and curious innocents - tolerated as long as they didn’t interfere. They wandered the vast Ork encampment unhindered, taking in the sights, sounds, and smells of the “Upside”. Huge mechanical contraptions, gunfire and music, and meat being cooked all astounded them. The mightiest of the Wreckers found themselves humbled by not only the scale but the perspective provided. What had seemed like vast wealth in their lives in the Downside now felt like pitiful trinkets in the face of the might of the Ork “Kultur”.
This wasn’t to last and the Orks soon began to round up the “Diggas”, demanding they guide them to the treasures they thought were lurking beneath the dunes. Valuable artefacts did indeed exist but the humans had little understanding of what was of interest to the Orks, particularly as to them the Orks already had better things than they had ever known.
It was at this point the Wreckers awakened their subterranean allies and in a single night the Orks were turned back. The unarmed Diggas might not have been much of a match for the greenskins but the creatures from the Downside had no trouble slaughtering any that didn’t flee before disappearing back beneath the sand.
Despite the Orks’ greed the Diggas were still in awe of them. Their aspirations became to be similarly grandiose, wielding powerful weapons aboard huge vehicles in the deserts of the Upside.
In time they were able to learn what these treasures looked like - many of them hiding in plain sight. A staff of office was found to be an ancient rifle, for example, and it was this fresh perspective that laid the foundations for what would eventually be. Artefacts from the Downside were gathered and whilst initially mistrustful the Ork Meks were fascinated by the alien technology and were happy to trade for a continued supply of the things.
With the Diggas supplying them the Orks did not return to the plateau of the pyramids. Whilst some argued that it was easier to let the human “runts” do the work the threat posed by the creatures from below was always an unspoken factor in the truce.
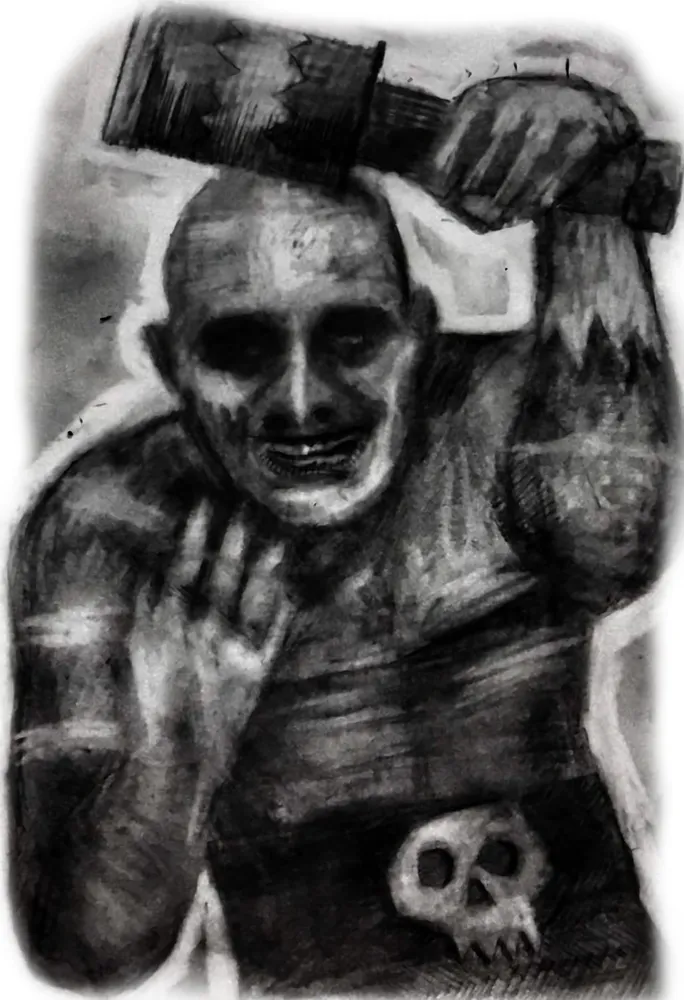
This description would of course not be complete without mentioning the particular quirk of the Diggas. Whilst many humans might want the technology of the Orks the Diggas are unusual in that they want to be Orks. Clothing, tattoos, body paint, and so on are all employed to make them appear as Ork-like as possible. This also extends to the tribal raiding parties they form, which utilise Ork nomenclature - being led by a Digganob, composed of Digga Boyz and Digga Yoofs, and referred to as a “Diggamob”. These Diggamobs try to earn their place in Mektown, seeking out scrap like their Ork equivalents, and are generally tolerated based on the understanding that imitation is the sincerest form of flattery.
Other Worlds
The Diggas are just one example, their equivalents can be found on other worlds. They might not share the fixation on Ork culture but in most other respects they’ll be rather similar. Many of them have the concept of dying gloriously in battle as part of their beliefs, while others don’t follow a particular tradition and are more incoherently insane. They fight, trade, and generally try to survive, although not necessarily on an individual level.
Whatever world your campaign is set on we’re sure you can tell some good stories featuring a faction analogous to the Diggas!
Creating a Mob
When recruiting your mob there are a number of Warrior types available with limitations on the structure of your mob. First the requirements:
- Your mob requires 1 Digganob - your leader.
- You must have at least 3 Warriors, including your Digganob.
- You need enough Vehicles to transport your mob.
There are then some options:
-
You may include as many Digga-Boyz as you wish.
-
Up to half of your mob may be Digga-Yoofs. The Digga-Yoofs may not outnumber the other Warriors in your mob.
-
You may include one Shaman if you wish
Each vehicle must also have an assigned Driver and Gunner (where applicable). These assignments are permanent. In order to change the assignment either the incumbent and challenger must engage in a Bar Brawl (detailed later in these rules) or the incumbent must be unavailable (e.g. due to an Old Battle Wound or being Captured) in which case the new permanent assignment happens without conflict.
Statlines and Costs
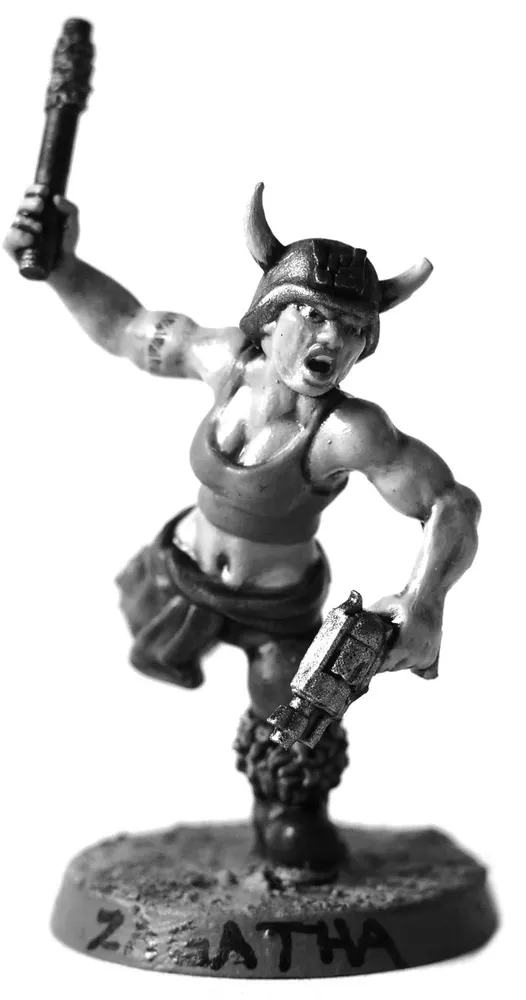
Digganob - 12 teef
Running a mob is a tough job but a Digganob has what it takes. Their desire to be Orky is exceptionally strong and their willingness to throw their weight around is pretty much a defining quality.
| M |
WS |
BS |
S |
T |
W |
I |
A |
Ld |
|---|---|---|---|---|---|---|---|---|
| 4 |
4 |
4 |
3 |
3 |
1 |
4 |
1 |
7 (8) |
Leadership: Whilst they’re nominally in charge of the mob they don’t properly receive Digganob status until they have either won a battle or survived two battles. Once that happens, they will automatically gain 1 point of Leadership (but may never exceed the stat cap of 9).
Pinning: Digganobz are subject to Pinning.
Equipment: Hand-to-Hand, Gunz, Stikkbombz, and Armour
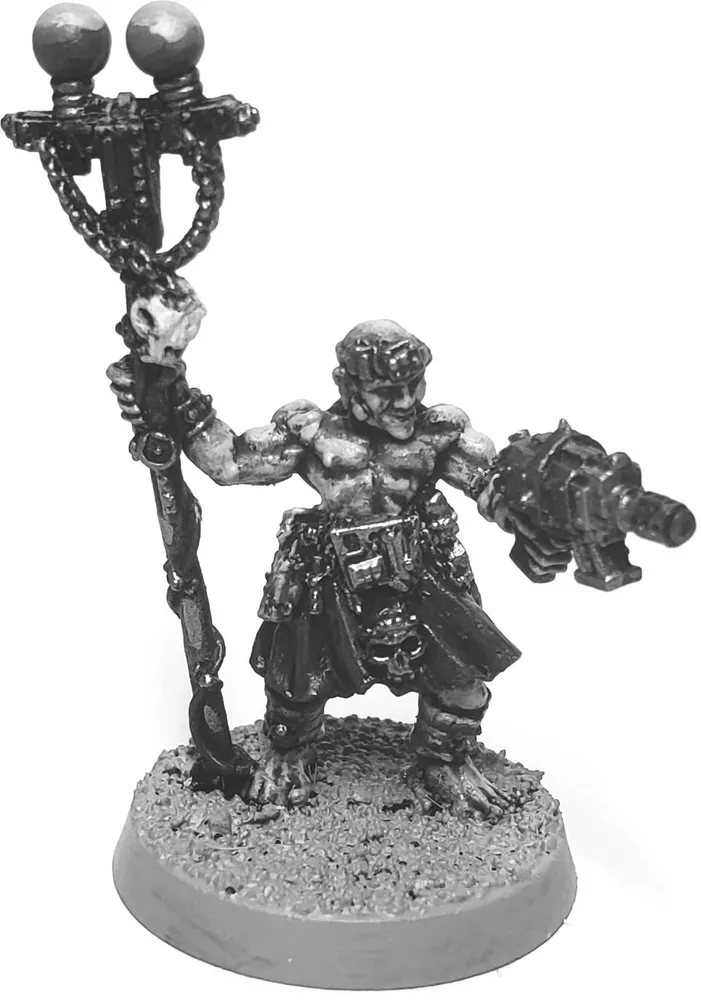
Shaman - 8 teef
A rattling and clanking of assorted trinkets accompanies the Shaman wherever they wander, scrutinising scrap for value only they see. Are they crazy or do they have ascendant knowledge? Who knows!
| M |
WS |
BS |
S |
T |
W |
I |
A |
Ld |
|---|---|---|---|---|---|---|---|---|
| 4 |
3 |
3 |
3 |
3 |
1 |
3 |
1 |
7 |
Ceremony of Searching: Shamans can provide additional income for the mob as detailed in the Income section below.
Findin’ Rod: Shamans join the mob carrying a Findin’ Rod. It may not be sold and if lost for some reason the Shaman will create a replacement before the next game.
Mind Powers: Shamans have access to the Shaman Abilities table.
Ancient Tek: The Pyramids are rich with ancient artefacts. Shamans have the unique ability to find and unearth this ancient tek. Such Archeotek is coveted by Diggas.
Pinning: Shamans are subject to Pinning.
Equipment: Hand-to-Hand, Gunz, Stikkbombz, and Armour
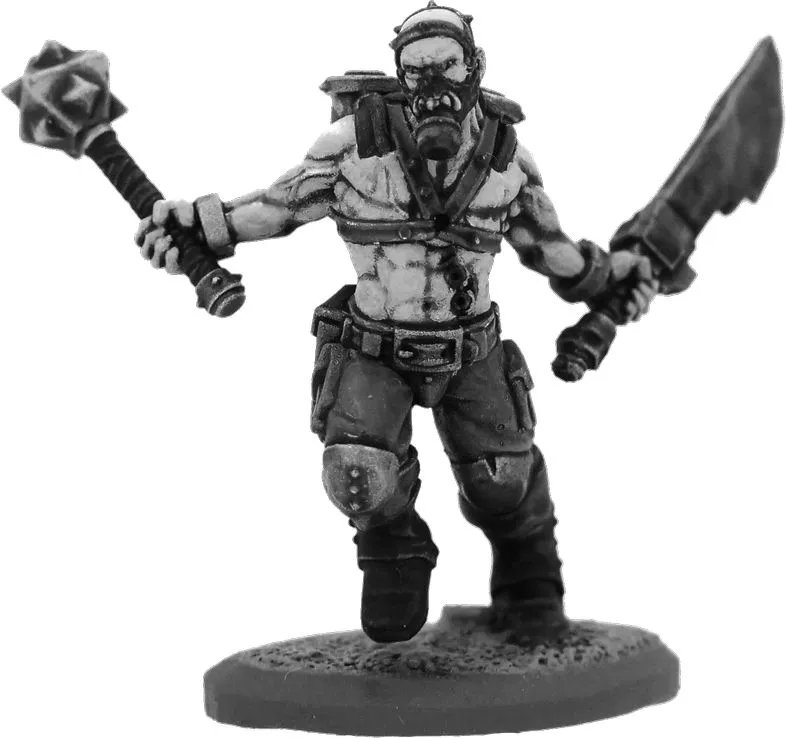
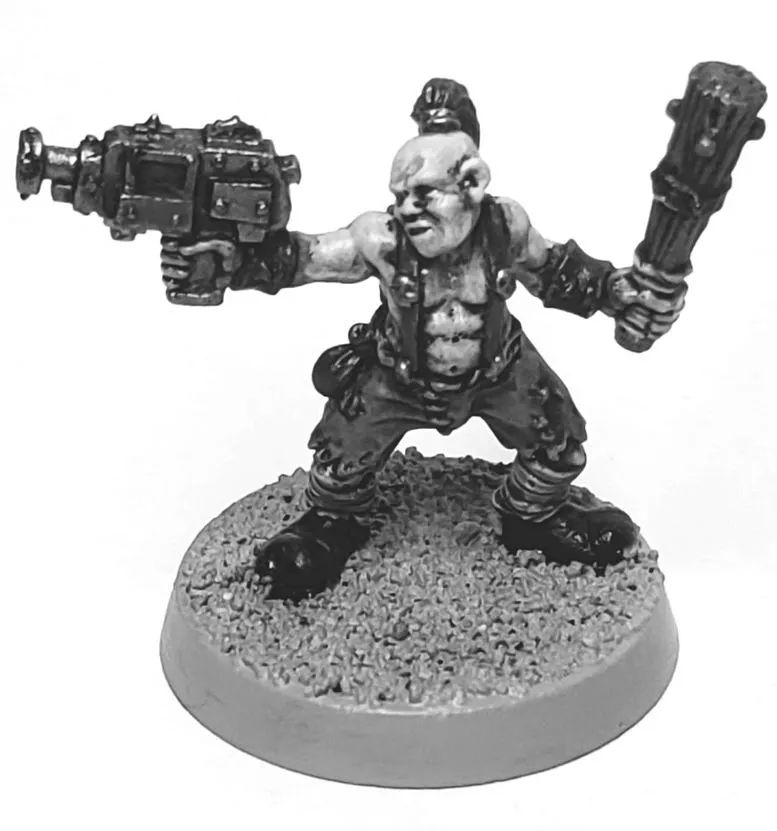
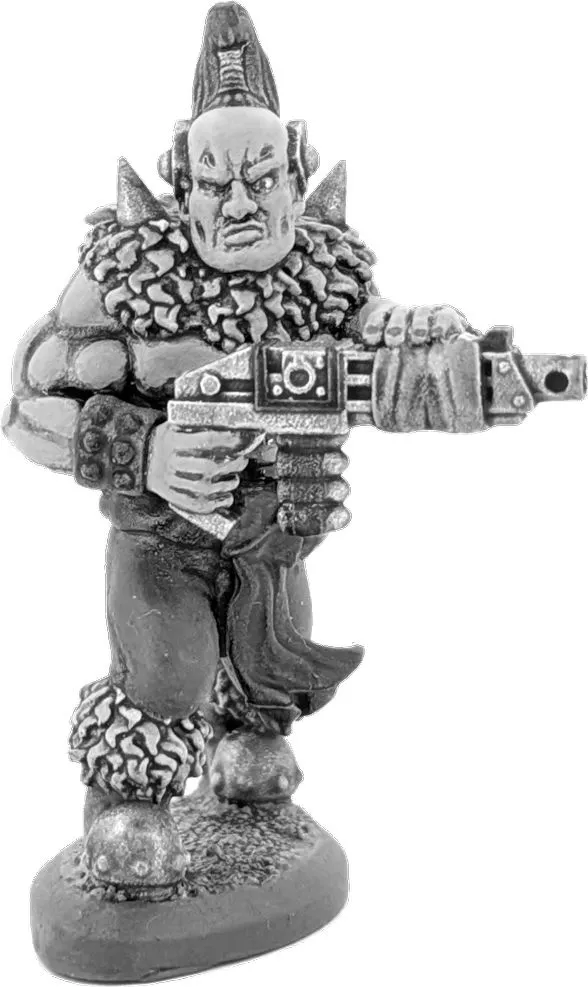
Digga-Boyz - 4 teef
Humans who have enough experience of surviving in the wastes to be fairly decent fighters. Nowhere near as tough as a proper Ork Boy, of course!
| M |
WS |
BS |
S |
T |
W |
I |
A |
Ld |
|---|---|---|---|---|---|---|---|---|
| 4 |
3 |
3 |
3 |
3 |
1 |
3 |
1 |
7 |
Pinning: Digga-Boyz are subject to Pinning.
Equipment: Hand-to-Hand, Gunz, Stikkbombz, and Armour
Digga-Yoofs - 2 teef
Wide-eyed human youths with a thirst for adventure and absolutely no idea what they’re signing up for!
| M |
WS |
BS |
S |
T |
W |
I |
A |
Ld |
|---|---|---|---|---|---|---|---|---|
| 4 |
2 |
2 |
3 |
3 |
1 |
2 |
1 |
7 |
Experience: When Digga-Yoofs reach 21 experience points they become Digga-Boyz. Their cost does not need to be updated when this happens. From then on their access to weapons, skills, and so on are those of a Digga-Boy.
Pinning: Digga-Yoofs are subject to Pinning.
Equipment: Hand-to-Hand and Gunz
Equipment Lists
Each Warrior type has their equipment restrictions listed above. In addition to those restrictions that the following limits apply:
- No more than 2 Gunz-class weapons per Warrior
- Unlimited Hand-to-Hand weapons
- Unlimited Stikkbombz
- Unless a player declares otherwise the Warrior is assumed to be using whatever their model carries. For example if you wish them to fight in Hand-to-Hand combat with the Choppa they have on their back but they’re modelled holding a Chain then you must declare that they’re switching weapons before Hand-to-Hand combat begins.
The full rules for weapons and equipment listed below can be found in the armoury appendix of this document.
Hand-to-Hand
- Knives or Knuckles - free
- Chain or Flail - 1 toof
- Club or Choppa - 1 toof
- Spear - 1 toof
- Slugga - 2 teef
- Six-Shoota - 2 teef
- ‘Uge Club or ‘Uge Choppa - 2 teef
Gunz (Two Gun Maximum)
- Blunderbuss - 1 toof
- Bow - 1 toof
- Crossbow - 1 toof
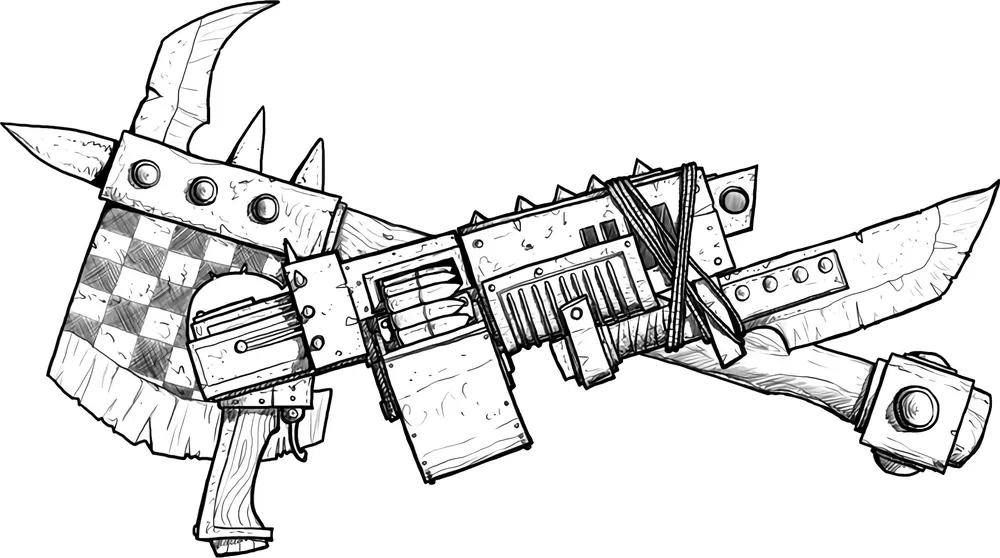
- Shoota - 2 teef
- Kannon - 3 teef
Stikkbombz
These prices are for a supply of the grenade type - not an individual grenade. The Warrior may run out of grenades during a game but will have replenished their loadout by the next game.
- Frag - 3 teef
- Krak - 5 teef
Armour
- Shield - 1 toof
- Studded armour - 1 toof
- Flak armour - 2 teef
- ‘Eavy armour - 7 teef
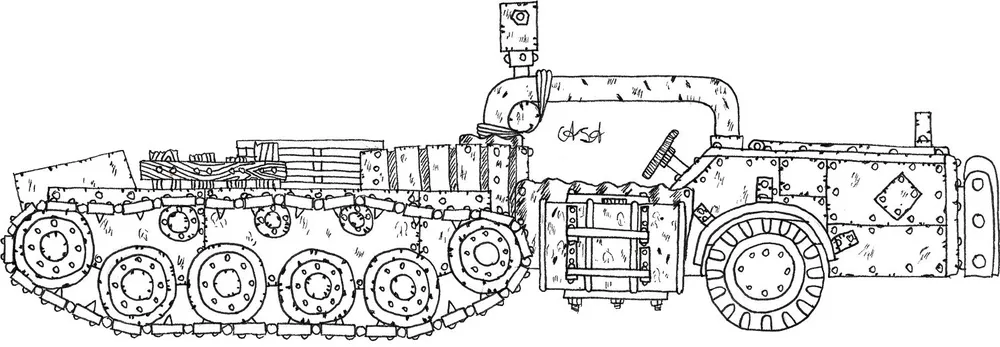
Vehicles
Diggas have various vehicles available to them, following the same rough designs of their larger, Orkish cousins.
| Cost |
Armament |
Vehicle Size |
Notes |
|
|---|---|---|---|---|
| Transport |
20 teef |
1 Big Gun |
Big |
|
| Support |
15 teef |
1 Big Gun |
Big |
Armour Value 0 for Crew |
| Small (Bikes) |
10 teef |
1 Linked Gun |
Small |
Armour Value 0 for Crew, one Auto-Thrust |
Transports have armour for the crew - the other vehicle types do not. Crew capacities are based on how many warriors will physically fit on your model so it’s entirely at players’ discretion. A single massive vehicle might sound like a good idea but you’ll quickly become intimately familiar with the expression “all your eggs in one basket”!
If the traditional WYSIWYG approach to vehicle capacities doesn’t sit well with you see the appendix - there’s some specific numbers you can use based on common sizing.
As with Support Vehicles, Small Vehicles have no armour for their crew. They are faster than their bigger brethren though:
One Free Thrust
Each time a Small Vehicle is eligible to Thrust it does not have to roll on the Thrust Table for the first attempted Thrust - it automatically passes. Subsequent Thrusts must be rolled for as usual, starting from 2+. This is shown on the Small Vehicle Datacard.
Traks or Wheels
When adding a vehicle to your mob, decide whether it has traks or wheels. This cannot be changed later. All Digga vehicles can have traks or wheels. In modelling terms a trakked vehicle does not have to exclusively have traks, e.g. a half-track style vehicle would still be considered to be trak. A wheeled vehicle should only have wheels though!
Wheeled vehicles have a thrust value of 6”, tracked vehicles only have 5”. Vehicles can usually thrust multiple times each turn so this can make a significant difference!
The trade-off here is that whilst wheels are faster, they are not as good on Difficult Terrain, as you might have seen in the Core Rules. A trakked vehicle moves through Difficult Terrain at normal speed, wheels are limited to Slow Speed Manoeuvres in Difficult Terrain.
For example, a Digga Transport with wheels would fill out its datacard like this:
| Digga Wheeled Transport |
|
|---|---|
| Terrain Type |
Movement |
| Open |
Normal |
| Difficult Ground |
Slow Speed Manoeuvres only |
| Very Difficult Ground |
Immobilised |
Whereas one with traks moves through Difficult Ground as if it were Normal:
| Digga Trakked Transport |
|
|---|---|
| Terrain Type |
Movement |
| Open |
Normal |
| Difficult Ground |
Normal |
| Very Difficult Ground |
Immobilised |
When you’re filling in your mob roster you’ll need to add the relevant terrain handling characteristics to the vehicle's datacard.
Fixed Weapons
The vehicle table above lists the different types of Vehicles and their options for armaments. These are optional - you aren’t required to buy or field a Fixed Weapon for your Vehicles. You can also choose to buy one later, when you have the spare cash.
Fixed Weapons are either two Gunz linked together (see the Armoury Appendix for details), or an item from the Big Gunz list below. A Vehicle that can fit a Big Gun can instead fit a Linked Gun, if you so choose (lots of mobs start out with a Linked Gun on their big vehicle and then later upgrade to a propa’ Big Gun).
Fixed Weapons can also be swapped between Vehicles between games, should you so choose (within the restrictions shown in the table).
Big Gunz
- Harpoon gun - 7 teef
- Skorcha - 8 teef
- Spear gun - 9 teef
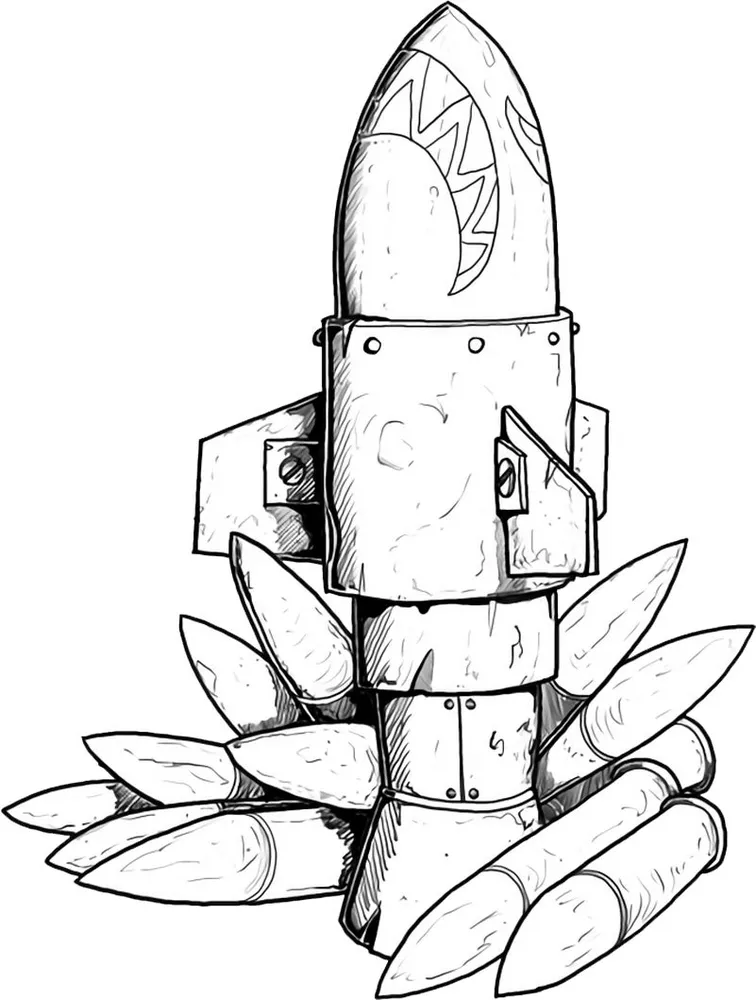
- Rokkit launcher - 13 teef
- ‘Eavy Shoota - 15 teef
Gubbinz
Digga vehicles can be fitted with a variety of Gubbinz but unlike Orks, Diggas don’t have the technical skills needed. Instead the Vehicle will have to be taken to an Ork Mek to fit them, just like a Kustom Job. See the relevant section later in this document.
- Boarding plank - 3 teef
- Extra armour plates - 4 teef each
- Big grabber - 5 teef
- Reinforced ram - 5 teef
- Spikes - 5 teef
- Extra spikes - 10 teef
- Wrecker ball - 10 teef
- Loadsa ammo - ¼ weapon cost
Special Rules
Vehicles
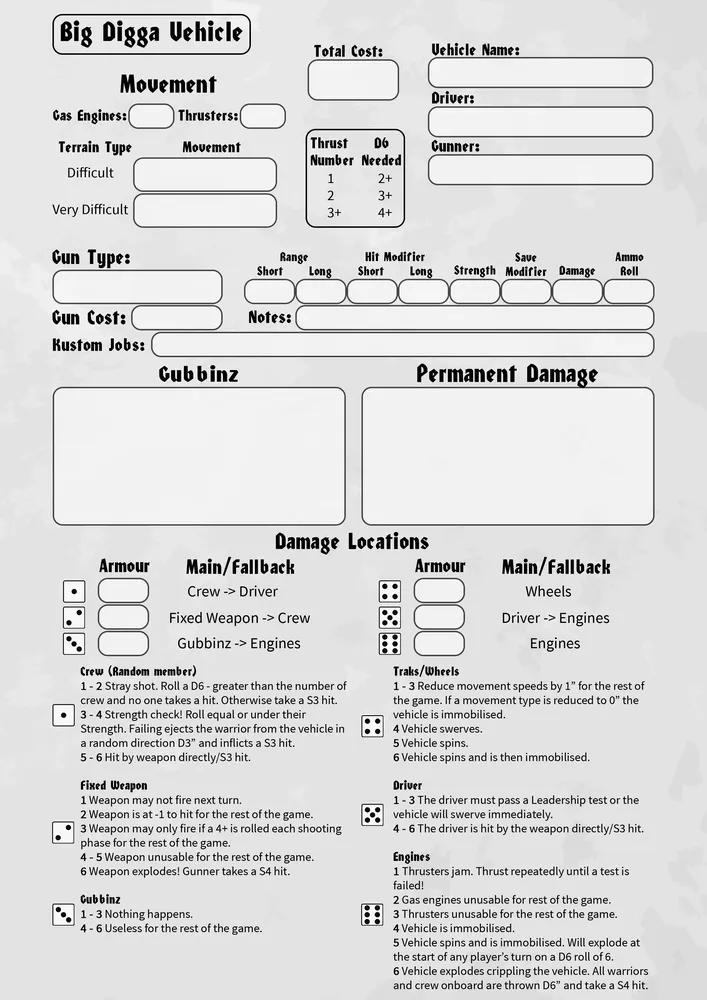
GCE Vehicle Datacards
Diggas have two vehicle datacards to choose from - big and small. The majority of their vehicles are big (Trukks, traks, buggies, and so on) but they also have warbikes which are small. The two card types are slightly different so make sure you use the correct one!
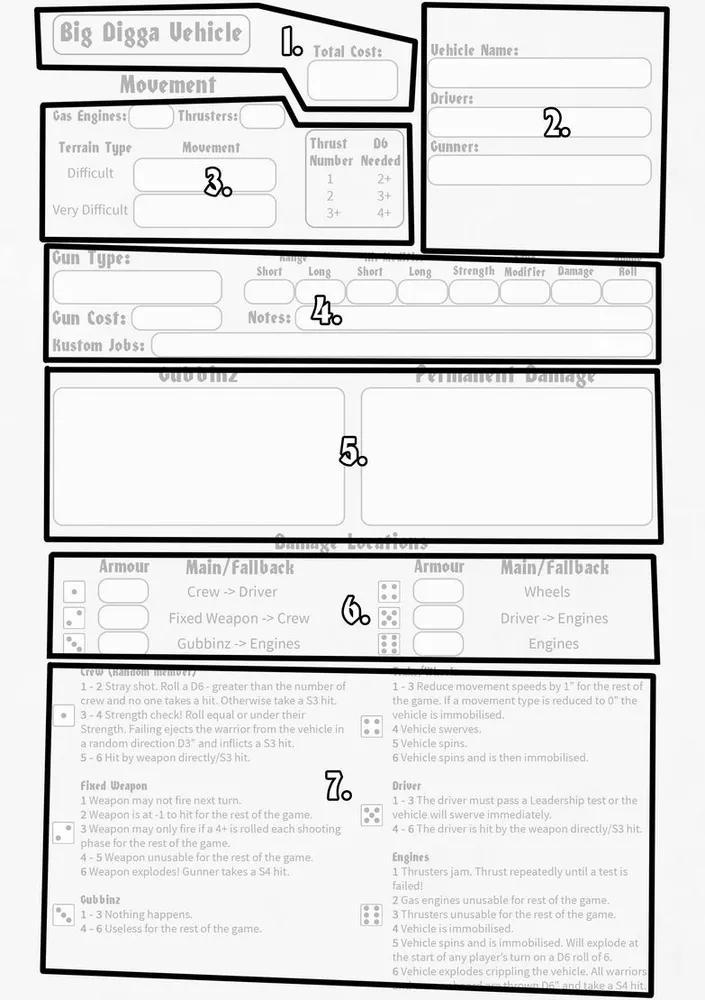
The cards can look a bit daunting to start with but you’ll soon get used to them. They contain all the information specific to your vehicle that you should ever need. We’ll cover filling it in momentarily but first let’s have a quick tour of the Big Digga Vehicle datacard.
Starting from the top we have the role and card type (1). The card type is “Big Digga Vehicle” and there’s also a big box for the total cost of the vehicle.
To the right there’s the vehicle’s role (transport/support, see previous section), name, and crew. To the left there’s the Movement rules (3).
After that there’s the Fixed Weapon profile (4), including any Kustomisations you’ve had done on it.
Beneath that there’s room for details of Gubbinz that have been fitted and Permanent Damage the vehicle has suffered (5).
Below - Damage Locations with blank boxes for Armour Values (6), including details for which location will be affected if the original one isn’t applicable (e.g. if the Driver has been thrown overboard!).
Lastly we have the damage tables (7). When the armour is pierced (e.g. by a successful ram) these are the tables you should roll on.
Filling Out a Vehicle Datacard
To fill one of these in you’ll need to apply the decisions you made earlier. Pick whether you’re dealing with a Small Vehicle (bikes) or a Big Vehicle and grab the relevant card.
For a Big Vehicle, fill in the role (Transport or Support), nominate a Driver and Gunner. For a Small Vehicle there’s no role of Gunner to worry about. You might notice that there is no location in the table for “Gunner” - that’s because Gunners are part of the Crew location. Only Drivers get their own location.
From there pick whether the Vehicle has wheels or traks and fill in the Movement section (see the previous section for relevant movement and terrain values).
Next if your vehicle has a Fixed Weapon fill in its characteristics (see the Armoury appendix of this pack for the details).
Lastly you’ll need the Armour Values - Transports have Crew armour:
| Digga Transport |
|||
|---|---|---|---|
| Armour Value |
Location |
Armour Value |
Location |
| 8 |
Crew |
8 |
Wheels/Traks |
| 8 |
Fixed Weapon |
8 |
Driver |
| 8 |
Gubbinz |
10 |
Engine |
…Support vehicles don’t:
| Digga Support |
|||
|---|---|---|---|
| Armour Value |
Location |
Armour Value |
Location |
| 0 |
Crew |
8 |
Wheels/Traks |
| 8 |
Fixed Weapon |
8 |
Driver |
| 8 |
Gubbinz |
10 |
Engine |
Small vehicles are pretty tough too - but as with Support vehicles, there’s no Crew armour:
| Small Digga Vehicle |
|||
|---|---|---|---|
| Armour Value |
Location |
Armour Value |
Location |
| 0 |
Crew |
8 |
Wheels/Traks |
| 8 |
Fixed Weapon |
8 |
Driver |
| 8 |
Gubbinz |
10 |
Engine |
Their damage tables are slightly different too, as well as them automatically passing their first Thrust each turn, as previously mentioned.
Bikes
We’ve decided to create the Small Digga Vehicle designation to be a bit flexible on what that is - mainly to encourage creativity. The category is primarily designed for Digga Warbikes but there’s plenty of other fun oddities cooked up by the Meks> Bikes
We’ve decided to create the Small Digga Vehicle designation to be a bit flexible on what that is - mainly to encourage creativity. The category is primarily designed for Warbikes but there’s plenty of other fun oddities cooked up by the Meks.
Big vehicle datacards
Small Vehicle datacard

‘Ow do they work?
Diggamobs are not blessed with naturally mechanically inclined individuals, leading to a complete lack of maintenance for their vehicles. Even by Ork standards, they rapidly become unreliable. The only upside to this is that things built by Orks respond surprisingly well to percussive maintenance, vicious tongue-lashings, and active neglect - occasionally resulting in problems simply resolving themselves, often with the added bonus of looking propa’ tuff!
Wear & Tear
After rolling for Vehicle Permanent Damage, roll a D6 for each vehicle in a Diggamob. If you roll a 1, 
the lack of maintenance has led to some deterioration. Roll on the table below to see what has occurred (see the Permanent Vehicle Damage Table in the Campaigns pack for details of each result).
- Armour Weakened
- Bent Chassis
- Steering Jams
- Boneshaker
- Fixed - the damage is entirely cosmetic
- ‘Ard Looking
A Mek will be happy to fix this for you - for a price, of course…
Fixer Upper
The lack of mechanics means that if you roll “Fixer Upper” on the Permanent Vehicle Damage Table, then the vehicle has to be taken to Mektown to be repaired. The Vehicle will miss the next game as normal while a mek fixes it up, but the mek will also charge your mob 2D3 teef for the service.
Gubbinz
As noted above, any Gubbinz must be fitted by a Mek as detailed in the Mektown section.
Diggas as Captives
If a Digga is Captured after a game and put to work in a mine or similar, they generate D3 teef worth of income.
If captured by a Gorker/Morker Ork mob then the captive will be in awe and volunteer to fight alongside the mob (assuming the mob’s player wants them to - it’s optional). If so see the advanced rules section in the Gorker/Morker faction pack for how hiring Diggas works. No fee needs to be paid for the volunteer though!
If this happens rescue attempts can still be made by the owning player, and once freed the Digga will fight for the original mob again.
Diggas with Captives
Diggas tend to be pretty ruthless with their captives. Factions they’re on speaking terms with (usually Gorkers/Morkers/Diggas but it’ll depend on your campaign) can engage in hostage exchanges and ransoming, as described in the GCE Campaign book, however there’s only one opportunity for this - Diggas will not hold onto captives indefinitely. If negotiations don’t end well then the captive will be dragged back to the Pyramids. A rescue scenario can be played at this point, otherwise the captive disappears forever.
Assuming the captive isn’t rescued the Diggas will sell the captive to Da Wreckers in exchange for 2D6 teef of profit (not income) and will also keep all the captive’s weapons and equipment (add it to your hoard if it can be used by Diggas, otherwise apply the relevant faction-specific rules for captured equipment).
The rules for captured Vehicles are the same as for Warriors, albeit with the Vehicle getting smashed up rather than disappearing into the tunnels.
Post Game Sequence
After a game has been completed, a Diggamob goes through the post-game process which involves a number of steps where you determine who survived the game, the experience they gathered, hire new members etc.
These stages must be completed in order, and are:
- Roll Permanent Injuries for any downed Warriors, to see if they survive unscathed, are killed or suffer some kind of debilitating injury
- Roll for Permanent Damage to vehicles, and whether Digga vehicles degrade through a lack of maintenance
- Gain Experience and Skills
- Generate Income to spend in Mektown
- Leadership Disputes and Crew Reassignments, settled in the traditional method of fighting in a pit until the other one gives up
- Visit Mektown to hire new warriors, buy new equipment, and upgrade weapons and vehicles.
Permanent Injuries
Follow the rules for Out of Action/Down at the End of a Game in the GCE Campaign Pack for any Warriors that were Out of Action or Down at the end of the game.
When a Warrior dies, their equipment, weapons, armour, bioniks, etc. are lost and may not be reallocated. Say your goodbyes and scrub them from your roster.
Permanent Damage
Follow the rules for Wrecked and Immobilised Vehicles in the GCE Campaign Pack for any Vehicles that were Wrecked or Immobilised at the end of the game.
Once completed, roll for Wear and Tear for all Vehicles in the mob (see Digga Special Rules).
When a Vehicle is destroyed all its equipment is also destroyed. Any Gubbinz, Big Gunz, or Kustom Jobs are lost and may not be reallocated.
Experience and Skills
This section deals only with the additional information needed for Diggamobs. For a full explanation of how Warrior advances and experience work see the Experience section of the GCE Campaign Book.
Starting Experience
| Type of Warrior |
Starting Experience Points |
|---|---|
| Digganob |
60 + D6 |
| Shaman |
20 + D6 |
| Digga-Boyz |
20 + D6 |
| Digga-Yoofs |
0 |
Experience Table
| Exp. Points |
Title |
Notes |
|---|---|---|
| 0-5 |
Digga-Grub |
Digga-Yoofs start at this level. |
| 6-10 |
Digga-Yoof |
|
| 11-20 |
Digga-Yoof |
|
| 21-30 |
Digga-Boy |
Digga-Boyz and Shamans start at this level. |
| 31-40 |
Digga-Boy |
|
| 41-50 |
Digga-Boy |
|
| 51-60 |
Digga-Boy |
|
| 61-80 |
Digga-Skarboy |
Digganobs start at this level. |
| 81-100 |
Digga-Skarboy |
|
| 101-120 |
Digga-Skarboy |
|
| 121-140 |
Digga-Skarboy |
|
| 141-160 |
Digga-Skarboy |
|
| 161-180 |
Digga-Skarboy |
|
| 181-200 |
Digga-Skarboy |
|
| 201-240 |
Digga-Boss |
|
| 241-280 |
Digga-Boss |
|
| 281-320 |
Digga-Boss |
|
| 321-360 |
Digga-Boss |
|
| 361-400 |
Digga-Boss |
|
| 401+ |
Wrecker |
No further advance rolls happen after this point. |
Maximum Statistics values
As described in the GCE Campaign Book here is the characteristics caps for Diggas:
| M |
WS |
BS |
S |
T |
W |
I |
A |
Ld |
|
|---|---|---|---|---|---|---|---|---|---|
| Digga |
4 |
6 |
6 |
4 |
4 |
3 |
6 |
3 |
9 |
If your warrior rolls a characteristic increase that would take them above the cap for that stat then increase the other characteristic in that bracket instead. If both are at their cap then pick any other characteristic that hasn’t reached the cap yet and increase it by one instead. If every stat is maxed out then generate a skill advance from a relevant table (equivalent to a result of 3-4 or 10-11 on the Advance Table).
Skill Availability
When rolling a Know Wots advance Diggas have the following skills available to them:
| Diggas |
||||||
|---|---|---|---|---|---|---|
| Muscle |
Ferocity |
Driving |
Cunnin’ |
Dakka |
Odd |
|
| Digganob |
✔ |
✔ |
✔ |
✔ |
✔ |
✘ |
| Shaman |
✘ |
✘ |
✔ |
✔ |
✔ |
✔ |
| Digga-Boyz |
✘ |
✔ |
✘ |
✔ |
✔ |
✘ |
| Digga-Yoofs |
✘ |
✔ |
✘ |
✔ |
✘ |
✘ |
When a Shaman rolls Know-wots you may choose to generate one from the Shaman Abilities table instead.
Only Shamans may take mind powers - that’s why they’re not listed in the skill chart above.
| D6 |
Mind Power |
|---|---|
| 1 |
Troofsayer With a wry grin and some barely-coherent advice the Shaman helps the mob make the right choices about how to approach a fight. A mob containing a Shaman with this skill adds +1 to dice rolls for determining first turn and dice rolls for reinforcements. Note: this doesn’t apply to Revvin’ and Shoutin’. |
| 2 |
Scrap Master By scrying, dowsing, or just being very good at guessing, the Shaman has a nose for where to find more scrap. When a scenario calls for a randomised number of scrap counters add +1 to that roll. |
| 3 |
Tek Master Closing their eyes they see the sparkle of lost technologies in the depths of the tunnels, twinkling in their mind. Try lookin’ in that direction… After a game if you pass a Leadership Test you may add D3 to the number of Scavengers for the purposes of finding Archeotek (not income). |
| 4 |
Precog The Shaman has learned to trust their gut (probably because their gut is a bit psychic) and isn’t shy about telling their comrades. Every now and again it saves someone’s life! While a Shaman is onboard a friendly Vehicle, the Driver has +1 Leadership for the purpose of Swerve attempts. Additionally, Friendly Warriors have +1 Initiative while within 6” of the Shaman when avoiding getting Squashed on foot. This includes the Shaman himself. |
| 5 |
Duck The Shaman moves in an aggravatingly mystic way. The way attacks seem to often miss them is purely coincidental! Shooting targeting the Shaman has an extra -1 to hit modifier. Similarly, Warriors that charge into Hand-to-Hand combat with this Shaman do not receive their +1 modifier for Charging. |
| 6 |
Pinpoint Accuracy The Shaman is possessed of an uncanny deftness, making shots with a reaction speed that catches the uninitiated off guard. The Shaman does not suffer the -1 modifier for shooting at fast moving targets (Vehicles that moved more than 6”, Warriors on foot that moved more than 10” etc.). They can also ignore the -1 modifier when shooting at appearing/disappearing targets on Overwatch. |
Income
All Diggamobs have access to the subterranean tunnels of the Pyramids and between battles will spend time scavenging for tradeable archeotek. After each battle, uninjured mob members may scavenge to produce income for the mob.
Scavenging
After Injuries and Experience, a mob determines the Income and Profit it will receive. Each Digga-boy and Digga-Yoof that did not go Out of Action in the game (including if they went Out of Action having been Down at the end of the game) may scour the tunnels for shiny things that can be sold for Teef. Each scavenger generates D3 teef of Income. There is also a chance that your scavenging party will turn up some ancient tek at the same time - see the Finding Ancient Tek section below.
What Lurks in the Darkness
The Downside is not a safe place and death stalks the tunnels - sometimes in a very literal sense. When making Scavenging rolls count the number of natural 6s rolled. If that number exceeds 3 then one of your mobsters has met with an untimely end in the Downside. Perhaps one of the creatures got them, perhaps a loose beam crushed them, perhaps they simply got lost - the end result is the same and you should remove them from your roster (along with all their equipment). The totals on the dice still go towards your income though, so it’s not all bad!
Ceremony of Searching
If your mob includes a Shaman and they didn’t go Out of Action in the previous game you may have them perform a Ceremony of Searching after each battle. They commune with the spirits around them or otherwise get up to some psychic fidgy widginess in order to locate some riches for the mob. If they can pass a Leadership Test the mob gains 2D6 teef of Income. This is separate from scavenging and not subject to the What Lurks in the Darkness rules.
‘Ard Boyz Bonus
Taking on a more reputable mob and winning gets the mob an income bonus!
| Difference in Mob Rating |
Bonus |
|---|---|
| 1-10 |
+1 |
| 11-15 |
+2 |
| 16-20 |
+3 |
| 21-25 |
+4 |
| 26-50 |
+5 |
| 51-75 |
+10 |
| 76-100 |
+15 |
| 101-150 |
+20 |
| 151+ |
+25 |
Scenario Income
Scenarios often include additional ways for mobs to earn income, often in the form of lovely, shiny scrap! When the game ends you should immediately figure out how much income your mob has earnt from the scenario’s loot. Scrap Counters are worth D6 teef each for Diggas, unless otherwise stated.
Calculate Total Income
Add up the various income totals from the sources described above. This forms your mob’s total income - this isn’t the amount you get to keep!
Profit
As in reality whatever a mob earns has to pay for things - it’s not all profit.
After each game a mob will need to pay for a variety of things ranging from ammo, repairs, fuel, their bar tab, and so on. These sorts of costs could probably have a game mechanic but then we’re just getting into accountancy rather than gaming!
Your income gets compared with the size of the mob which consists of its permanent members and vehicles. Each warrior on the roster counts as one, each vehicle counts as one. Special characters, hired guns, and other temporary mob members do not count towards this count unless otherwise stated.
Find the relevant row and column in the table. Where they cross over that’s how much profit the mob gets. There’s no addition or subtraction involved here - the number is how many teef the mob gets to keep.
| Mob Size |
|||||||
|---|---|---|---|---|---|---|---|
| Income |
1-3 |
4-6 |
7-9 |
10-12 |
13-15 |
16-18 |
19+ |
| 0-2 |
3 |
3 |
2 |
2 |
1 |
1 |
0 |
| 3-5 |
5 |
4 |
3 |
3 |
2 |
1 |
1 |
| 6-8 |
7 |
6 |
5 |
4 |
3 |
2 |
2 |
| 9-12 |
9 |
8 |
7 |
6 |
5 |
4 |
3 |
| 13-17 |
11 |
10 |
9 |
8 |
7 |
5 |
4 |
| 18-23 |
13 |
11 |
10 |
9 |
8 |
6 |
5 |
| 24-30 |
15 |
13 |
12 |
10 |
9 |
7 |
6 |
| 31-38 |
16 |
15 |
14 |
12 |
10 |
8 |
7 |
| 39-47 |
17 |
16 |
15 |
13 |
12 |
10 |
9 |
| 48-57 |
18 |
17 |
16 |
14 |
13 |
11 |
10 |
| 58+ |
19 |
18 |
17 |
15 |
14 |
12 |
11 |
For example:
Gorktanion’s Blasta Boyz consist of 1 Transport vehicle, 1 Support vehicle and 7 Diggas, including the Digganob, Shaman, and Drivers and Gunners. This is a total mob size of 9. In their most recent battle, they gained one scrap counter, for 4 teef, a total of 8 teef through Scavenging, and their Shaman found 7 teef through the Ceremony of Searching for a total of 19 teef.
Looking at the Profit table, the mob sits in the 7-9 Mob Size bracket, and with the income bracket of 18-23 generates a total profit of 10 teef. These teef are added to the mob’s stash and can be spent on upgrades, new members etc..
Finding Ancient Tek
Ancient technology lurks amongst the debris of the ages - a valuable commodity both in terms of being a force multiplier against a foe and for the purposes of trade. As mentioned in the income rules there is a chance of stumbling upon Archeotek during normal scavenging. A larger scavenging party has a greater chance of finding the good stuff, and having a Shaman’s assistance increases the odds too. Warriors lost to the darkness do still count towards the party size though.
| Scavenging Party Size |
D6 Roll To Find Archeotek |
|---|---|
| 1 - 3 |
No chance |
| 4 - 5 |
6+ |
| 6 - 8 |
5+ |
| 9 - 11 |
4+ |
| 12+ |
3+ |
If your mob has a Shaman add +1 to this roll. A scavenging party of 3 or less will never find Archeotek, even with the assistance of a Shaman.
You may not split your scavenging party or attempt other shenanigans to manipulate the searching mechanics. Your scavengers form one party for each post-game and will, at best, find a single item of Archeotek.
It’z a… fing..?
The obscure nature of Archeotek does present the slight problem of figuring out what precisely any given thingy does. Narrowing it down to wearable, wieldable, fireable, or “other” is about the best one can manage without actively testing it in the field.
As alluded to above archeotek comes in four categories: armour, Hand-to-Hand weapons, ranged weapons, and equipment. When your scavenging party finds a piece of Archeotek you should roll immediately to determine its category:
| D6 |
Artefact type |
|---|---|
| 1 - 2 |
Gun |
| 3 - 4 |
Hand-to-Hand weapon |
| 5 |
Armour |
| 6 |
Gizmo |
To learn more than that you’ll need to assign it to one of your Warriors and try it out in a game (see below).
Selling and Trading Archeotek
Archeotek is valuable stuff and you may wish to sell it rather than keep it. You do not need to test it first, you can locate it and sell it on immediately if you so choose (to the Meks or to another player).
Roll once for each item when it is first acquired to determine its permanent value. This is the amount of teef you can sell to the Meks for (not half its value as per normal sales).
| Artefact type |
Cost |
|---|---|
| Gun |
D6 teef |
| Hand-to-Hand weapon |
D6 teef |
| Armour |
D6 teef |
| Gizmo |
D6 + 2 teef |
If you opt to sell then that happens independently of the income/profit mechanics - add the teef directly to your horde (tax free!).
You can also sell it to other mobs that will deal with Diggas (Orks and other Diggamobs, primarily, but it’ll depend on your campaign). Under those circumstances you can name your price. The item’s permanent value is unchanged by the sale price. Whoever owns it can sell it to the Meks for the permanent value, regardless of the price they paid for it.
For example Gorktanion’s Blasta Boyz acquire a snazzy bit of Archeotek Armour and roll a permanent value of 4 teef for it. After testing it out in a game, another player offers 6 teef for it and it is sold. Its new owner tries it out, isn’t happy with it, and sells it to the Meks for its permanent value - 4 teef.
N.B. Unless otherwise specified, this is the only time equipment can be traded between mobs.
Here Goez Nuffink!
Assuming you’re keeping the Archeotek, you should nominate a Warrior in your mob to test it. Add it to their roster entry, adding the permanent cost of the artefact type (do not pay that cost, it’s simply the value of the item you have acquired).
When your Warrior first uses the item you’ll find out what exactly it does!
First usage is defined as follows:
| Artefact type |
When… |
|---|---|
| Gun |
A ranged attack is attempted |
| Hand-to-Hand weapon |
Used in Hand-to-Hand combat |
| Armour |
Its wearer is wounded |
| Gizmo |
At the start of any turn |
When that happens, roll on the relevant table below:
| Ancient Gunz, Kombi-Weapons, and Archeotek Gunz |
|
|---|---|
| D6 |
|
| 1 |
No, no, no, no! Roll a further D6: 1 - 3: The weapon explodes, causing a S4 hit with a -1 Save Modifier to the Warrior. 4 - 6: The weapon breaks apart into tiny pieces in the Warrior’s hand. In either case the weapon is permanently useless. Remove it from your roster. |
| 2 |
Almost got it… The Warrior can’t seem to get the complex safety mechanism to disengage - take an Initiative test. If they pass re-roll on this table, re-rolling further 2s. If they fail they can take another Initiative test in their next Shooting Phase, and so on, until they pass. |
| 3 - 4 |
Fzzappp! This is an Ancient Gun, generate one using the rules below. |
| 5 |
Dakka…Brakka! This is a Kombi-Weapon, generate one using the rules below. |
| 6 |
Fazoom! This is an Archeotek Gun, roll a further D6: Blasta Mini-Skorcha Bomb-Lobber Pulsa Deff-ray Smasha See the Armoury Appendix for rules for each of these. |
Generating an Ancient Gun
Ancient Guns are fairly common and come in a wide range of configurations. All Ancient Guns require two hands to use.
Ancient Guns cannot be Kustomised by a Mek and cannot be mounted on a Vehicle.
| Range |
Hit modifier |
S |
Save Mod |
D |
Ammo Roll |
Notes |
||
|---|---|---|---|---|---|---|---|---|
| Short |
Long |
Short |
Long |
|||||
| 3D6” |
+3D6” |
1: -1 2-5: - 6: +1 |
1: -1 2-5: - 6: +1 |
2D3 |
1-3: 0 4: -1 5: -2 6: -3 |
1-5: 1 6: D3 |
1: Auto 2-5: 2-5+ (2 = 2+) |
1-4: No sustained fire dice 5: 1 sustained fire dice 6: 2 sustained fire dice |
For example, generating a gun, working from left to right:
| Range |
Hit modifier |
Strength |
Save Mod |
D |
Ammo Roll |
Notes |
||
|---|---|---|---|---|---|---|---|---|
| Short |
Long |
Short |
Long |
|||||
| 0” - 9” |
9” – 21”
(9 + 12) |
+1 |
- |
5 |
-2 |
1 |
3+ |
|
The long range is the short range, plus another 3D6”. The ammo roll D6 gives a 3, so 3+ is the ammo roll. The resultant gun has a decent range, excellent Strength, and a reliable ammo roll!
Generating a Kombi-Weapon
Kombi-weapons combine the functionality of two or even three guns into one unwieldy package!
First roll a D6 - on a 6 the weapon has 3 barrels, any other result and it only has 2.
Then roll for each barrel on the table:
| D6 |
Gun type |
|---|---|
| 1 - 2 |
Shoota |
| 3 - 4 |
Kannon |
| 5 |
Blasta (Archeotek Gun) |
| 6 |
Mini-Skorcha (Archeotek Gun) |
Duplicate results add Sustained Fire Dice to the resulting weapon profile.
For example: A 2 barrel Kombi-Weapon might be 2 Kannons, resulting in a weapon with this profile:
| Range |
Hit modifier |
Strength |
Save Mod |
D |
Ammo Roll |
Notes |
||
|---|---|---|---|---|---|---|---|---|
| Short |
Long |
Short |
Long |
|||||
| 0” - 4” |
4” - 18” |
- |
-1 |
4 |
0 |
1 |
4+ |
Knockback, 1 Sustained Fire Dice |
When a Warrior fires a Kombi-Weapon they must decide how many barrels are being used. For each additional barrel a -1 to Hit modifier is added to all shots. Regardless of how many barrels are used, a single target must be chosen. Kombi-Weapons with sustained fire dice can spread shots across targets as normal.
For example, firing the weapon described above the Warrior could act as if they had a standard Kannon (no additional modifiers) or a Kannon with a sustained fire dice (-1 to Hit, regardless of how many shots are fired).
Keen observers might notice that the Mini-Skorcha does not suffer from to Hit modifiers. A Kombi-Weapon with one will still inflict to Hit modifier penalties on the other barrels - unless you’re lucky enough to discover a Kombi-Weapon with only Mini-Skorcha barrels!
Kombi-Weapons may not be Kustomised by the Meks but may be mounted on vehicles (counts as a big gun, so small vehicles cannot have a Kombi-Weapon fitted).
| Archeotek Hand-to-Hand Weapons |
|
|---|---|
| D6 |
|
| 1 |
No, no, no, no! Roll a further D6: 1 - 3: The weapon explodes, causing a S4 hit with a -1 Save Modifier to the Warrior. 4 - 6: The weapon breaks apart into tiny pieces in the Warrior’s hand. In either case the weapon is permanently useless. Remove it from your roster. |
| 2 |
My thumb! The Warrior takes a S3 hit. Roll again on this table immediately. |
| 3+ |
Wummm! The weapon springs to life, roll a further D6. On a 6, the weapon has a trick up its sleeve in addition to its more obvious properties - it hurls energy bolts! Roll a further D6 and consult the list below to establish what kind of weapon it is. If you roll another 6 then it doesn’t just fire a single energy bolt, it fires two! If you are lucky enough to keep rolling 6s more bolts will be fired. Repeat until the weapon’s final form is decided, from this point it now has that profile but will retain the energy bolt mechanic at the start of Close Combat. E.g. If you were to roll 6, 6, 2 then it would be a Spiky weapon that fires two energy bolts at the start of each Close Combat phase. 1 - 2. Spiky! 3 - 4. Power weapon! 5. Zinggg! 6. See above. See the Armoury Appendix for rules for each of these. |
| Archeotek Armour |
|
|---|---|
| D6 |
|
| 1 |
Malfunction! The hit causes no damage to the Warrior this time, however the armour rapidly overheats and inflicts a Strength 3 hit on the wearer. It is then permanently destroyed. |
| 2 |
Thud! Maybe the Warrior wasn’t wearing it correctly - try adjusting the straps. The hit inflicts damage as normal. Roll again on this chart the next time that the warrior is hit. |
| 3 |
Clang! See the Armoury Appendix for rules for this type of Archeotek armour. |
| 4 |
Badang! See the Armoury Appendix for rules for this type of Archeotek armour. |
| 5 |
Vwoom! See the Armoury Appendix for rules for this type of Archeotek armour. |
| 6 |
Badoing! See the Armoury Appendix for rules for this type of Archeotek armour. |
| Archeotek Gizmo |
|
|---|---|
| D6 |
|
| 1 |
Beep, Beep, Beep! The gizmo begins beeping in a rather concerning manner, steadily getting faster. The Warrior must take an Initiative Test. If the test is passed, the Warrior is smart enough to throw the gizmo 2D6” away in a random direction. It then explodes with the same Blast and characteristics of a Frag Stikkbomb. If the Initiative Test is failed, the Frag Stikkbomb explodes centred on the Warrior instead. Once this has been resolved, remove the Gizmo from your roster. |
| 2 |
Click… click… It turns out that the thing which looks like a button or a trigger wasn’t. The Warrior must take an Initiative Test (D6 - equal or under Initiative to pass). If they pass re-roll on this table, re-rolling further 2s. If they fail they can take another Initiative test at the start of their next turn, and so on, until they pass. |
| 3 |
Distorta! See the Armoury Appendix for rules for this type of Archeotek gizmo. |
| 4 |
Targeta! See the Armoury Appendix for rules for this type of Archeotek gizmo. |
| 5 |
Lifta! See the Armoury Appendix for rules for this type of Archeotek gizmo. |
| 6 |
Displaca! See the Armoury Appendix for rules for this type of Archeotek gizmo. |
Crew Reassignments and Leadership Disputes
After a game, the Diggamob may attempt to swap around vehicle crew members, and there will often be an upstart boy who reckons they’d be better at leading than the current nob.
First, you must resolve any Leadership Disputes.
Next, resolve any Warriors being removed from the mob and Kicked To Da Kurb (see below).
Finally, if you want to swap a Driver or Gunner for another Warrior, then resolve those disputes in any order you wish.
Leadership Disputes
Everyone thinks they can do better than the boss, and Diggas are no exception.
If any member of the mob has a Leadership value higher than the Nob, then they will attempt to take over as leader of the mob and challenge the Nob to a Pit Fight (described below).
If there are multiple members of the mob who have a higher Leadership, then they will each challenge the Nob one after the other. Sort the Warriors challenging in order of Leadership, from highest to lowest. If multiple challenging members have the same Leadership value, then sort that group in order of Experience from highest to lowest.
Once a Warrior has beaten the Nob, they are safe from any further Leadership Disputes until the end of the next game. They are changed to a Digganob and the losing Digganob is now a Digga Boy. Teef Value, experience etc are not affected. The new Digganob will only gain the +1 Leadership bonus for winning a game if the original Digganob did not gain this.
Kicked To Da Kurb
Life in the wasteland can be harsh and unforgiving. If a Digga doesn’t pull their weight in a fight, they find themselves at risk of being rather violently kicked out of their mob.
You may attempt to remove one Warrior from your roster during the Post-Game process. In order to do this, your Digganob will challenge them to a Pit Fight and must win.
If your Digganob wins the Pit Fight then the Warrior is removed from the roster. In addition, roll a D6. On a 5+, you may keep the Warrior’s equipment and may either give it to other members of the mob, or add it to your stash. Otherwise, all the equipment and weapons carried by the Warrior are lost.
If your Nob loses, then the Warrior remains in the mob. You may attempt to kick the warrior out after your next game if you wish.
Nobs may not be removed. They must be unseated in a Leadership Dispute, and then beaten in a Kicked To Da Kurb Pit Fight after a subsequent game.
Crew Reassignments
The position of Gunner or Driver on a vehicle is considered rather prestigious in Digga society. It is not a position that a Digga is likely to willingly give up. As per usual in Digga society, a change of role is usually only done after a bout of violence.
If you wish to swap any Gunners or Drivers, then the new member must first beat the original in a Pit Fight. This Pit Fight will always be ‘Ard - only bare knuckle brawling is the accepted way of taking over or defending such a lofty position (see the table below).
Each Driver or Gunner may only be challenged once per Post-Game Sequence.
If the challenger beats the defender, then they take over the much coveted position. Otherwise, the Driver/Gunner remains in place.
Pit Fights
The Diggas aspirations to be like Orks extends in many directions, and this includes the “might makes right” approach to leadership.
Unlike a bar brawl these establishments are a bit more organised and the parameters of the fight will vary depending on what the pitboss has scheduled for the day.
If not otherwise specified, roll on the table below to determine what type of Pit Fight takes place.
| D6 |
Result |
|---|---|
| 1-2 |
Shooty
The two Warriors are equipped as normal. They start 16” apart. Roll a D6 each with the winner getting the first turn. They may move around the arena and engage in Hand-to-Hand Combat as normal (in addition to shooting). |
| 3-4 |
Cunnin’
The two Warriors can use all the Hand-to-Hand weapons they own. They are equipped with all armour and bioniks on their Mob sheet entry. They start in base-to-base contact and neither Warrior counts as Charging. |
| 5-6 |
‘Ard
The two Warriors have no Hand-to-Hand weapons apart from Knuckles and Knives. They are equipped with all armour and bioniks on their Mob sheet entry. They start in base-to-base contact and neither Warrior counts as Charging. |
The Loser rolls Serious Injuries Table as normal. Results of ‘Captured’, ‘Bitter Enmity’ and ‘Gobsmacked’ are treated as a ‘Full Recovery’ in this case.
Bar Brawl / Pit Fight Experience
Warriors who take part in a Bar Brawl or Pit Fight gain +5 Experience for each Wounding Hit they inflict on their opponent and an additional D6 Experience Points for taking part. If this allows them to Advance, go through the Advancement process immediately.
New faces and new gear
Once “management issues” have all been sorted out over a beer and a fist-fight, as is tradition, new mobsters can be hired and equipment can be purchased. Use the same price and equipment lists as in the hiring rules for Diggamobs.
Selling (Hoarding & Swapping)
Sell weapons and equipment at half value, rounding down (1 toof items are worthless). Remember that the half value rule does not apply to selling Archeotek. Alternatively you may hoard or swap them around the mob. Hoarded weapons, equipment and vehicles do not count towards Mob Rating.
Da Mekboy’z Workshop
Mekboys are equal parts mechanic, inventor, and swindler. Brilliant in their own ways and they know it. They consider almost any job “open to interpretation” but, conversely, this can sometimes lead to spectacular results.
Weapons can be made deadlier, vehicles faster, and so much more besides. Hand over the kit and brace your wallet!
You’z Are Weedy Boyz
Diggas are naturally treated with suspicion in Mektown until they have proven themselves. Until a Diggamob reaches a Mob Rating of at least 200, it must apply a -1 modifier, to a minimum of 1, to any rolls made on Da Big Day table below.
Once the mob has reached a mob rating of 200 or higher, they are considered proppa orky, and do not suffer the modifier.
Additionally, Diggamobs may not even visit Da Mekboy’z Workshops until they have either won a battle or survived at least two. This doesn’t affect recruitment or buying equipment.
We Can Do It!
After your game has finished and your Mob is ready to visit Mektown you may take any weapon or vehicle to have a kustom job done. If your Diggamob wants Gubbinz fitted then you’ll also need to visit a Mek. You may only attempt to upgrade each vehicle or weapon once per post-game sequence, even if the attempt fails.
Eligible Weapons: Restrictions apply, see Gunz and Big Gunz in the Armoury Appendix.
Kustomised Weapon options are:
- Shootier (+1 Strength)
- Longer Range (+6” Total Range)
- More Dakka (+1 Sustained Fire Dice)
Note: Linked Weapons count as a single Weapon.
Kustomised Vehicle options are:
- Getting It Fixed (Remove Permanent Damage)
- Faster (+3” Thrust)
- Smarter (+1 Ld bonus on turns)
- ‘Eavier (+1 Armour)
If you have Warriors with Bioniks then you may be able to have them Kustomised too. Meks will not fit Bioniks, you need to see a Dok for that – see .
- Shoota Arm - Shootier, Longer Range, More Dakka
- Trak/Wheels - Faster, Smarter
- Cybork Body - ‘Eavier
Once you’ve nominated your desired job, roll on Da Big Day Table and see how things went:
| Da Big Day |
|
|---|---|
| D6 |
Result |
| 1 |
We Adda Bitta Trubble. Uh oh. The Mek has made things worse. Roll on the Bodge Table. Despite the mishap the Mekboy still demands D6 teef for his work. |
| 2 |
While we Wuz at It… The Mek has found something to repair instead which has been done without your consent. Your original request has been forgotten about, unless it was to fix a piece of Permanent Damage. If there is more than one randomise which one is repaired. The Mekboy still demands D6 teef for his work. |
| 3 |
Can’t Get da Parts. The Mekboy has done nothing but charges nothing. |
| 4-6 |
Job’s a Good ’Un. Hurrah! The Mekboy completed the work successfully. You are presented with a bill for D6 teef. Refer to the Weapon or Vehicle’s Job’s a Good ’Un section. |
Fitting Gubbinz
Any Mekboy worth his teef knows that Diggas are easy targets and whilst they might help them for a laugh there’s also a very real risk that they’ll take advantage of their prospective customers.
Select the Gubbinz you’d like fitted to your Vehicle and roll on the table below:
| Digga Gubbinz Table |
|
|---|---|
| D6 |
Result |
| 1 |
Pocketing the teef, the Mek looks your lads up and down before laughing in their faces and shoving them back out into the street. Deduct the cost of the Gubbinz from your teef hoard. No work is done on your Vehicle. |
| 2-3 |
After spending the day being ignored by the Mek your vehicle is eventually ready. The job is done but the Mek is very clear that a generous tip is appropriate if the job is to remain done. The Gubbinz are fitted as requested but you must also pay an additional D3 teef. See Da Bad Nooz for how this works. |
| 4+ |
The Mek laughs at the sorry state of your vehicle as he bolts on your new gubbinz, commenting that it’s “like puttin’ lipstick on a squig”. The Gubbinz are fitted at list price. See Da Bad Nooz for how this works. |
Da Bad Nooz - Meks
Except for Can’t Get Da Parts you must pay your bill (D6 teef) immediately. Note: The teef paid to the Meks is not added to the Weapon or Vehicle’s value - see the Job’s A Good ‘Un section.
If you can’t afford to pay your bill the Mekboy confiscates your Weapon/Vehicle until you’ve paid your bill. Remove their value temporarily from your Mob Rating until you’ve paid.
Bodged Jobs
The work has been bodged but you won’t find out how badly until you start a new game. When you attempt to shoot the bodged Weapon or move the bodged vehicle, roll on the relevant Bodge Table.
| Bodged Weapon Table |
|
|---|---|
| D6 |
Bodge |
| 1 |
Just Don’t Ask Where to even start. That bit wasn’t supposed to fall off and there’s this whole section missing… The Weapon is unusable. |
| 2 |
Bits Left Out It turns out the parts left over weren’t spare… The Weapon shoots once like normal then falls to bits in the Warrior’s hand. |
| 3 |
Sights Bodged It’s fine if you squint, I guess? Short and Long Ranges reduced by half (rounding down). |
| 4 |
Aim Bodged The trigger feels all wrong and it’s jumping about like an agitated herd squig! All shots made by the Weapon are at a -1 to Hit. |
| 5 |
Rapid Fire Mechanism Bodged The Weapon loses its Full Auto function. If it didn’t have one to begin with, it now requires an Ammo test every time the Weapon is fired. |
| 6 |
Ammo Feed Bodged Any Ammo rolls automatically fail. Still test for Exploding Weapons. |
| Bodged Vehicle Table |
|
|---|---|
| D6 |
Bodge |
| 1 |
Thrusters Bodged Thrusts only succeed on a 4+. Anything less than that is a failure. This includes the first thrust for Small Ork Vehicles. |
| 2 |
Wheel/Tracks Bodged Turning under gas engines (including slow speed manoeuvres) is incredibly difficult. You must pass a Leadership test each time you want to turn. Failure results in the Vehicle moving D6” forward and then stopping (this does not end the Vehicle’s move like a failure on a Thrust roll). You may still turn using thrusters as normal. |
| 3 |
Gas Engine Bodged Gas Engine moves are halved (rounding up). |
| 4 |
Gears Bodged The low gears of the Vehicle are well and truly massacred. If you wish to undertake a Slow Speed Manoeuvre you’ll need to roll D6 first. On a 4+ the gearbox survives and you may make the move - otherwise the gearbox gives up and the Vehicle is immobilised! |
| 5 |
Fuel Injector Bodged Each time your Vehicle makes a Thrust move there’s a chance that the Thrusters will gum up, preventing any further Thrust moves from being made during this game. This happens if you roll a 1 on a Thrust test. |
| 6 |
Brakes Bodged The only way this Vehicle is stopping is if it becomes Immobilised! Each turn you must use your entire gas move. You can use your Thrusters if you’d like, they aren’t affected. Slow speed manoeuvres are impossible. |
Getting’ Bodges Fixed
Once you have fielded the weapon or vehicle in a game the bodge is automatically sorted. This costs you nothing and does not prevent another job. The embarrassed Mek tries to make excuses but ultimately concedes and completes the original job you requested.
Job’s A Good ‘Un - Weapons
-
Shootier: +1 Strength
-
Longer Range: +6" Total Range
-
More Dakka: +1 Sustained Fire Dice
Note: The first upgrade (of each type) adds +5 teef to the Weapon’s Value. Second and subsequent upgrades do not but will incur performance loss. These effects are cumulative.
| Weapon Performance Loss Table |
|
|---|---|
| D6 |
Compromise (reroll any results that are the same as the upgrade just received) |
| 1 |
Slowed Fire The Weapon loses a Sustained Fire Dice. If this takes the number to zero the weapon now fires a single shot. If it fired a single shot it becomes ‘Move or Fire’. If it was already ‘Move or Fire’ the weapon is now useless - remove it from your roster. |
| 2 |
Ammo Guzzler The Weapons Ammo rolls are now ‘Automatic’. If it is already Auto, roll again for a different effect. |
| 3-4 |
Kicks Some All shots made by the Weapon have a penalty of -1 to Hit (Both Short and Long Range). |
| 5 |
Sawn Off Weapons with a Total Range greater than 30” are reduced to a Maximum of 24”. All other Weapons lose 6” off their Total Range. Short Range is not affected. |
| 6 |
Lightweight The Weapon’s Strength is reduced by -1. |
Job’s A Good ‘Un - Vehicles
-
Getting It Fixed (Remove one type of Permanent Damage e.g. all Unreliables)
-
Faster +3" Thrust. (Maximum of 9”)
-
Smarter +1 Ld bonus on turns
-
‘Eavier +1 Armour to all Hit Locations
Note: The first upgrade (of each type) adds +5 teef to the Vehicles Value. Second and subsequent upgrades do not but will incur performance loss. These effects are cumulative.
Having a Mek fit Gubbinz to a Vehicle does not count as an upgrade for these purposes.
| Vehicle Performance Loss Table |
|
|---|---|
| D6 |
Compromise (Roll again any results the same as the upgrade just received) |
| 1 |
Lighter Armour All Armour Values are reduced by -2. |
| 2 |
Stripped Armour All Armour Values are reduced by -1. |
| 3-4 |
Dodgy Steering The Vehicle Driver suffers a -1 penalty to Leadership tests required to turn. |
| 5 |
Smaller Thrusters The Vehicle’s Thrusters suffer a -3" penalty. If the Thrusters are reduced to 0 then they may not be used at all. |
| 6 |
Smaller Gas Burners The Vehicle Gas Engine suffers a -3'' penalty. If the Gas Engines are reduced to 0 then only Thrusters may be used (if available). |
Dok’s Serjery
Ork Doks are naturally curious creatures and love to open up and prod around anything that gets too close to their operating table. If a Digga is suffering enough or has lost all grip on sanity they can opt for Serjery and any Dok will be happy to oblige.
After a game once you are ready to visit Mektown you may take an injured Digga to a Dok’s Serjery. The injury suffered can be new or old; it doesn't matter to the Dok. Here you can request one of four kinds of “procedure”, each with its own Serjery Table:
- Kustom Arm Replacement - Heals Arm Wounds
- Kustom Leg Replacement - Heals Leg Wounds
- Rebuilt Kranium - Heals Head Wounds
- Kustom Orculars - Heals Blinded In One Eye
- Dok’s Surprise!!! - Heals Chest Wounds or Old Battle Wounds
Pick a procedure then roll on the “Iz It Safe Table” to see what happens.
Da Dokz’ Kode
All Doks have sworn a “hypocritic” oath and will not mess with another Dok's work once it has been done. You cannot replace or remove Bioniks or have more than one of the same type (e.g. two Kustom Arm Replacements). However the bioniks they are stuck with will prevent injuries of the same kind from happening again in the future. If the Warrior receives that specific limb injury again, treat it as a Full Recovery result (i.e. a Warrior with a bionik left leg could ignore future injuries to the left leg but a right leg injury would be applied as normal). A further injury to that body part (such as the right leg in the previous example) is permanent and will not be treated by a Dok.
It’s worth noting that Meks may work on some bioniks, see Da Meks Workshop for a list.
| Iz It Safe Table |
|
|---|---|
| D6 |
Result |
| 1 |
Dis Is A New Technique Uh oh. The Serjery has been well and truly messed up. The Dok still demands D6 teef for his work though. In the next game when the Warrior attempts to move or shoot, whichever happens first roll on the Eksperiment Table. |
| 2 |
Da Patient is Restin’... The Serjery was a success but the Warrior is still unconscious. They will miss the next game. Roll on the appropriate Serjery Table and pay the bill for D6 teef now. |
| 3 |
Klose enuff! The Dok was either not listening or not interested. He’s done Serjery on a different body part instead! Randomly pick one of the other Serjery Tables and then roll to see which procedure was completed. The Dok still demands D6 teef for his work. |
| 4-5 |
Rooteen Serjery The Dok looks almost as surprised as you are but he gestures at the patient as they wake up with their shiny new bionik upgrades. After wiping the gore on his apron he presents you with a bill for D6 teef. Deduct this from your Mob’s hoard and roll on the appropriate Serjery Table. |
| 6 |
Profeshunnal! You’ve managed to catch the Dok during a rare moment of concentration and he paid close attention when treating the patient! As above but there is no need to resolve whether the Dok operated on the correct limb/body part (see Which Wun Wuz It? below). |
As a squishy human yourself you’re probably well aware that human physiology is both extremely tough and comedically fragile, seemingly at random. To find out which way the patient’s body has reacted, roll a D6. If the result is under their Toughness then all has gone well. If not then roll on the table below…
| Serjikal Error Table |
|
|---|---|
| D6 |
Result |
| 1 |
‘E’z ded, Jim Whether it was the “sedation”, the blasé dissection, or something more gruesome, the patient is in the bin outside with the other discarded body parts. Remove him from your roster. |
| 2-3 |
‘E’ll neva make it By the time the Dok had finished prodding and cutting for his own curiosity the patient was on the brink of death. Not much point in wasting good bioniks on a corpse so off the slab he came and back to your mob in the waiting room. Miraculously they slowly recover over the next few days, albeit without any new bioniks to show for it. Roll on the Serious Injury Table for them (re-rolling results of “Full Recovery”, “Dead”, “Captured”, and “Bitter Enmity”). |
| 4+ |
I only did wot wuz striktly necessary… The patient looks like they’ve been mauled by a group of angry squigs but remarkably they’re still breathing and their new bionik is in place. Roll on the Serious Injury Table for them (re-rolling results of “Full Recovery”, “Dead”, “Captured”, and “Bitter Enmity”) and then proceed with rolling the results as per the Rooteen Serjery result in the Iz It Safe Table. |
Da Bad Nooz - Doks
You must pay your bill (D6 teef) immediately. Note: The teef paid to the Dok is not added to the Warriors value. Instead the cost to add to the Warrior’s value is in the “Added Value” section for the table.
If you can’t afford to, the Dok will ‘take care’ of your Warrior until you scrape together the cash. Remove their value temporarily from your Mob Rating until you’ve paid.
| Eksperiment Table |
|
|---|---|
| D6 |
Eksperiment |
| 1 |
Eksperimentation The Dok has performed an eksperimental technique on the Warrior, but halfway through the operation got bored and decided to try something different… The Warrior gains no bionik bitz and, worse, must roll on the Serious Injuries Table. Reroll results of Bitter Enmity, Captured or Dead. |
| 2 |
Not Enough Nailz The Warrior’s new bionik was creaking a bit but the Dok insisted that it was just aklimatin’... As soon as the Warrior attempts to use it, the magic blue smoke escapes and the Warrior is immediately taken Out of Action. |
| 3 |
Duuuuh… Wow, this lad was really down there deep for the Serjery! In fact he’s not really come back yet… Unless there’s a friendly Warrior within 2” of them they may not do anything. If there’s a friendly Warrior to babysit them they may move or shoot as normal. They may take part in Hand to Hand Combat as normal. |
| 4 |
Sumfink’s Missin’ The warrior just isn’t feeling themselves after the Serjery - probably ‘cos the Dok nicked a bunch of their innards! They’re sat in a jar back in the Klinik and the Warrior is at -1 Toughness for this game. |
| 5 |
My Brain ’Urts The Dok’s eksperimental brain Serjery has inflicted a Head Wound on the warrior, as described in the GCE Campaign Rules. |
| 6 |
Steel Teef The warrior wakes up to find that something is terribly, terribly wrong! His teeth are gone and replaced with clumsy metal ones that make intelligible speech nearly impossible! The Warrior is immune to the Gobsmacked Serious Injury from now on but also suffers a permanent -1 Leadership (treat the result as Full Recovery). |
Corrective Serjery
Once you have fielded a Warrior affected by the Eksperiment Table they are automatically sorted, except for My Brain ‘Urts which lasts another battle and Steel Teef which are permanent. As well as fixing his mistake, the Dok also does the surgery you originally went in for, roll on the appropriate Serjery Table. This costs you nothing but any additional Serjery cannot be performed on the Warrior until after the next game.
Which Wun Wuz It?
A Dok’s enthusiasm for his craft is terrifying. Unfortunately their ability (or willingness) to follow instructions is not quite so well developed. Each time an injured warrior is taken in with an Arm Wound, Leg Wound, or Blinded in One Eye you must roll a D6 to determine which receives surgical attention (1-3 Left, 4-6 Right).
Serjery Tables
| D6 Added Value |
Kustom Arm Replacement |
|---|---|
| 1 +0 |
Hook Arm The Warrior’s arm has been replaced by a cobbled together hook contraption. It’s not much good for Close Combat but at least they can still steady a shoota. The Warrior suffers a permanent -1 Weapon Skill and cannot use two-handed Hand-to-Hand weapons. They may continue to use Gunz that require two hands. |
| 2 +1 |
Kutta Arm Instead of a prosthetic hand or claw the Warrior now has a big knifey thing for an arm! It counts as a Choppa. The Warrior may not use two-handed weapons of any kind. |
| 3 +2 |
Telescopic Arm The Dok has replaced the arm with an extendable one! If this Warrior is Charged the Attacker loses -D3” as they are pushed back (potentially failing the Charge). The Warrior also gains +1 Initiative in Close Combat and when attempting to Board Vehicles. The Warrior can use two-handed weapons as normal. |
| 4 +3 |
Shoota Arm The Warrior now has a snazzy looking Shoota for an arm which can be upgraded at the Meks Workshop. Nothing else may be held in the Shoota Arm. |
| 5 +4 |
Grapple Arm The Warriors arm is now a spring-loaded scorpion hook! The grapple may be fired in the Shooting Phase instead of another weapon, at a Vehicle, Warrior or Small Target up to 8" away. Roll to Hit as usual using the Warriors BS. If a Vehicle is Hit the Warrior automatically and immediately Boards the Vehicle. If a Warrior is Hit, compare Strength, if the Target’s is equal or lower they are pulled towards you into Close Combat. If the Target’s is higher they yank you towards them instead. Small Targets, if Hit, can be used to reposition yourself, including high up places. After each shot the grapple immediately resets back into the arm and will be ready to fire again in the next turn. No Ammo roll is needed. Nothing else may be held in the Grapple Arm. |
| 6 +5 |
Klaw Arm Every Ork dreams of owning one of these - most would give their right arm for one! Hugely powerful pneumatic pistons allow the owner to crush whatever they want with ease. It may only be used in Close Combat and counts as one handed. It is User Strength x2, -3 Save Modifier and Damage 2. No other weapon may be held in the Klaw Arm. |

| D6 Added Value |
Kustom Leg Replacement |
|---|---|
| 1 +0 |
Peg Leg A crude leg replacement. Only a Freebooter would be happy with this outcome. The unfortunate Warrior’s Movement is reduced by -1". |
| 2 +1 |
Bionik Leg State of the art Orky teknologee. Just as good as the Warrior’s old leg but ‘arder! |
| 3 +2 |
De-Lux Kicking Leg Like a normal bionik leg but with a kick! The Warrior’s kicks now have the power of punches. A Warrior with a De-Lux Kicking Leg gains an extra Attack in Close Combat at user Strength. |
| 4 +3 |
Telescopic Legs These legs are something special - extra height without having to worry about door frames. A twitch of a nerve and the legs extend allowing the Warrior to see over tall obstacles (up to 4”), including for shooting purposes. A Warrior with Telescopic Legs also adds D6" to their Run or Charge move. This extra distance should be rolled each time such a move is taken and is added after their normal Movement is doubled. This bionik replaces both legs. |
| 5 +4 |
Gyro-Stabilised Monowheel Why have legs when you can have a powered unicycle instead? Well, lots of reasons, but that’s what the Warrior now has! Increase the Warrior’s Movement characteristic by +2. They may not move over Difficult or Very Difficult Ground. If they end up there they are effectively immobile for the rest of the game. The Warrior may not engage in boarding actions and cannot climb things (e.g. ladders). For reinforcement purposes they count as a vehicle. This bionik replaces both legs. |
| 6 +5 |
Traks/Wheels Plentiful around the area of Mektown, traks or wheels are used by the Doks to replace the Warriors’ legs. A fighter with this outcome gets to choose what to have. Traks and wheels follow the same Movement rules as their bigger counterparts. However the Warrior can still be squashed like other Models on foot and is unable to Ram but can still Charge. The Warrior is unable to get on board any other Vehicle or climb up walls/ladders and counts as a Vehicle when using reinforcements/reserves in scenarios. No other Model may be transported on the Warrior. The Warrior can visit the Meks to be made Faster or Smarter once. Other actions like Shooting and taking Damage, use the same rules as normal. This bionik replaces both legs. |
| D6 Added Value |
Rebuilt Kranium |
|---|---|
| 1 Squig-specific |
Squig Brain Transplant Is there something a little… different about the Warrior? They really don't seem like themselves since the Serjery… Little do the Mob know that their mate’s brain is long gone. Either for “research” or just a bit of a laugh the Dok has replaced the Warrior’s brain with that of a squig! Roll a D6 to find out what kind of squig brain your Warrior has in their head. D6 Squig (Added value) 1 Herd Squig (+0) Herd squigs are used by Slaverz to round up stray Gretchin. They are ferocious creatures but cannot think for themselves and always act on orders. A Warrior with a Herd squig for a brain is subject to Stupidity. 2-4 Face-eater Squig (+2) Face-eater squigs are just plain nasty. They like to hang around on their own and attack anything that bothers them, including Orks! They are hard to befriend, but are very loyal and will defend their masters to the end. A Warrior with a Face-eater squig for a brain Hates all enemy mobs. 5-6 Buzzer Squig (+4) Buzzer squigs are the most angry and hungry of all squigs. They fly around in swarms and eat anything that gets in their way. A Warrior with a Buzzer squig for a brain is subject to Frenzy. Regardless of the result all characteristics on the Warrior’s profile are halved (rounding up). The Warrior can continue to be part of the Mob as normal otherwise, gaining experience and so on. They’re probably not much of a conversationalist if they ever were though… |
| 2 +1 |
Staples & Glue It’s not the prettiest solution by far, and it’s not quite as techy as a bionik eye, but the crude surgery is a success, and whilst it offers no bonuses, at least the Warrior is cured of their Head Wound. Unlike other results, this does not prevent you from receiving further injuries to the head. |
| 3 +2 |
Steel Horns Whilst the Warrior will now struggle to find hats that fit they do have a rather nifty set of horns! When charging they receive an extra Attack at user Strength! |
| 4 +3 |
Steel skull Crude steel plates have been nailed to the Warrior’s skull. It looks ded ‘ard and as a result the Warrior gets a permanent +1 to their Leadership. |
| 5 +4 |
Explosive Kranium The Dok has wired a blast-proof cradle for a frag charge into the Warrior’s head. The trigger is the Warriors blood flow - should the Warrior be taken Out of Action' the charge explodes away from them! Treat it as a Frag Stikkbomb. Place the Template over the affected Warrior and resolve. If this Warrior is involved in Hand-to-Hand Combat then apply the explosion as described in the Might Explode rules. If either Warrior has the ‘Eadbutt skill, the charge explodes and they are both taken Out of Action immediately as they absorb the force of the blast (do not use a template). Assuming the Warrior recovers then the charge will be replaced for free! |
| 6 +5 |
Iron Mask The contents of the Warrior’s head have been patched up and poured into a metal shell made in the image of Gork (or Mork). Their new face is thoroughly unpleasant to look at and the Warrior now causes Fear and is immune to the Gobsmacked serious injury. |
| D6 Added Value |
Kustom Orculars |
|---|---|
| 1 +0 |
Squig Eye The Doc has only done half a job and thumbed in an eye pulled from one of the many squiggly beasts that inhabit the area. Although the Warriors' vision is restored it isn’t as good as before. They can make out blurry shapes and are sensitive to light (best hold onto that eye patch). The Warrior no longer counts as blinded but the -1 to Ballistic Skill remains. |
| 2 +1 |
Spare Parts! A more suitable transplant donated by one of the Docs previous patients (without consent of course). It seems to have worked though! The Warriors vision has been restored and the Warrior no longer counts as blinded! |
| 3 +2 |
Telescopic Eye The Doc has gone that little bit extra and fitted a Telescopic Eye which allows the Warrior to see targets at long range but not a lot else. When shooting at Targets more than 18” away the Warrior receives a +1 to Hit modifier. The Warrior no longer counts as blinded. |
| 4 +3 |
Periscope The Warrior has received a periscope for an eye that can be raised up or around corners, extending vision by 3” and +3 Initiative (making it harder for enemy Warriors to Hide). Additionally if this Warrior teams up with another as a “spotta’” they confer a +1 to Hit when the Warrior they’re spotting for shoots (so long as they remain within 2” of each other). The Warrior no longer counts as blinded. |
| 5 +4 |
Bionik Eye The Doc has replaced the Warrior’s eye with a special bionik part known locally as a “gitfinda”. It has a built in crosshair and a rangefinder to allow the Warrior to shoot betta’. The warrior gains +1 to Hit when Shooting with any weapon. The Warrior is no longer affected by blindness. |
| 6 +5 |
Auto Senses The Warrior’s eyes have been completely removed and replaced with some hi-tech looking lenses and sensors that confer a +1 to Hit as well as night vision and the ability to see without penalty through sandstorms, smoke, etc.. The Warrior is no longer affected by blindness. |
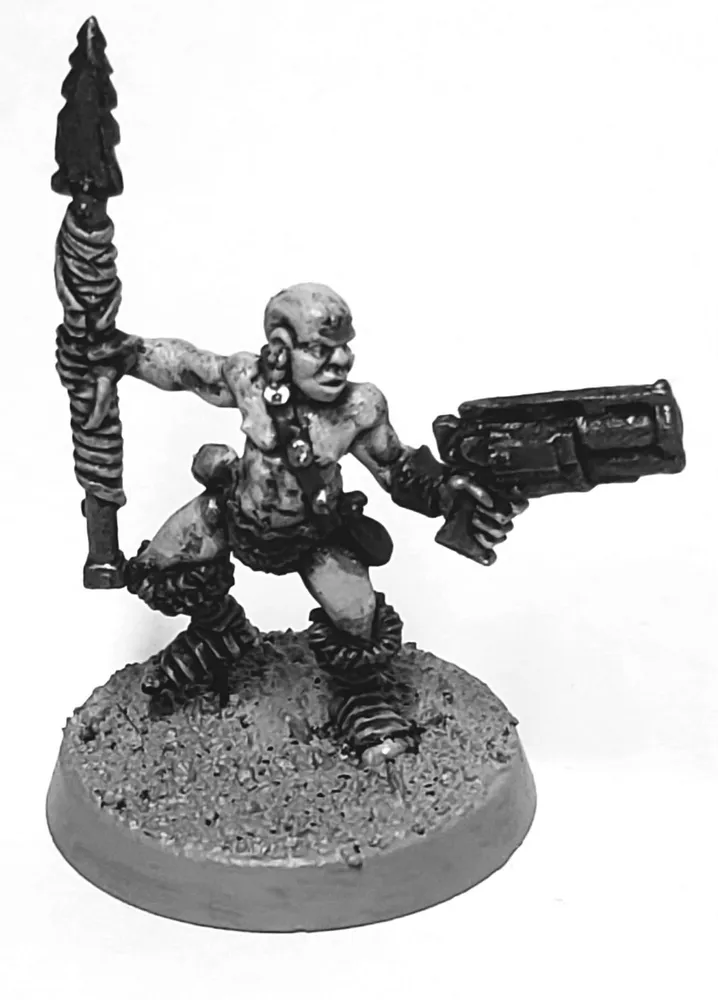
| D6 Added Value |
Dok’s Surprise |
|---|---|
| 1 +0 |
Iron Lung Whilst the Warrior can breath as normal most of the time the amount of staples, plates, and stitching in their lungs is a bit much when they try to run. The Warrior’s Movement characteristic is treated as have a -1” penalty when calculating Run or Charge moves (i.e. M4 means a 6” Run/Charge). |
| 2 +1 |
Kustom Thrusta Boosta The Warrior finds he now has a big red button in the middle of their chest - pressing it ignites a boosta rokkit in their back! The off switch is conspicuously absent… Once per battle the Warrior can choose to ignite their Kustom Thrusta Boosta. They immediately make a Thrust move like a vehicle - then another, and another, until they fail their Thrust test. They may make turns just like a vehicle thrusting and Driving skills can be used if the Warrior has any that are relevant! Once the Warrior fails their Thrust test, resolve the roll on the Thruster Buster Table and end their movement. A Warrior with a Kustom Thruster Boosta may not have any Kustom Leg Replacements. If the Warrior already has a Leg Bionik, Reroll. |
| 3 +2 |
Fungus Bref Lungs All those late night squig kebabs have finally caught up with the warrior. The Dok has had to fit a brewboy fermentation rig inside their guts! The belches they’re now capable of could floor a stink squig and they know it. Any enemy fighting this Warrior in Close Combat suffers a -1 to their Weapon Skill due to the noxious stench! |
| 4 +3 |
Fuel Injection Implant The Dok has wired up a strange injector for the warrior. It’s not clear what the concoction is but it seems to be quite efficacious. In a “Kill or cure” type of way, admittedly. At the start of the player’s turn they must Declare whether the Warrior is using this bionik or not. If so their Movement and Initiative characteristics are increased by +2 but they must roll a D6. On a result of 1 they immediately go Down (on any other result they’re fine). The Fuel Injection Implant can be used every turn - it doesn’t run out. It will also be refilled between games. |
| 5 +4 |
Armour Plating The patient's body is almost entirely covered with steel plates riveted to their flesh, patching up the holes in them. This confers an extra +1 to their Toughness. |
| 6 +5 |
Cybork Body Sometimes you might as well pretty much start over from scratch as far as this Dok’s concerned. Worry not, we can rebuild them - we have da teknolojee, although it ain’t going to be pretty. Working up from a metal endoskeleton and making liberal use of plating and pistons the lad is now pretty much unkillable. Instead of a Wound or Toughness value the Warrior now has an Armour Value of 9. If any Hits Penetrate the Warrior’s Armour roll a D6. On a roll of 1-3 the Warrior is unharmed but on a 4+ the Warrior explodes spectacularly and is taken Out of Action! The Cybork Warrior may not wear any other form of Armour but the Meks can make them ‘Eavier once. If a Cybork Warrior gains an Advance to their Wounds or Toughness, reroll for a different result. |
Armoury Appendix
Each weapon that can be Kustomised by the Meks has it listed in their Notes section, along with any restrictions on which Kustom jobs can be performed.
Notes
- Weapons that use the user’s Strength characteristic will note this “AU” (“As User”).
- Sustained Fire Dice – Weapons with these will have how many listed as “SFD” (e.g. “1 SFD”).
- Kustomisation options will be listed with the prefix “K” (e.g. “K: All”)
Hand-to-Hand
Knives and Knuckles
All Warriors carry at least a knife or a set of knuckledusters.
| Range |
Hit Modifier |
Strength |
Save Mod |
D |
Ammo Roll |
Notes |
|---|---|---|---|---|---|---|
| - |
- |
AU |
Var |
1 |
N/A |
N/A |
Chain
It’s a big length of chain. Whack someone with it and they’re not going to be happy about it. Try to show off too much and you’ll just end up hitting yourself in the back of the head.
| Range |
Hit Modifier |
Strength |
Save Mod |
D |
Ammo Roll |
Notes |
|---|---|---|---|---|---|---|
| - |
- |
AU +1 |
Var |
1 |
N/A |
Opponent may not block. Fumbles count double. |
Opponent May Not Block: Warriors armed with a Chain cannot be forced to reroll a blocked Attack (e.g. using a Shield).
Fumbles Count Double: Fumbles rolled by a Warrior armed with a Chain count as +2 to their opponent’s score, rather than the usual +1.
Club/Choppa
Solid, dependable, vicious. Additional spikey bits optional but encouraged. Whilst a club is any pipe or hefty stick strong enough to crack skulls a choppa can refer to almost any single-handed sharp thing. Often it’s an axe, sometimes a cleaver, and other times it’s a strange hybrid of blade and club. Apply repeatedly to enemies for best results.
| Range |
Hit Modifier |
Strength |
Save Mod |
D |
Ammo Roll |
Notes |
|---|---|---|---|---|---|---|
| - |
- |
AU +1 |
Var |
1 |
N/A |
N/A |
Spear
Do you like stabbing people but hate having to get close enough to smell their BO? Have I got a weapon for you…
| Range |
Hit modifier |
Strength |
Save Mod |
D |
Ammo Roll |
Notes |
||
|---|---|---|---|---|---|---|---|---|
| Short |
Long |
Short |
Long |
|||||
| - |
- |
- |
- |
AU |
Var |
1 |
- |
HtH: +1 Initiative |
| 0” - 8” |
- |
-1 |
- |
AU |
0 |
1 |
4 |
Ranged: 1 Use Only |
+1 Initiative for Hand-to-Hand Combat Draws: In the event of a draw in Hand-to-Hand Combat where Initiative values are compared to decide the winner a Warrior with a Spear counts as having +1 Initiative (over and above their potential maximum statline). This does not stack if the Warrior carries additional spears!
Single-Use Throw: A Warrior with a Spear can choose to throw it in their Shooting Phase, with the ranged profile. The Spear cannot be retrieved during the game but the Warrior will have done so by the next battle.
'Uge Club/Choppa
You know what’s better than a choppa you can hold in your hand? A choppa so big you need two hands!
| Range |
Hit Modifier |
Strength |
Save Mod |
D |
Ammo Roll |
Notes |
|---|---|---|---|---|---|---|
| - |
- |
AU +2 |
Var |
1 |
N/A |
Double-handed, Opponent wins draws. |
Double-handed: A Warrior needs two hands (or equivalent) to use an ‘Uge Club/Choppa in Hand-to-Hand Combat. If they don’t have two functional hands (e.g. due to Bionik replacement) they cannot use this weapon and equally if they’re using this weapon they cannot use any other weapons at the same time. If an arm wound or similar means that the Warrior has two different Strength characteristics, use the higher of the two.
Opponent Wins Draws: In the event of a draw in Hand-to-Hand Combat where Initiative values are compared to decide the winner a Warrior with an ‘Uge Choppa/Club loses, regardless of whether they have higher Initiative than their opponent.
Six-Shoota
A revolver-style weapon that’ll fire as fast as you can fan the hammer.
| Range |
Hit modifier |
Strength |
Save Mod |
D |
Ammo Roll |
Notes |
||
|---|---|---|---|---|---|---|---|---|
| Short |
Long |
Short |
Long |
|||||
| 0” - 6” |
6” - 12” |
+1 |
- |
3 |
0 |
1 |
4+ |
1 SFD, 1 shooting phase to reload |
Reloading: Each time a Six-Shoota is fired a shooting phase must be spent reloading it (if the Warrior wishes to fire again during the battle). Only one Six-Shoota may be reloaded per shooting phase (i.e. a Warrior with two could fire in two consecutive turns but would need to spend two shooting phases reloading in order to use both pistols again). A Six-Shoota that has yet to be reloaded is functionally identical to a Six-Shoota that has failed its Ammo Roll - it cannot be used in Hand to Hand Combat until it is reloaded. Using a Six-Shoota in Hand to Hand Combat does not deplete its ammo.
Slugga
A magazine-fed pistol of dubious efficacy. Loud, plodding, and very Orky.
| Range |
Hit modifier |
Strength |
Save Mod |
D |
Ammo Roll |
Notes |
||
|---|---|---|---|---|---|---|---|---|
| Short |
Long |
Short |
Long |
|||||
| 0” - 6” |
6” - 12” |
+1 |
- |
3 |
0 |
1 |
4+ |
N/A |
Findin’ Rod
A Shaman’s Findin’ Rod serves as a psychic extension of the self. It also serves as a physical extension of the self when fighting! Findin’ Rods usually take the form of a tall staff covered with cryptic decorations whose meaning is only known to the bearer.
| Range |
Hit Modifier |
Strength |
Save Mod |
D |
Ammo Roll |
Notes |
|---|---|---|---|---|---|---|
| - |
- |
AU +1 |
Var |
1 |
N/A |
Double-handed, Block |
Double-handed: A Shaman needs two hands (or equivalent) to use a Findin’ Rod in Hand-to-Hand Combat. If they don’t have two functional hands they cannot use this weapon and equally if they’re using this weapon they cannot use any other weapons at the same time.
Block: Much like a shield the Shaman can choose to force their opponent to reroll their highest Attack dice in Hand-to-Hand Combat. As with the shield this cancels out if their opponent has a similar parry ability.
Gunz
Each weapon has a note concerning whether they can be Kustomised or not. See the Da Mekboy’z Workshop section for the relevant rules.
All Gunz require two hands to use.
Blunderbuss
The one advantage of a weapon with range this lousy is that it’s nearly impossible to miss. Whether the thing you hit will actually take much in the way of damage remains to be seen though as the scatter shot fired is turned away by as little as normal clothing.
| Range |
Hit modifier |
Strength |
Save Mod |
D |
Ammo Roll |
Notes |
||
|---|---|---|---|---|---|---|---|---|
| Short |
Long |
Short |
Long |
|||||
| 0” - 6” |
- |
+3 |
- |
3 |
+1 |
1 |
4+ |
K: More Dakka only |
+1 Save Modifier: Warriors hit by this weapon receive +1 to their Armour Save, including if they aren’t wearing any armour (i.e. they receive a 6+ save).
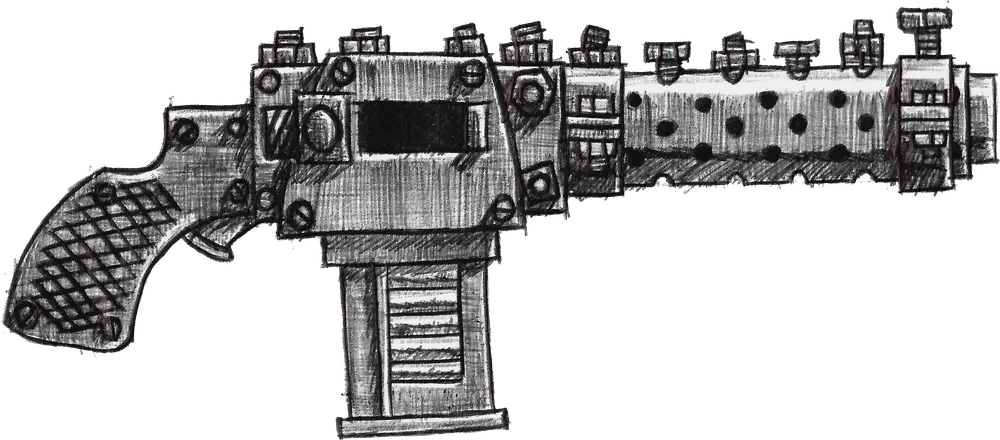
Bow
Don’t trust one of your lads with a shoota? Give ‘em a bow to prove themselves with - the old ways are sometimes best!
| Range |
Hit modifier |
Strength |
Save Mod |
D |
Ammo Roll |
Notes |
||
|---|---|---|---|---|---|---|---|---|
| Short |
Long |
Short |
Long |
|||||
| 0” - 12” |
12” - 18” |
- |
-1 |
3 |
+1 |
1 |
4+ |
K: None |
+1 Save Modifier: Warriors hit by this weapon receive +1 to their Armour Save, including if they aren’t wearing any armour (i.e. they receive a 6+ save).
Crossbow
Surprisingly killy but a right faff to make ready for another shot. Still - not to be underestimated.
| Range |
Hit modifier |
Strength |
Save Mod |
D |
Ammo Roll |
Notes |
||
|---|---|---|---|---|---|---|---|---|
| Short |
Long |
Short |
Long |
|||||
| 0” - 12” |
12” - 18” |
- |
-1 |
4 |
0 |
1 |
4+ |
Move or Fire, K: None |
Move or Fire: Warriors armed with a Crossbow can either move in their movement phase or choose to fire in their shooting phase, not both. Being onboard a moving Vehicle also counts as moving for the purposes of this rule.
Linked Gun
Any of the Gunz in this section can be permanently joined together to create a Linked Gun which can then be mounted on a Vehicle that can take a Fixed Weapon (Linked Gunz are not equippable by Warriors on foot). Pay for two of the same type of Gun (no mixing!) and use the profile for that gun. Add 1 Sustained Fire Dice to the new Linked Gun’s profile. The Kustomisin’ restrictions of the original Gun still apply.
Kannon
An Orky shotgun. Kicks like a squiggoth and puts hefty holes in whatever it hits.
| Range |
Hit modifier |
Strength |
Save Mod |
D |
Ammo Roll |
Notes |
||
|---|---|---|---|---|---|---|---|---|
| Short |
Long |
Short |
Long |
|||||
| 0” - 4” |
4” - 18” |
- |
-1 |
4 |
0 |
1 |
4+ |
Knockback, K: All |
Knockback: Newton’s Third Law applies more than usual to the shells fired by an Ork Kannon - any Warrior hit (whether wounded or not) must roll under their Strength characteristic or be knocked back. If knocked back, move the Warrior 2” away from the direction of the shot. If they were Crew onboard a Vehicle at the time they will be knocked overboard (this does not apply to Drivers).
Shoota
What exactly is a shoota? There’s probably a magazine of some kind involved, definitely a barrel, and it’ll go bang when fired. Beyond that there’s rarely two shootas that look or function in the same way.
| Range |
Hit modifier |
Strength |
Save Mod |
D |
Ammo Roll |
Notes |
||
|---|---|---|---|---|---|---|---|---|
| Short |
Long |
Short |
Long |
|||||
| 0” - 12” |
12” - 18” |
+1 |
- |
3 |
0 |
1 |
4+ |
K: All |
Stikkbombz
As the name suggests these are bombs, on-a-stick. Some fling shrapnel over a large area while others concentrate the force into a single point. They also work rather well as clubs…
In rules terms both kinds have a Hand-to-Hand weapon profile and effectively function as clubs. They both have the following rule:
Might Explode: If both the Attacker and Defender in Hand-to-Hand Combat roll one or more sixes (each) for their Attack Dice then the Stikkbomb goes off, hitting both of them. Do not place the template if the Stikkbomb uses one as both Warriors instead absorb the blast.
In multiple combatant or Pilin’ On situations this only affects the two Warriors currently resolving combat, not anyone providing bonuses to them.
Grenade range: range is determined by the thrower’s Strength. Take the user’s Strength characteristic, multiply it by 2, and then add 2”. For example a Warrior with a Strength characteristic of 4 could throw a Stikkbomb up to 10” (4 x 2, +2”).
Frag
A standard fragmentation grenade - drop one into a group of enemies and watch them panic!
| Range |
Hit modifier |
Strength |
Save Mod |
D |
Ammo Roll |
Notes |
||
|---|---|---|---|---|---|---|---|---|
| Short |
Long |
Short |
Long |
|||||
| - |
- |
- |
- |
AU +1 |
Var |
1 |
- |
HtH: Might Explode |
| G |
- |
- |
- |
3 |
-1 |
1 |
Auto |
Ranged: 2” Blast Template, K: Shootier only |
Krak
These usually take the form of a shaped charge for burning a nasty hole in an armoured target, although as with all Orky tech this is merely the most common approach.
| Range |
Hit modifier |
Strength |
Save Mod |
D |
Ammo Roll |
Notes |
||
|---|---|---|---|---|---|---|---|---|
| Short |
Long |
Short |
Long |
|||||
| - |
- |
- |
- |
AU +1 |
Var |
1 |
- |
HtH: Might Explode |
| G |
- |
- |
- |
6 |
-3 |
D6 |
Auto |
K: Shootier only |
Armour
Shield
Strap a big hunk of metal to an arm and feel safer. Results may vary.
Armour Save +1 against Bows, Crossbows, template weapons, and Hand-To-Hand weapons.
Large: The shield takes one of the Warrior’s hand “slots” and so double-handed weapons cannot be used at the same time as the shield. This includes Gunz that require two hands.
Block: User may choose to force Hand-to-Hand opponent to reroll highest scoring Attack dice once per round. If their opponent has a shield (or parry ability) these cancel each other out and neither Warrior can force a re-roll.
Studded Armour
Often disparagingly known as a “t-shirt save” but the leather of studded armour has saved many a wearer’s innards from ending up as outards.
Studded Armour confers a 6+ Saving Throw.
Flak Armour
Flak Armour is a slightly fancier version of Studded Armour. Its extra layers don’t make much difference to a bullet but they can make all the difference against less high velocity sources of trouble.
Flak Armour provides a 6+ Saving Throw.
Against attacks using Blast Markers or Teardrop templates Flak Armour provides a 5+ Saving Throw. The Save Modifier of these attacks still apply (so a Frag Stikkbomb with a -1 Save Modifier would result in a 6+ saving throw for a Warrior in Flak Armour).
This 5+ save also applies to S3 hits from Vehicle hit location tables - excluding hits from falling overboard.
‘Eavy armour
The clanking a warrior wearing ‘Eavy Armour makes is usually loud enough to cover up the wheezing the extra weight tends to elicit. The loss of agility is usually worth it, admittedly as it’s proper snazzy and quite tough too.
‘Eavy Armour confers a 4+ Saving Throw.
Warriors wearing ‘Eavy Armour halve their Initiative (rounding up) when taking Initiative Tests related to Boarding Actions and avoiding being squashed. 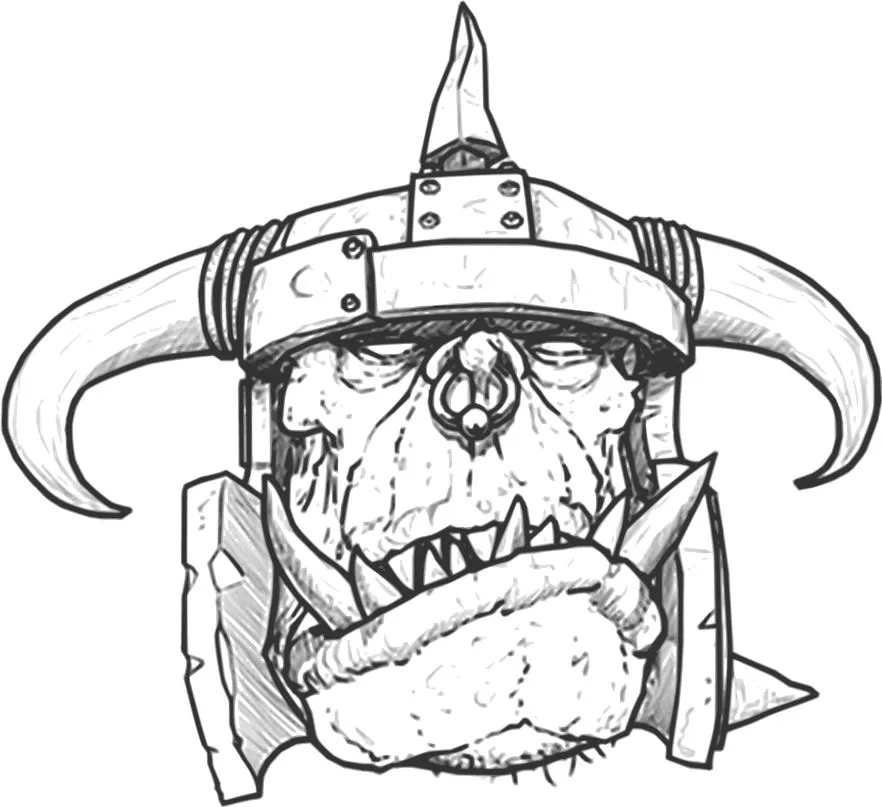
Big Gunz
‘Eavy Shoota
Imagine a shoota. Now imagine it’s twice the size. Oh and make the bullets bigger too - and more of them while you’re at it!
‘Eavy Shootas (sometimes known as Big Shootas) are just that - large calibre machine guns that blow rows of nasty holes in whatever they’re pointed at.
| Range |
Hit modifier |
Strength |
Save Mod |
D |
Ammo Roll |
Notes |
||
|---|---|---|---|---|---|---|---|---|
| Short |
Long |
Short |
Long |
|||||
| 0” - 20” |
20” - 40” |
- |
-2 |
5 |
-2 |
1 |
4+ |
2 SFD, K: All |
Harpoon Gun
Tharr she blows! There’s something tremendously nautical about a harpoon gun. A huge metal arrow fired at high speed will ruin vehicles and warriors’ days alike. Getting a solid hit can be tricky though, particularly at long range.
| Range |
Hit modifier |
Strength |
Save Mod |
D |
Ammo Roll |
Notes |
||
|---|---|---|---|---|---|---|---|---|
| Short |
Long |
Short |
Long |
|||||
| 0” - 12” |
12” - 18” |
- |
-1 |
D6 +2 |
-2 |
D3 |
4+ |
K: All |
Strength: roll D6 + 2 for each shot this weapon makes to determine that shot’s Strength characteristic (S3 – S8).
Linked Gun
See the Linked Gun profile from the Gunz section of this appendix.
Skorcha
They drip, they sputter, and they sometimes explode. Their gunners have a love/hate relationship with them. When they go off though - ooft, it gets nasty.
| Range |
Hit modifier |
Strength |
Save Mod |
D |
Ammo Roll |
Notes |
||
|---|---|---|---|---|---|---|---|---|
| Short |
Long |
Short |
Long |
|||||
| T |
T |
- |
- |
4 |
-2 |
1 |
4+ |
Ammo Test, Catching Fire, Template, K: Special |
Ammo Test: An Ammo Roll must be made after every shot fired.
Catching Fire: Warriors and Vehicles can both be set fire to using a Skorcha. Roll a D6 for each hit made by a Skorcha - on a 4+ the target catches fire! Note - hit, not wounded; this is in addition to wounding. Warriors on foot that go Down or Out of Action do not catch light but otherwise they are now on fire - see the Movement section of the GCE Core Rules for how that works. Similarly the rules for Vehicles Catching Fire can be found in the Vehicle Shooting section of the GCE Core Rules.
Template: Skorchas use the standard “Flamer” teardrop template. See the GCE Core Rules for how template weapons work.
Kustomisin’ Special: Shootier or Longer Range only. Any subsequent upgrade will reduce the effect of the other option. Range changes are done using the three teardrop template sizes - Hand Flamer Template, Flamer Template, Heavy Flamer Template (4”, 8”, and 16” long respectively).
For example, two Shootier upgrades would reduce range down to a Hand Flamer Template.
Spear gun
Firing a volley of spears at something is generally a good idea, or so the thinking goes. Rack ‘em up!
| Range |
Hit modifier |
Strength |
Save Mod |
D |
Ammo Roll |
Notes |
||
|---|---|---|---|---|---|---|---|---|
| Short |
Long |
Short |
Long |
|||||
| 0” - 12” |
12” - 18” |
+1 |
- |
4 |
-1 |
1 |
4+ |
2 SFD, K: All |
Rokkit launcher
The bane of anything armoured, Ork Rokkit Launchers are accurately described as “Ded Killy”. Most Gunners don’t know what words like “shaped charge” mean but that makes little difference to their efficacy.
| Range |
Hit modifier |
Strength |
Save Mod |
D |
Ammo Roll |
Notes |
||
|---|---|---|---|---|---|---|---|---|
| Short |
Long |
Short |
Long |
|||||
| 0” - 12” |
12” - 30” |
- |
-1 |
6 |
-3 |
D6 |
6+ |
K: All |
Gubbinz
Some Gubbinz have the stipulation that they can only be mounted in certain places. The sides are the usual vehicle quadrants, as seen in this diagram. These are not “slots” - mounting something on the left side does not mean another piece of Gubbinz can’t be mounted on the Vehicle’s left side. Between games you may move Gubbinz between quadrants, assuming where you’re moving them to is a legal location as described in their rules. No sneakily tryi
ng to move things to places they weren’t intended!
If the Gubbinz Damage Location is hit during a battle, randomise which single item of Gubbinz takes the damage. Unless otherwise stated a Penetrating Hit on an item of Gubbinz renders it unusable on a 4+. It will be repaired before the next battle.
Boarding Plank
Why leap when you can stroll? Ork boarding planks are usually spiky affairs that securely attach to their prey once deployed. Tearing them loose is advisable but it’ll hurt!
If a Vehicle declares that it is Racing or Chasing an enemy Vehicle it may deploy a Boarding Plank. No operator is needed for this - it deploys automatically. Once this is done the Enemy Vehicle will suffer 1 point of damage if it moves more than 2” from the Racing/Chasing Vehicle for any reason.
A deployed Boarding Plank may be used by Warriors on either Vehicle to cross between them without taking an Initiative Test.
Big Ork Vehicles have three places where a Boarding Plank may be fitted - front, left side, and right side. You may fit one at each location if you wish!
Small Ork Vehicles may not mount a Boarding Plank.
Extra Armour Plates
You know what’s better than armour? Lots of armour!
The Extra Armour gubbinz provide a Saving Throw, much like Armour on a Warrior. Each purchase of Extra Armour Plates for a Vehicle ups the Saving Throw by +1 (starting at 6+) to a maximum of 4+. When the Vehicle’s Armour is penetrated (any location), a successful Extra Armour Plates save will negate the hit completely. This saving throw is affected by the hit’s Save Modifier.
If Extra Armour Plates are damaged by a 4+ hit to the Gubbinz location then 3 Extra Armour Plates are unusable for the rest of the game.
Big Vehicles may have up to 6 Extra Armour Plates – meaning a fully stocked Vehicle of this type can lose 3 and still have a backup 3 to provide a save!
Small Vehicles may have up to 3 Extra Armour Plates.
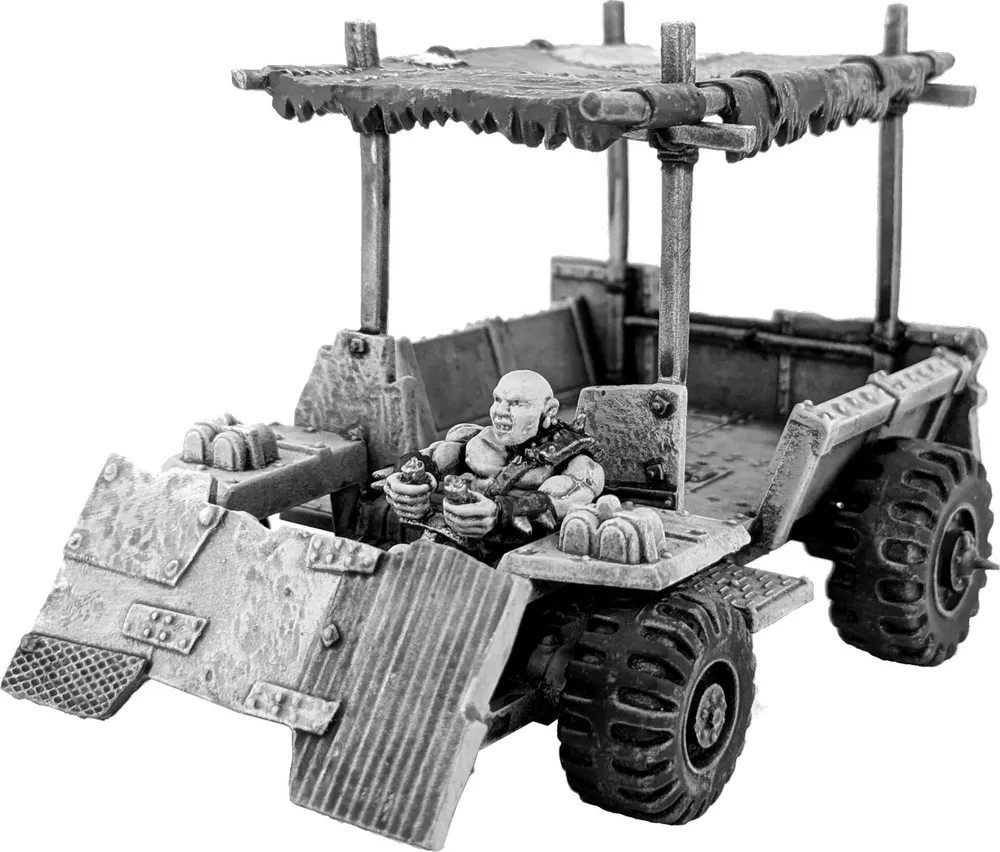
Big Grabber
Getting close to an enemy vehicle is pretty dangerous - why not make it more dangerous for them? A big hydraulic claw can liven things up - both for the enemy vehicle and its crew!
Once installed a member of the Mob’s Crew can choose to operate it during your turn. Unlike Driver/Gunner positions this is not a permanent assignment and can vary throughout the battle. A Warrior operating a Big Grabber may not fight in Hand-to-Hand Combat in the same player turn they make an attack with it, but they may shoot. Enemies may not operate your Big Grabber.
When the Vehicle comes within range to perform a Ram, Rake, or Sideswipe on an enemy Vehicle the Big Grabber can be used. The Vehicle does not need to actually perform a Ram/Rake/Sideswipe, although it may if you wish. The Big Grabber attack is resolved before that can happen and the enemy Vehicle may not Swerve to avoid it!
A Big Grabber attack automatically hits and penetrates one random Damage Location. Roll 2D6 and pick the highest of the two dice as the Damage result.
If you hit the Driver or Crew location you grab someone in addition to any other damage! The Crew member should be randomised as normal. You can choose to drop them during your turn, whereupon they take a S3 hit and land D3” away from your Vehicle. If they’re still grabbed at the end of the game they are automatically Captured. Any penetrating hit affecting the Big Grabber causes the grabbed Warrior to be dropped, regardless of other damage.
Big Ork Vehicles may fit one Big Grabber - pick any of the quadrants described above.
Small Ork Vehicles may not mount a Big Grabber.
Reinforced Ram
Ramming is dangerous at the best of times - what if a vehicle was modified to be even rammier? Wouldn’t that be great? Too right.
When a Vehicle with a Reinforced Ram performs a Ram (or is involved in a head-on Ram) one of the Damage Rolls should be done using 2D6. Pick the highest Damage result.
Sideswiping and Raking aren’t affected by having a Reinforced Ram.
Big Ork Vehicles may fit one Reinforced Ram - fitted to the front quadrant of the Vehicle.
Small Ork Vehicles may not mount a Reinforced Ram.
Spikes
A vehicle covered in spikes looks properly menacing and that’s the usual reason Orks add them. The fact that it’s even more unpleasant for targets on foot is merely a bonus!
Any time a Warrior is hit by the vehicle (friend or foe) and the effect would be a Strength 3 Hit it instead becomes a Strength 4 hit. This includes squashing Warriors on foot, failed Boarding attempts, and falling off in general. It also affects incoming penetrating hits on the Vehicle (shooting/ramming/etc..). All of these are made worse by a spiky vehicle!
Both Big Ork Vehicles and Small Ork Vehicles can have Spikes.
Extra Spikes
There’s clearly still some room onboard for spikes. Look - that bit over there could clearly benefit from a rusty barb the size of your forearm!
Extra Spikes require Spikes to be fitted first and effectively replace them. In addition to the benefits of Spikes a Vehicle with Extra Spikes also inflict a -1 modifier on Initiative Tests against enemy Warriors attempting to board it. This modifier also applies to Warriors trying to avoid being squashed by it (friend or foe!).
If rendered unusable by damage during a game Extra Spikes are downgraded to Spikes (meaning it would take two destroying hits to remove all spikiness from a Vehicle). As with all damage to Gubbinz they’ll be repaired by the next game.
Both Big Ork Vehicles and Small Ork Vehicles can have Extra Spikes.
Wrecker Ball
Did you know that wrecking balls don’t just work on buildings? It’s true. Talk to your local Mek for more information!
Once installed a member of the Mob’s Crew can choose to operate it during your turn. Unlike Driver/Gunner positions this is not a permanent assignment and can vary throughout the battle. A Warrior operating a Wrecker Ball may not fight in Hand-to-Hand Combat in the same player turn they make an attack with it, but they may shoot. Enemies may not operate your Wrecker Ball.
When the Vehicle comes within range to perform a Ram, Rake, or Sideswipe on an enemy Vehicle the Wrecker Ball can be used. The Vehicle does not need to actually perform a Ram/Rake/Sideswipe, although it may if you wish. The Wrecker Ball attack is resolved before that can happen and the enemy Vehicle may not Swerve to avoid it!
A Wrecker Ball attack automatically hits and penetrates D3 random Damage Locations.
If you hit the Driver or Crew location you knock them off the Vehicle in addition to any other damage! The Crew member should be randomised as normal. They take a S3 Hit and are knocked D3” away from their Vehicle (in whatever direction seems most appropriate!).
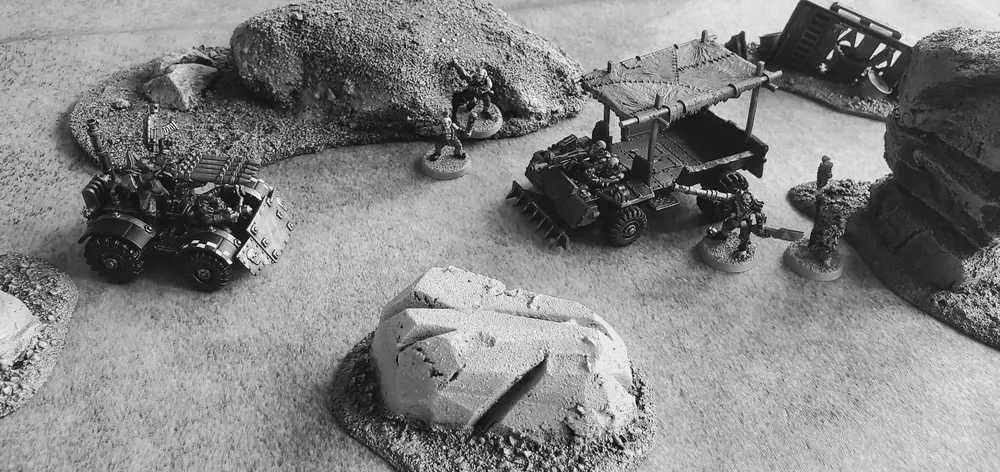
If a Wrecker Ball takes a Penetrating Hit then roll as normal (4+ renders it unusable) but in addition to this a 6 causes it to also hit the Vehicle it’s mounted on (D3 random Damage Locations are penetrated).
Big Ork Vehicles may fit one Wrecker Ball - pick any of the quadrants described above.
Small Ork Vehicles may not mount a Wrecker Ball.
Loadsa Ammo
Boxes of rokkits, lengthy belts of bullets, extra burny juice! It’s always good to have spare ammunition for the vehicle's fixed weapon.
A Fixed Weapon with Loadsa Ammo ignores its first failed Ammo Roll. Additional failed Ammo Rolls can be ignored by mounting more Loadsa Ammo Gubbinz.
Big Ork Vehicles may carry as many Loadsa Ammo Gubbinz as you’d like.
Small Ork Vehicles may carry a single Loadsa Ammo.
Archeotek
See the Finding Archeotek section on see for details on acquiring Archeotek.
Artefact Hand-to-Hand Weapons
Artefact Weapons only require one hand to use.
Spiky
When powered up various whirring blades emerge from hidden recesses on the weapon. It slices, dices, and can be applied with gusto to anyone that comes too close!
| Range |
Hit Modifier |
Strength |
Save Mod |
D |
Ammo Roll |
Notes |
|---|---|---|---|---|---|---|
| - |
- |
AU +1 |
-1 |
1 |
N/A |
Power Weapon
With a satisfying “wommmm” the weapon gains a glowing aura and a viciously powerful ability to cut through things.
| Range |
Hit Modifier |
Strength |
Save Mod |
D |
Ammo Roll |
Notes |
|---|---|---|---|---|---|---|
| - |
- |
AU +2 |
-2 |
1 |
N/A |
Zinggg!
The small handle of this weapon barely weighs anything and glides through the air with ease. When turned on a weightless energy blade extends from it, providing any fighter with an elegant weapon that can be used to brutal effect.
| Range |
Hit Modifier |
Strength |
Save Mod |
D |
Ammo Roll |
Notes |
|---|---|---|---|---|---|---|
| - |
- |
AU +2 |
-2 |
1 |
N/A |
+1 Attack, Wins Draws |
Attacks: Whilst using this weapon in Hand-to-Hand combat the wielder gains +1 to their Attacks characteristic.
Wins Draws: Any time there is a draw in Hand-to-Hand combat the wielder of this weapon wins, even if their Initiative is lower than their opponent.
Archeotek Guns
Archeotek Guns require both hands to use. Don’t even think about taking it to a Mek for Kustomization or mounting it on a vehicle (or tampering with it in any way!).
Blasta
This seems to be some sort of twin-linked gyrojet weapon, firing miniature rockets of some sort. There are a few of them about so getting the holy machines in the caverns to spit out reloads for them is surprisingly easy. The little eagle on the side is a novel touch too!
| Range |
Hit modifier |
Strength |
Save Mod |
D |
Ammo Roll |
Notes |
||
|---|---|---|---|---|---|---|---|---|
| Short |
Long |
Short |
Long |
|||||
| 0” - 12” |
12” - 24” |
+1 |
- |
4 |
-1 |
1 |
2+ |
1 Sustained Fire Dice |
Mini-Skorcha
A skorcha you can hold in your hand! It’s unclear how the ancients managed to miniaturise throwing hot flammable liquid on things but apparently they did.
This weapon uses the same rules as a Skorcha (see the Big Gunz section) but cannot be mounted on a Vehicle - it’s a Gun as far as carrying rules go.
Bomb-Lobber
With a satisfying “bloop” this weapon lobs a cluster bomb of some kind. Upon acquiring this weapon roll a D6 immediately to permanently determine its ammo type (1-3 Frag, 4-6 Krak). The weapon functions the same as Stikkbombz however once a bomb has come to its final resting point roll a D3 to find out how many extra bombz will then scatter from this point (roll each time it fires - this is not part of the permanent stats). Should you need to roll on the Unreliable Explosives table, the “thrower” is the scatter point, not the Warrior!
| Range |
Hit modifier |
Strength |
Save Mod |
D |
Ammo Roll |
Notes |
||
|---|---|---|---|---|---|---|---|---|
| Short |
Long |
Short |
Long |
|||||
| 0” - 12” |
12” - 24” |
- |
-1 |
As ammo type |
4+ |
D3 extra bombz |
||
Pulsa
The hazy blue pulse this weapon fires seems to almost hang in the air, floating forward and sizzling whatever it passes through. The energy beam continues to be connected to the weapon in some way once in flight as it cannot be fired again until it dissipates.
The Pulsa template starts in contact with the shooter, placed within their firing arc in the intended direction of travel. The template then moves 2D6” in this direction. If the Pulsa template passes over Warriors on foot they are Hit. Vehicles and structures passed over suffer D3 hits. Partial Hits are resolved with a roll of a 4+, just like with other template weapons. In the firer’s subsequent Shooting Phases the template moves again, 2D6” in the same direction. It will continue to move across the board until it dissipates or leaves the table.
| Range |
Hit modifier |
Strength |
Save Mod |
D |
Ammo Roll |
Notes |
||
|---|---|---|---|---|---|---|---|---|
| Short |
Long |
Short |
Long |
|||||
| Special 2D6” |
- |
- |
4 |
-2 |
1 |
Special |
Uses Pulsa template |
|
Note: Only one template per Pulsa is allowed in play. If the movement results are doubles, resolve the effects then remove the template. A result of double 1 means the template is immediately removed and is out of ammo for the rest of the game.
Deff-ray
This might come as a surprise but the name is quite apt - it’s a ray that kills things. It’ll also surprise whatever it kills as the beam of energy it fires is invisible!
| Range |
Hit modifier |
Strength |
Save Mod |
D |
Ammo Roll |
Notes |
||
|---|---|---|---|---|---|---|---|---|
| Short |
Long |
Short |
Long |
|||||
| 0” - 6” |
6” - 12” |
+1 |
- |
8 |
-4 |
D6 |
6+ |
|
Smasha
Once primed and ready to fire the Smasha makes short work of most things, firing off multiple powerful energy blasts, but for all its power it is short lived. It’s never quite clear to the user why it acts like this - possibly some arcane setting in the guts of the device, or maybe it’s just sleepy?
The Smasha may fire three times each Shooting Phase, resolve each shot separately. In addition to normal Ammo Rolls, at the end of every shooting phase an extra Ammo Roll must be taken.
| Range |
Hit modifier |
Strength |
Save Mod |
D |
Ammo Roll |
Notes |
||
|---|---|---|---|---|---|---|---|---|
| Short |
Long |
Short |
Long |
|||||
| 0” - 12” |
12” - 24” |
+1 |
- |
6 |
-1 |
1 |
4+ |
Three shots, extra Ammo roll |
Archeotek Armour
Clang!
The sturdy plating glows momentarily as it attempts to dissipate the force of the hit.
The armour grants the wearer a saving throw of 5+.
Badang!
The thick plates become rigid as the blow strikes it.
The armour grants the wearer a saving throw of 4+.
Vwoom!
A glowing blue aura appears around the Warrior as the armour’s shielding activates.
This armour grants the wearer a saving throw of 5+, which ignores any saving throw modifiers.
Badoing!
There’s something very odd about this armour - it can deflect shots in random directions!
Roll a Scatter Dice for each hit, whether in Close Combat or from Shooting. On a Hit, the wearer is hit as normal.
In close combat, if the Scatter Dice rolls an arrow, then the hit is deflected and applied against the attacker instead. They will suffer a hit with the same Strength and other characteristics of the attack, while the wearer of the armour suffers no damage.
In shooting, if the Scatter Dice rolls an arrow, then the shot is deflected from the centre of the target model in the given direction on the dice for 3D6”. This deflected shot will strike the first model in that path within the 3D6”, and hit them with the same Strength and characteristics of the attack.
If the wearer is on board a vehicle, a random location is hit instead.
Archeotek Gizmos
Note that the effects of these gizmos are localised to the Warrior carrying them. They do not apply to the Vehicle a Warrior is embarked upon (so no hopping onboard and teleporting a whole trukk!) or other similar situations.
Distorta
Things very much stop being what they seem when this Gizmo springs to life. Reality seems to warp around the Warrior. Roll a D6 to determine what type of Distorta field this is.
1-2 Shadow Field. Enemies struggle to see the wearer. If the wearer is targeted by a ranged attack during the Shooting Phase, then the attacker suffers an additional -1 to hit Modifier if they are shooting at long range.
3-4 Shifta Field. The wearer appears to be slightly to the left (or is it the right?) of where they actually are. Enemies may not target this warrior with Overwatch if they are Charged by the wearer. In addition, while in combat with the wearer, enemies suffer a -1 Modifier to their Weapon Skill.
5-6 Nasty Field. The field seems to break something in the wearer’s foes, projecting a terrifying visage straight into their mind. The wearer causes Terror.
Targeta
The strange, cylindrical object appears to have glass at either end, and a strange red cross when looking through it. The Warrior has the brilliant idea of using it to try and see where a gun is pointing a bit more accurately. It may be affixed to a Shoota, Kannon, Slugga, or Six-Shoota and grants a +1 to hit Modifier when firing that weapon. Once fitted, it may not be removed or switched to another weapon. This does not stop you from kustomisin’ the weapon.
Lifta
As this Gizmo whirrs to life the Warrior starts to question their relationship with gravity - something weird is going on and everything feels lighter as if they’re not weighed down by their weapons and armour. The Warrior has +1 to their Movement stat while Moving or Running. While Charging, they add D6” to their charge distance instead (Roll for this at the start of each of the controlling Player’s turns).
Displaca
The user appears to phase out of existence, and reappears slightly further away.
When first activated, the Warrior is immediately moved 3D6” in a random direction. The Warrior may then activate the Displaca to teleport 2D6” at the start of their Movement Phase in any subsequent turns. If they pass an Initiative Test then they have successfully used the rather complex controls and may choose the direction they go. If they fail, then they go in a random direction.
If this movement takes the Warrior into base-to-base contact with an enemy Warrior then this is counted as a successful Charge with no Overwatch allowed. If they land on top of a vehicle, friend or foe, then treat it as successfully boarding that vehicle with no Initiative test needed.
The Displaca movement can go through Impassable Terrain without penalty if the Warrior ends clear, but must stop just before entering if the Warrior would end up on top of it.
Once the Displaca movement has been completed, the Warrior is then free to carry out any other movement normally, such as Running or Charging, but they may not go into Overwatch.
Misc Appendix
Vehicle Capacities
Vehicle capacities can be a source of confusion for some players. Vehicles can be all shapes and sizes - build whatever contraptions you like. Crew capacity is based on how many models are physically able to fit† however (depending on your models, players, and preferences) you may prefer to stipulate vehicle capacities rather than using your vehicles’ literal capacities.
Based on the models of the late 1990s Digga vehicle capacities were roughly as follows:
Transports: Driver, Gunner, 6 additional crew.
Support: Driver, Gunner, 1 additional crew.
Small: Driver, 1 additional crew
You may wish to adjust this. Discuss them with the other players in your campaign and agree what you feel is reasonable.
† Models that fall off are not deemed to have fallen off in-game!
Pulsa Template
You’ll need the special template to use the Pulsa Archeotek Gun (see Armoury Appendix). Here’s a template that can be printed. This book is scaled for A4 paper, so make sure you’re not trying to rescale this see if you want the template size to be accurate. Print at 100% scaling and you should be fine, although we’ve included a 1” square so you can check.

Licence details and Credits
This document was written by Morgan Fox, Matthew Bester, Tom Inglis, Ben Middleton, Ben Saunders, Andrew Meijers, and Nick Williams.
It is licenced under Creative Commons Attribution-NonCommercial-ShareAlike 4.0 International
https://creativecommons.org/licenses/by-nc-sa/4.0/
Unsure what any of that means?
Visit https://gorkamorka.co.uk/creative-commons for an explanation.
Cover art by Andrew Meijers (Creative Commons Attribution-NonCommercial-ShareAlike 4.0 Unported license)
Additional art and images provided by: Andrew Meijers (Creative Commons Attribution-NonCommercial-ShareAlike 4.0 Unported license) Andrew Trevorrow-Seymour (Creative Commons Attribution-NonCommercial-ShareAlike 4.0 Unported license) Clayton Tait (Creative Commons Attribution-NonCommercial-ShareAlike 3.0 Unported license) Louis DePrix (Creative Commons Attribution-NonCommercial-ShareAlike 4.0 Unported license) Morgan Fox (Creative Commons Attribution-NonCommercial-ShareAlike 4.0 Unported license) Steve Byrne (Creative Commons Attribution-NonCommercial-ShareAlike 4.0 Unported license)
The layout was made by Morgan Fox using images created by Jenny Mathiasson and is also licensed under a Creative Commons Attribution-NonCommercial-ShareAlike 3.0 Unported license.